|
Actors |
Freight forwarder (Custom brokers), Freight forwarder (Claimant) |
|---|---|
|
Description |
Creation of a customs clearance folder. |
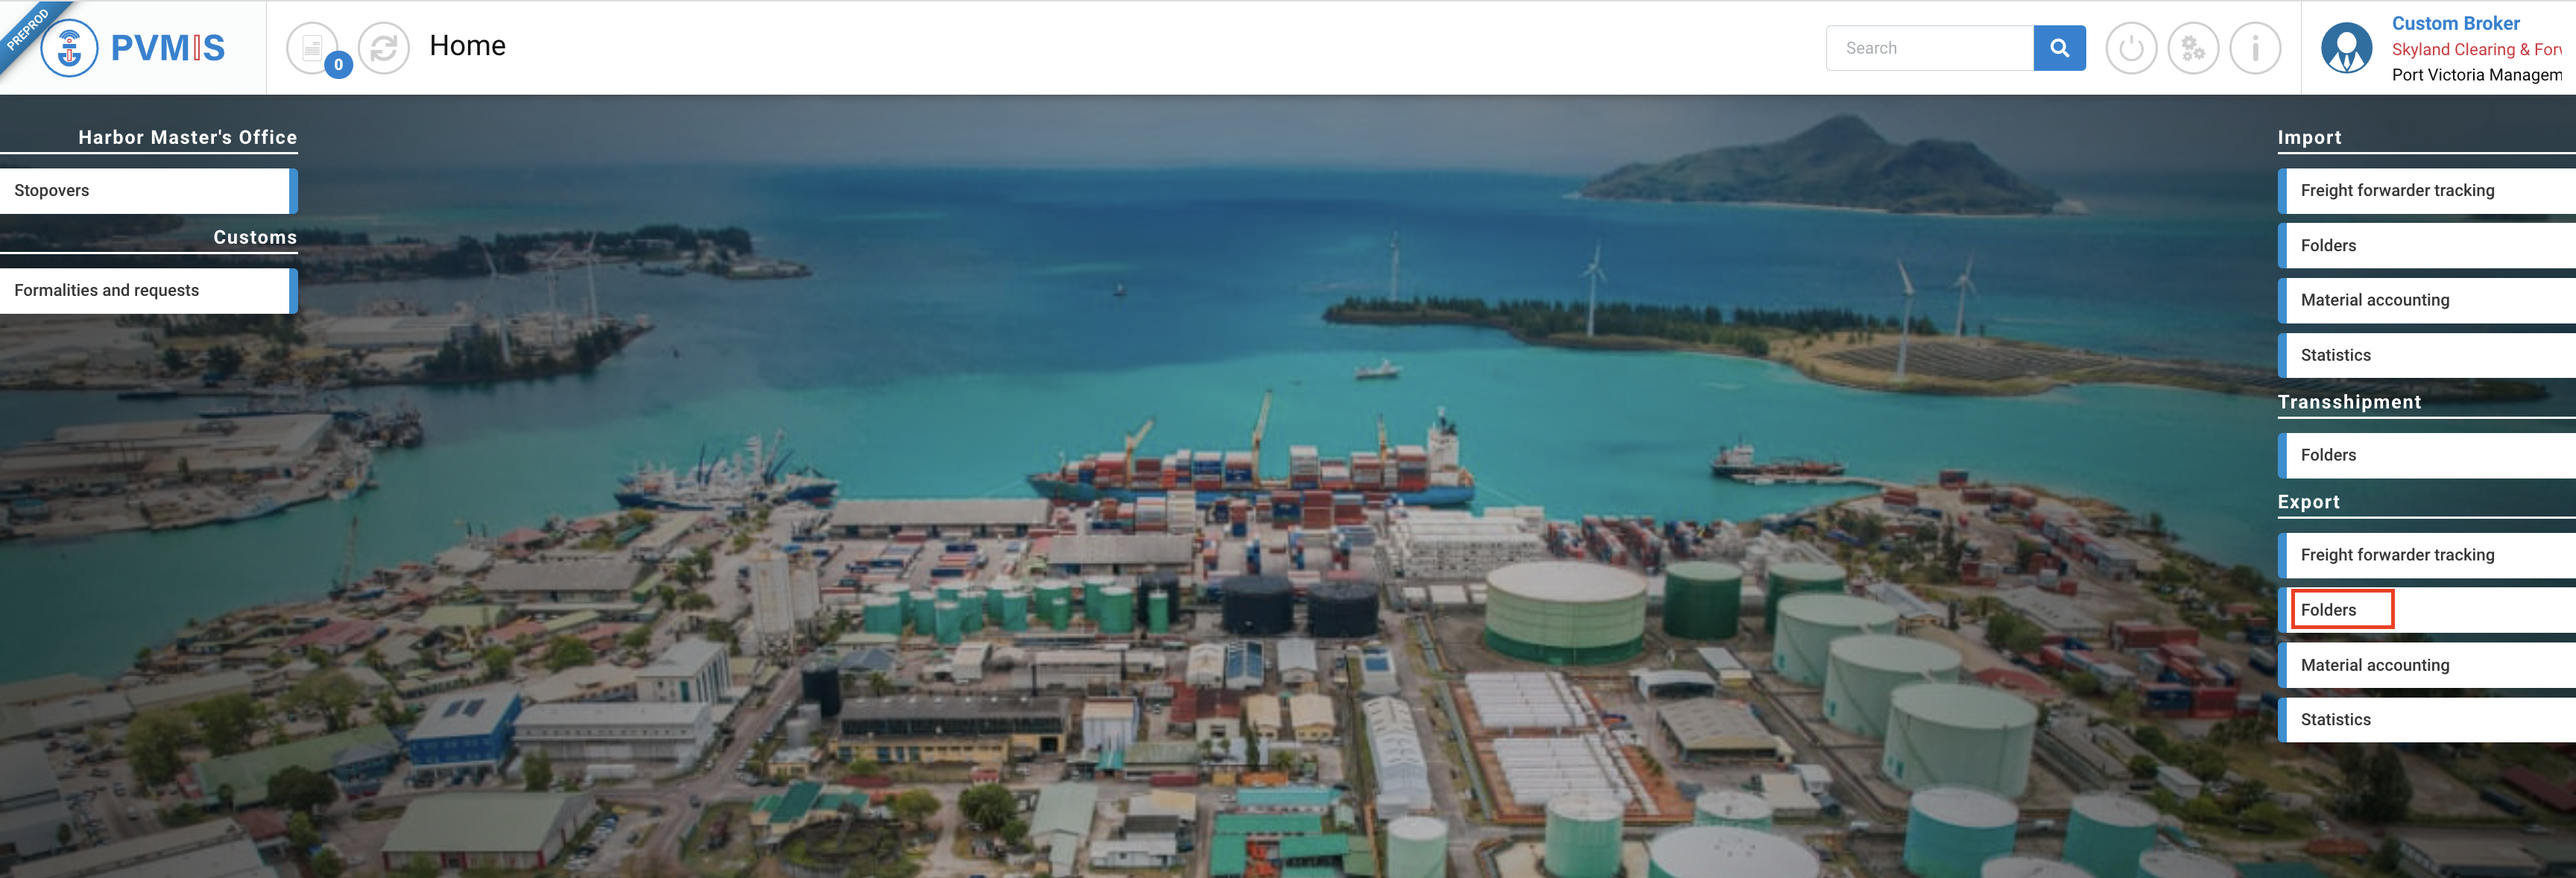
Create a custom clearance folder
To create a folder, click on “Folders” menu in the Export section:
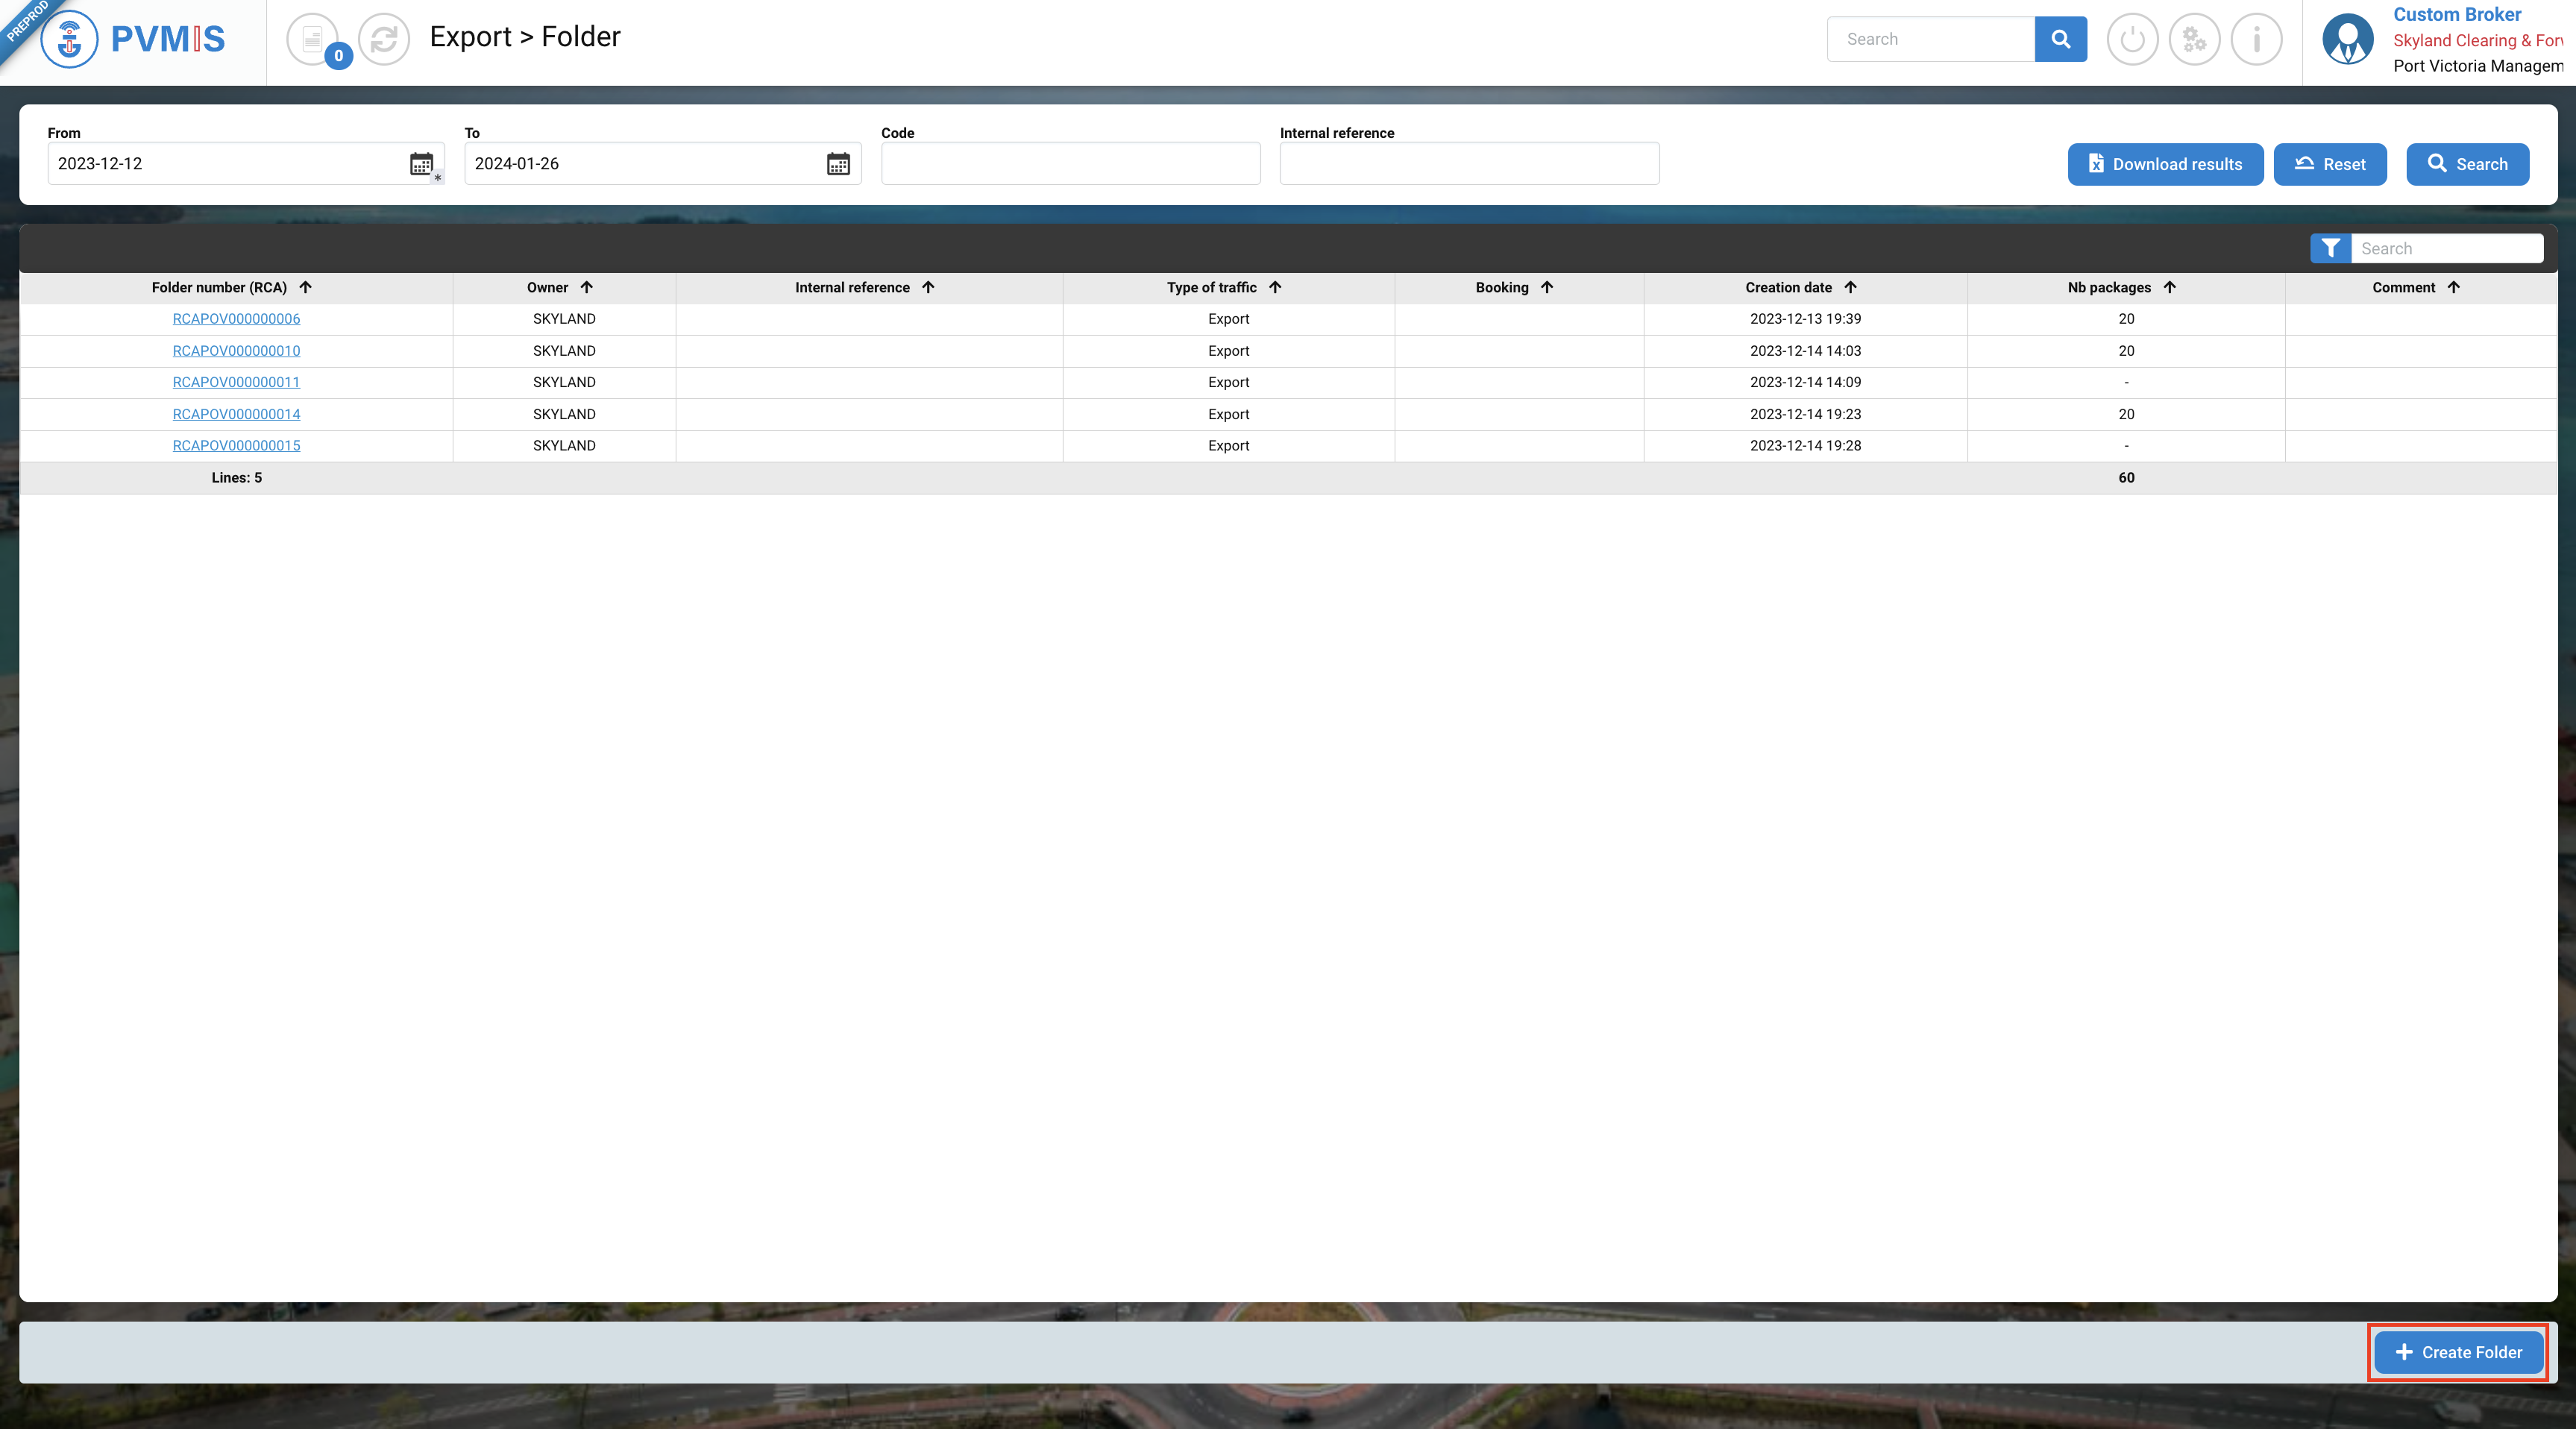
Then, click on +Create Folder button:
The folder form display, is segmented into four sections :
-
Folder details
-
Bookings
-
Bookings - Equipment
-
CargoUnits
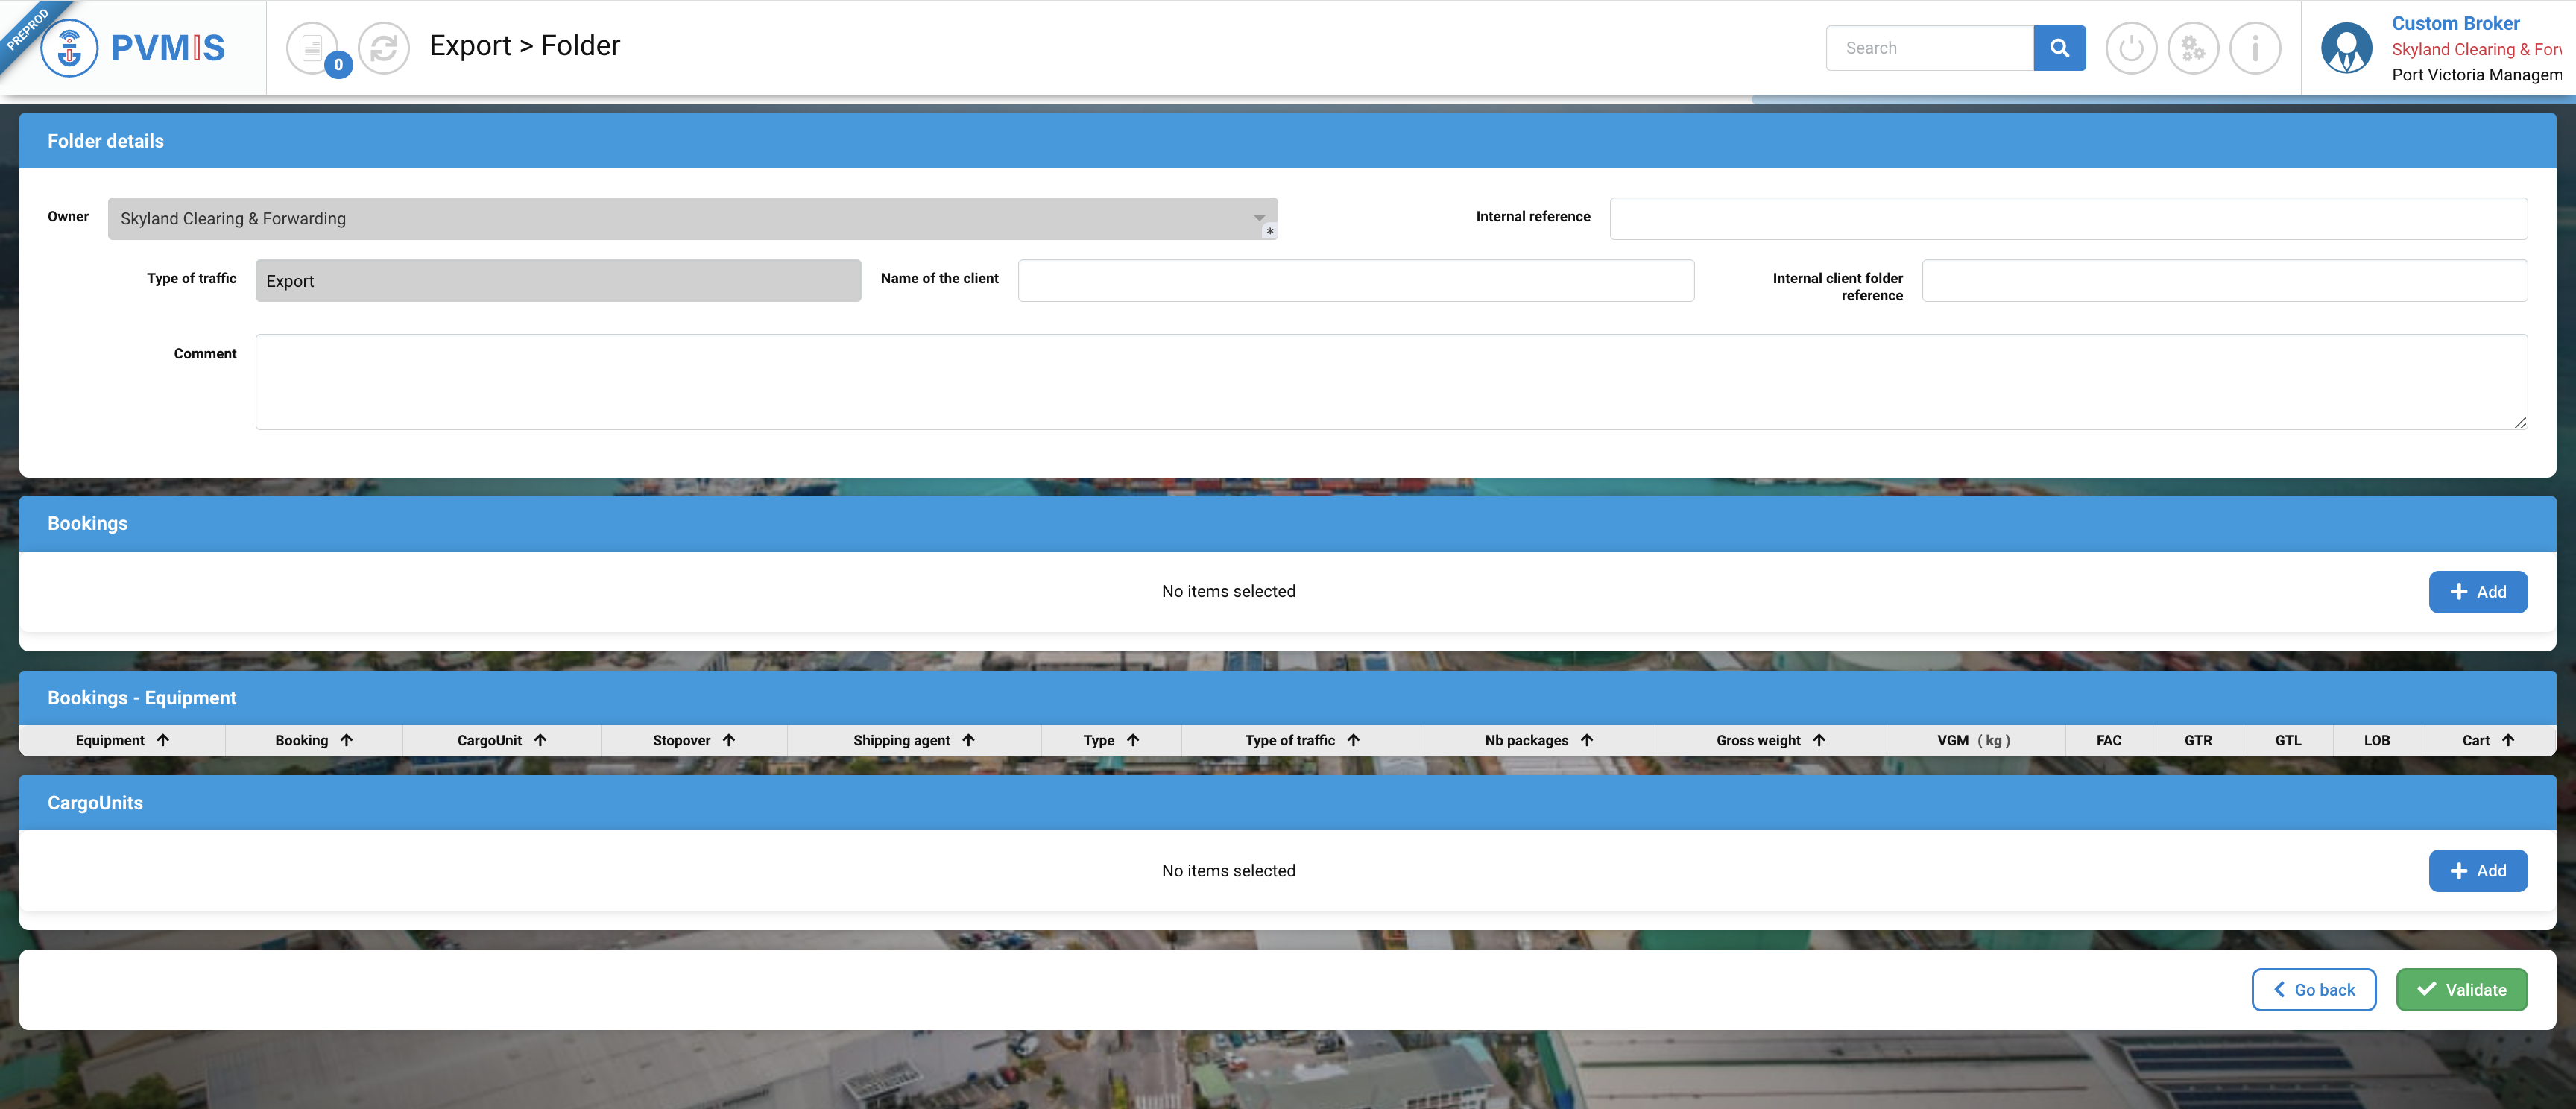
Folder details
Below here is the list of fields:
|
Fields |
Description |
|---|---|
|
Owner* |
Name of company. The fields are disabled and pre-filled based on the connected customer brokers. |
|
Internal reference |
|
|
Type of traffic |
Disabled and pre-filed. |
|
Name of the client |
|
|
Internal client folder reference |
|
|
Comment |
|

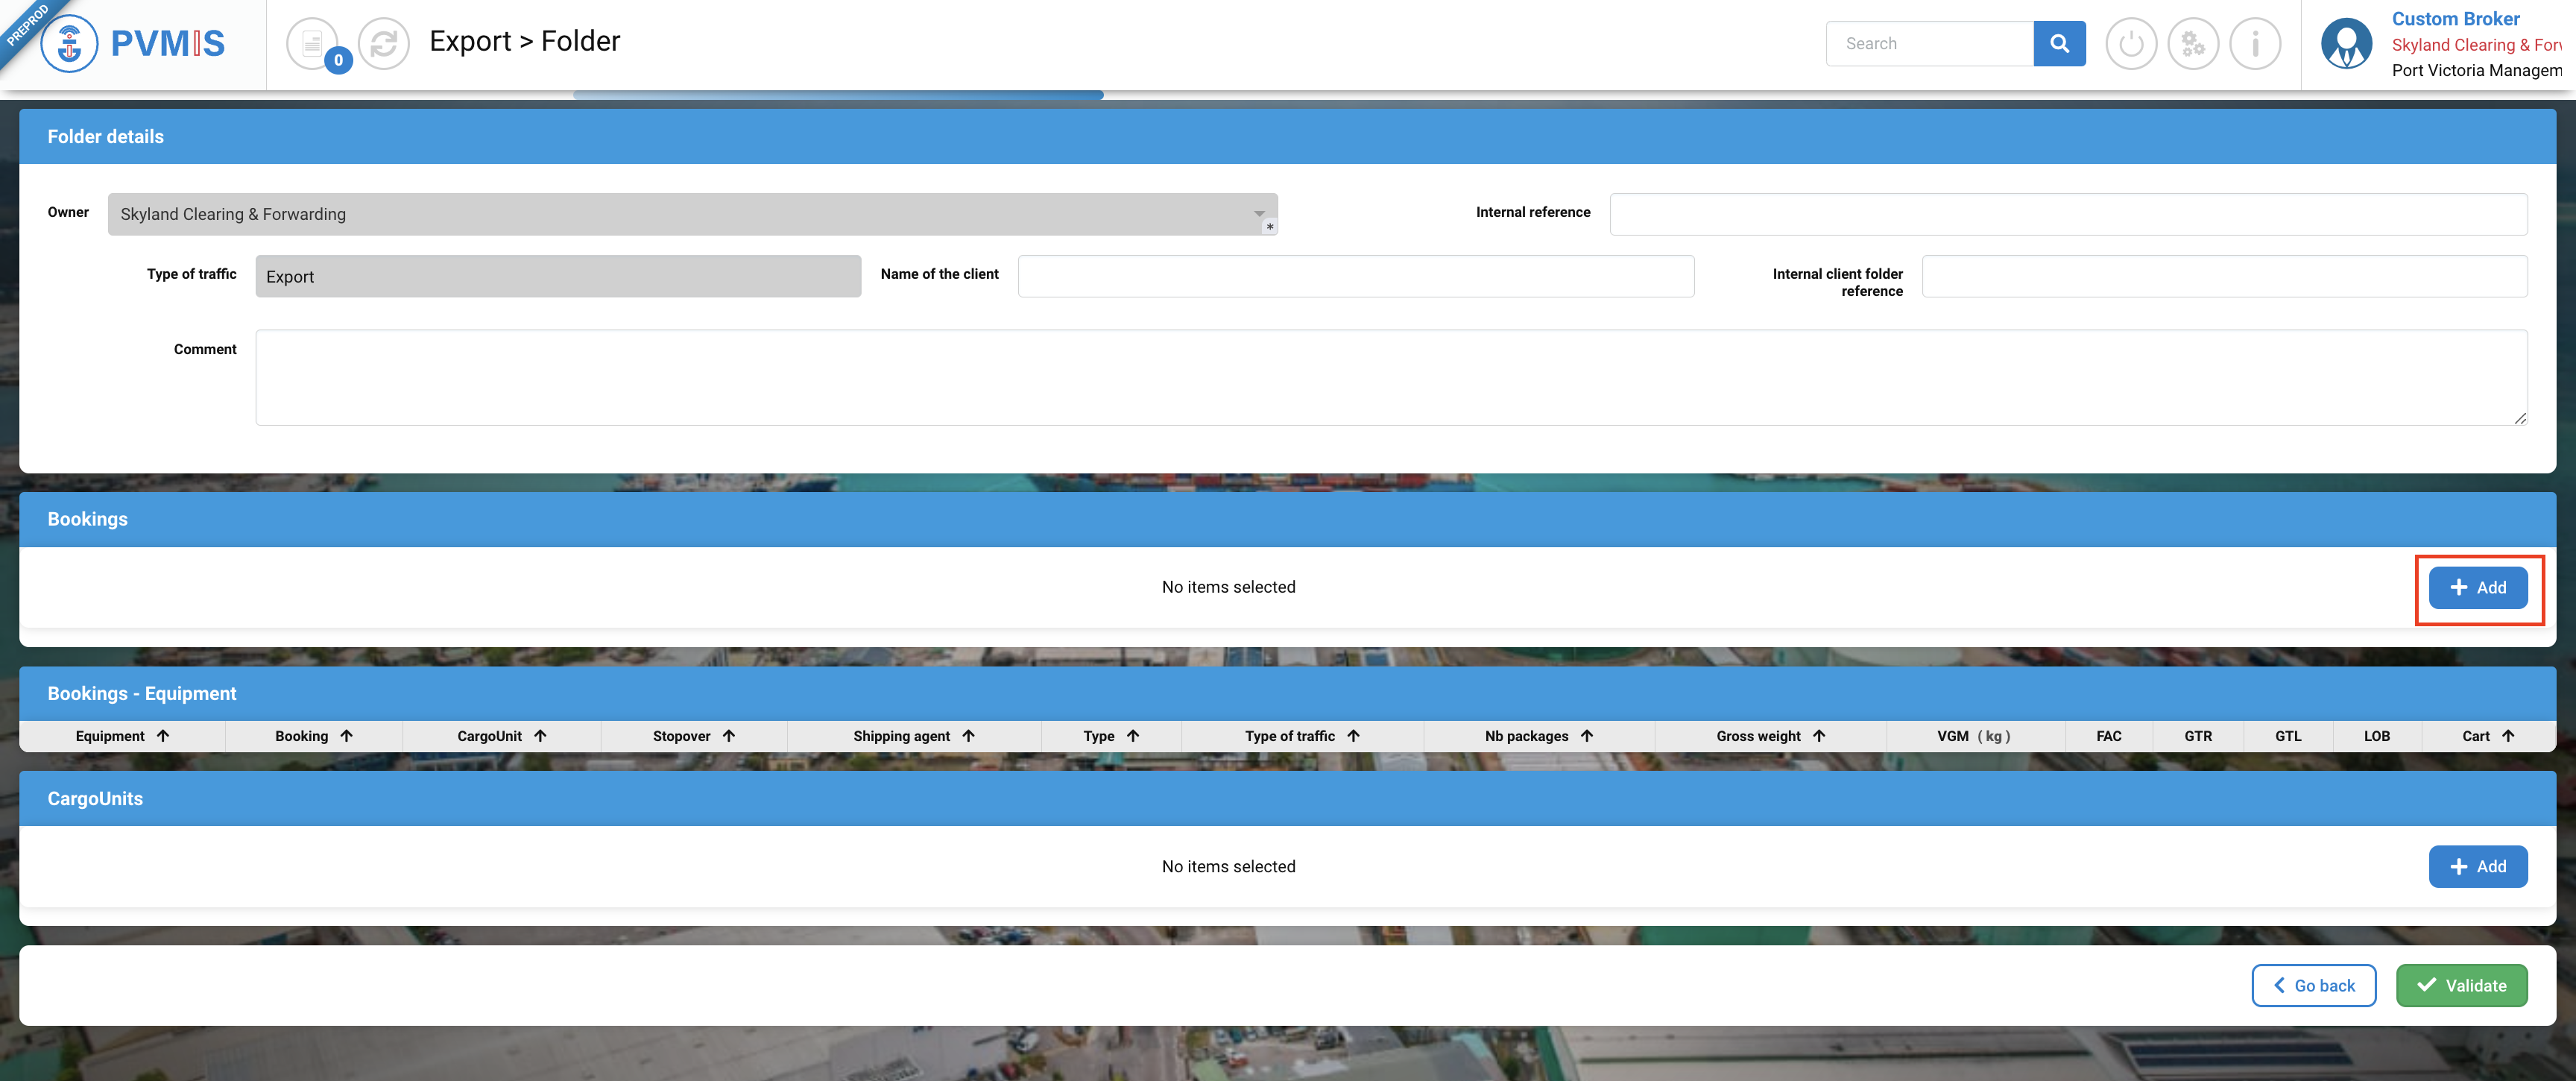
Bookings (optional)
After entering the folder details, in the Booking section, you can click on +Add button:
The list of bookings is presented, click on the line of the booking that you need, and click on Confirm button:
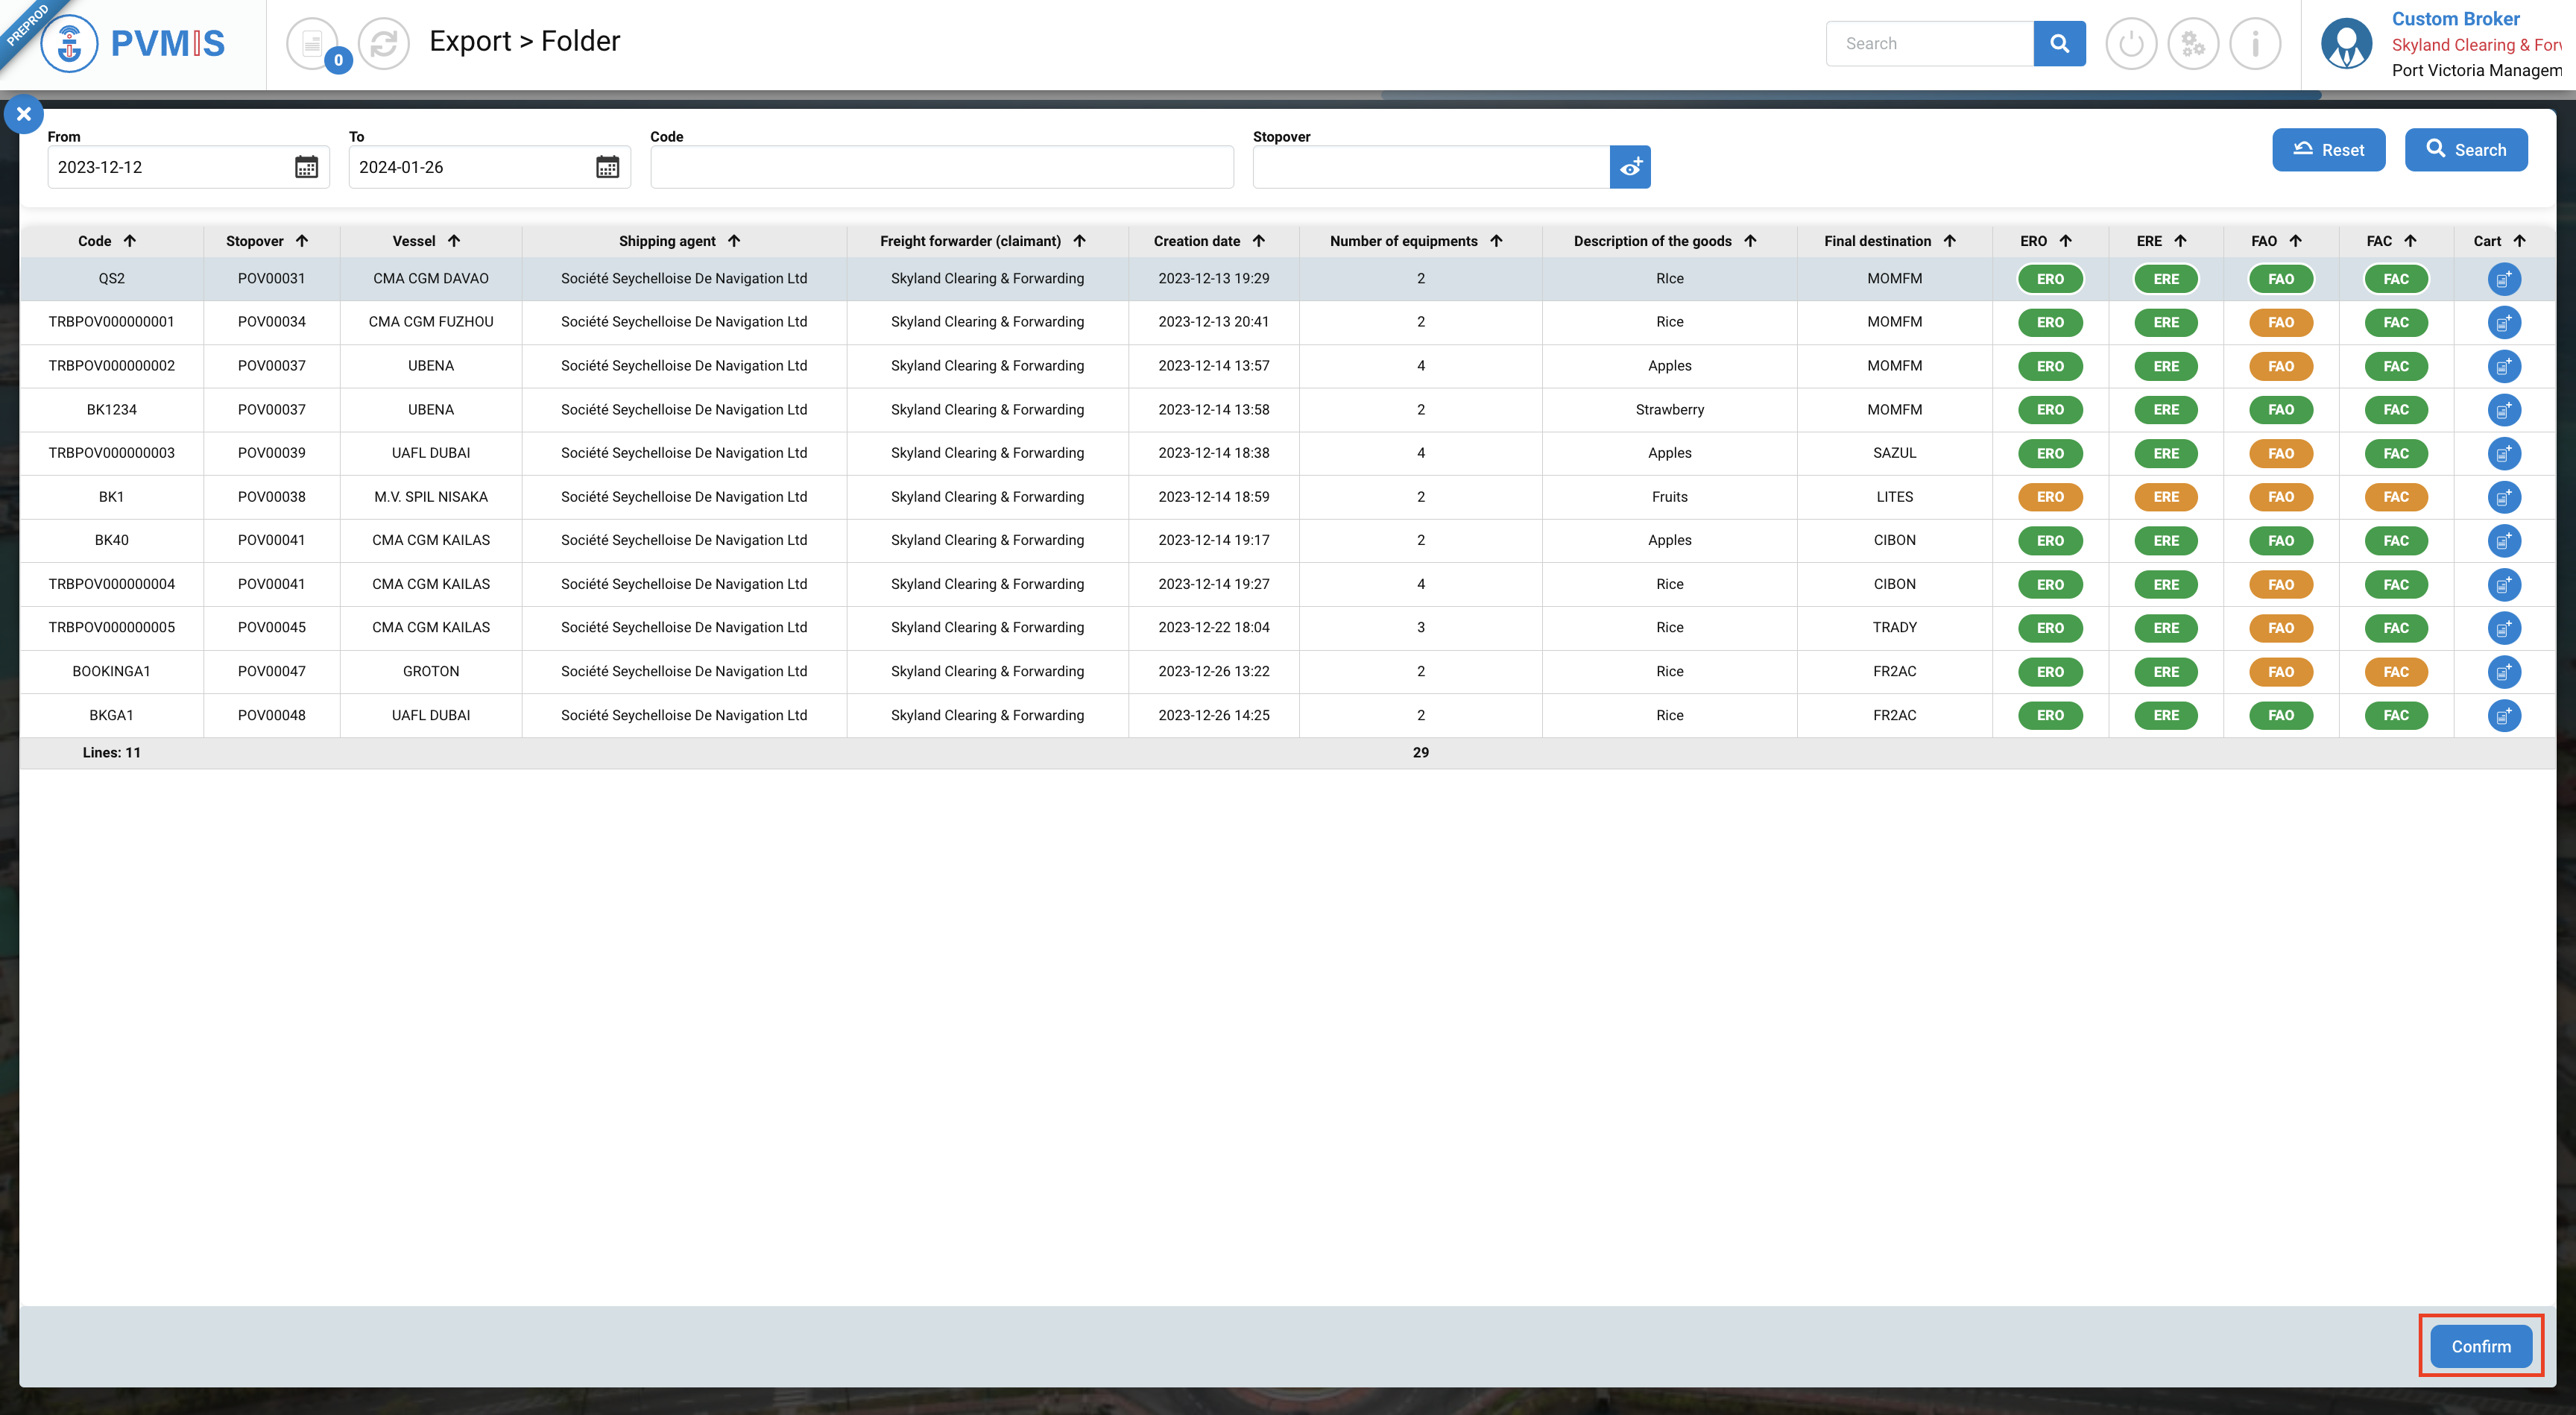
The booking that you selected is added in the Bookings section and the Bookings - Equipment is completed by the information of the booking.
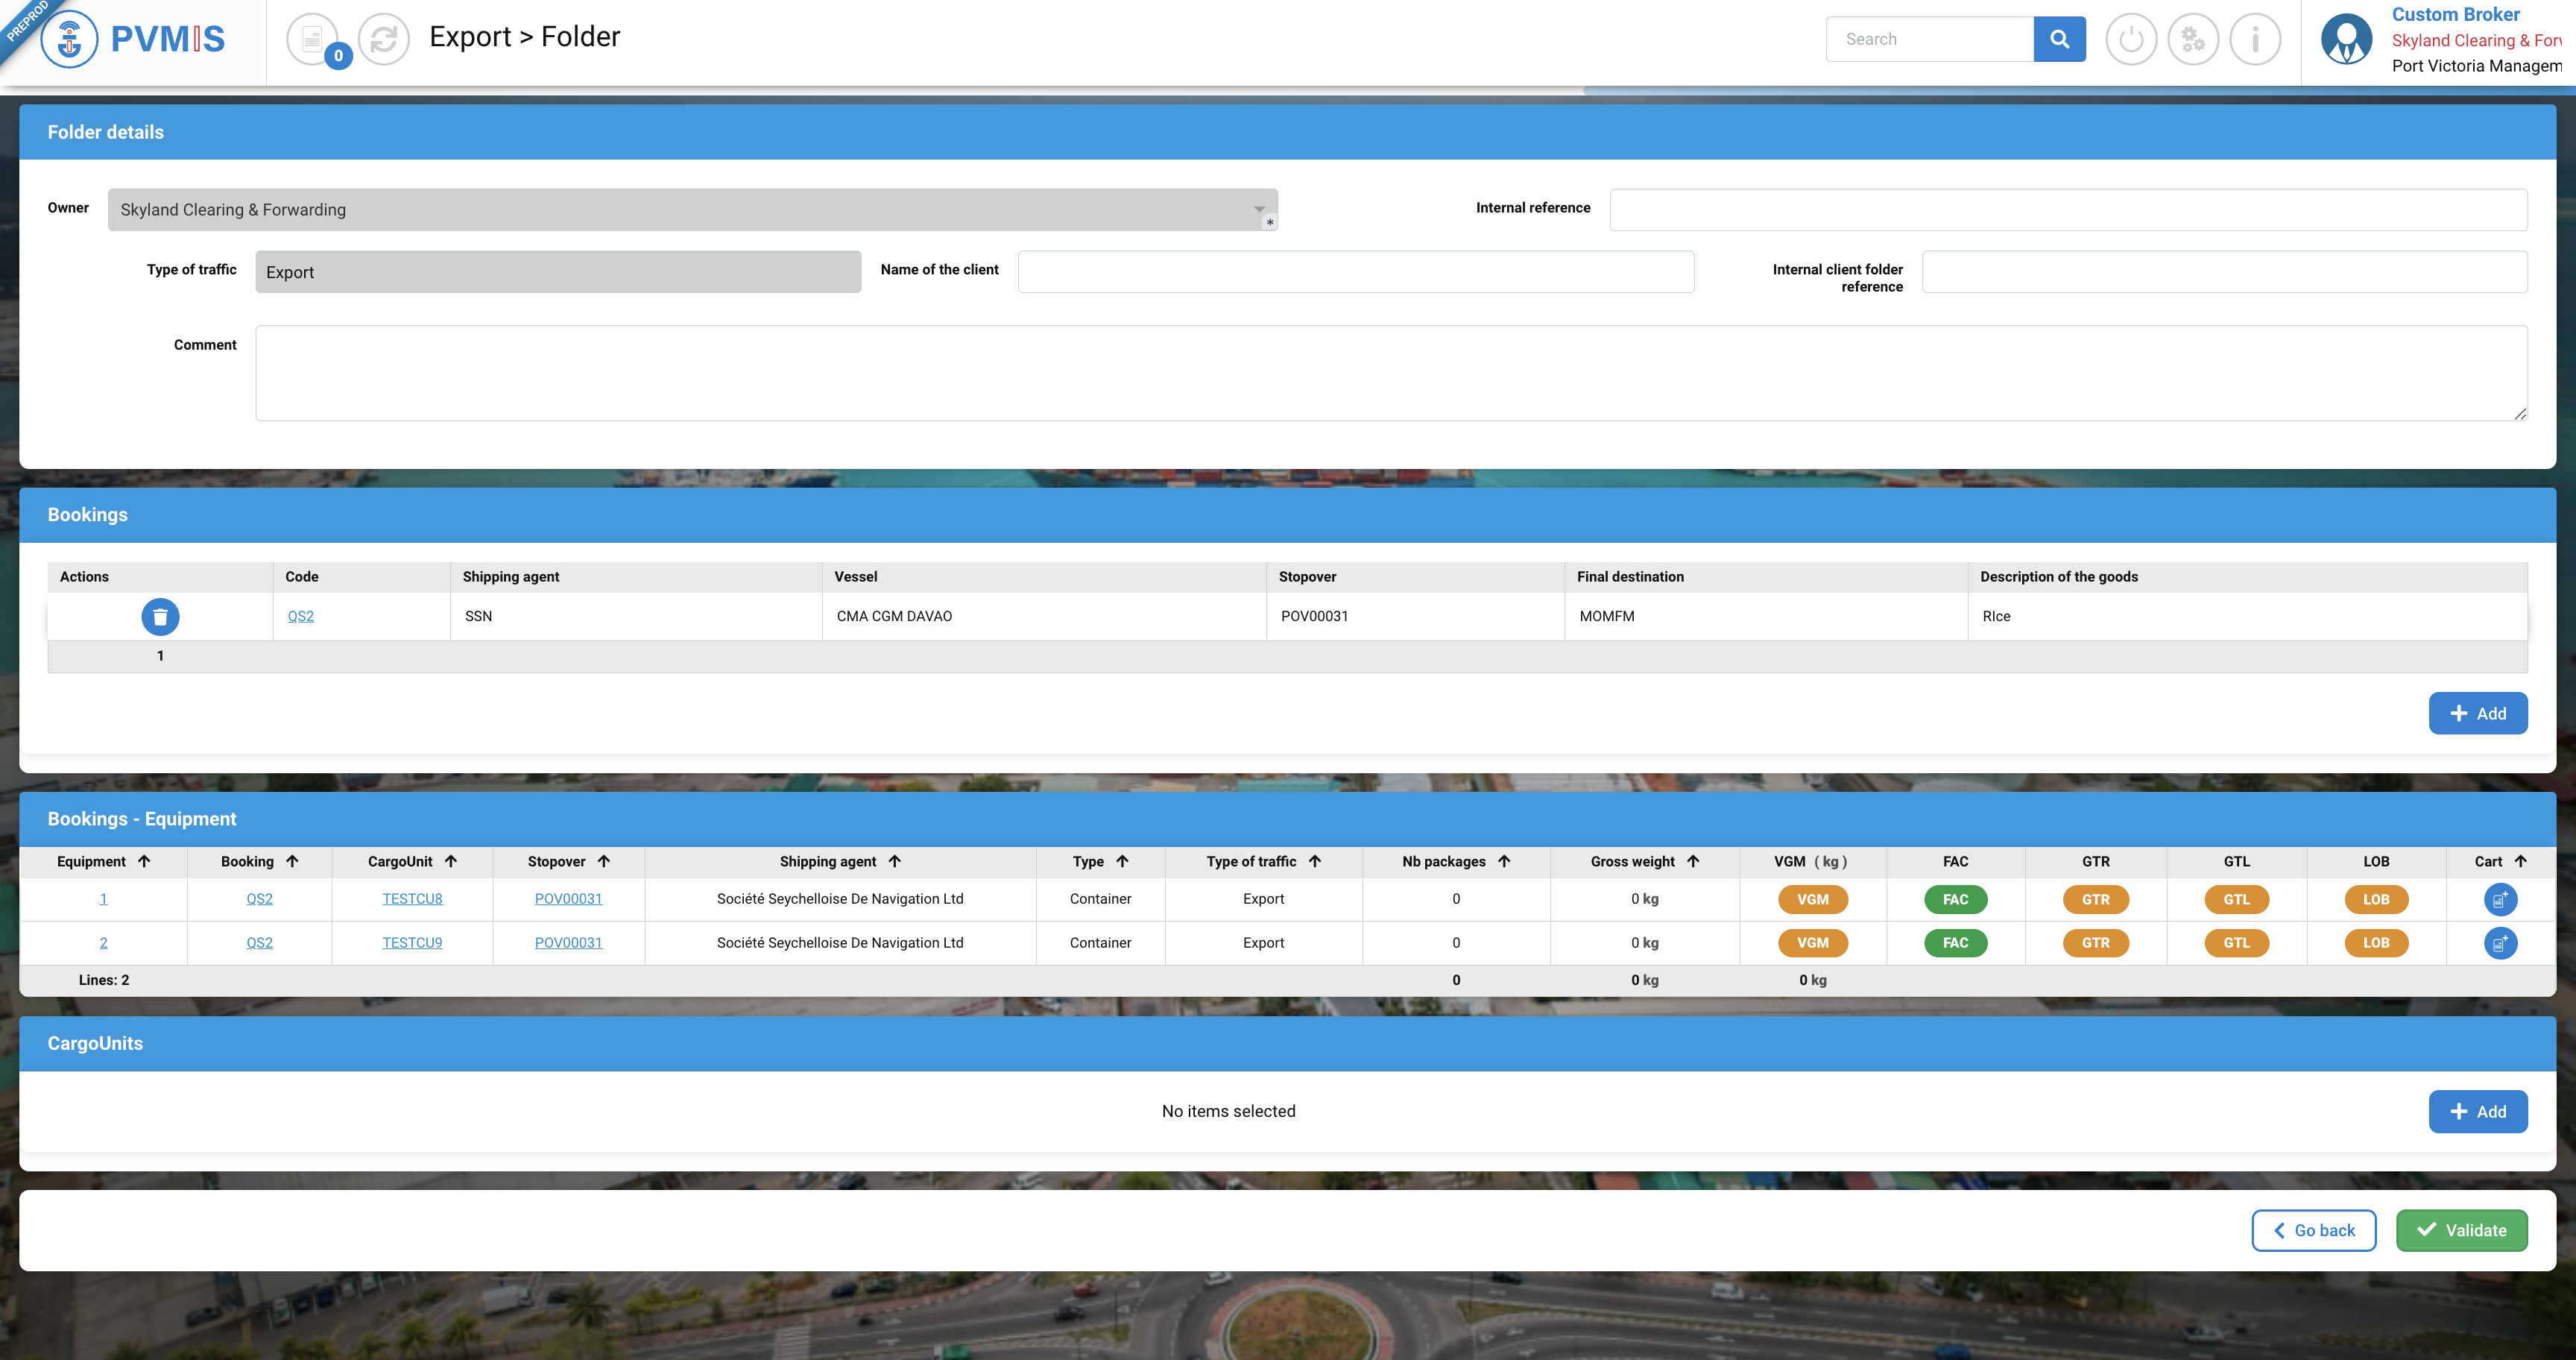
CargoUnits section
You have the possibility to add Cargo units by clicking +Add button:

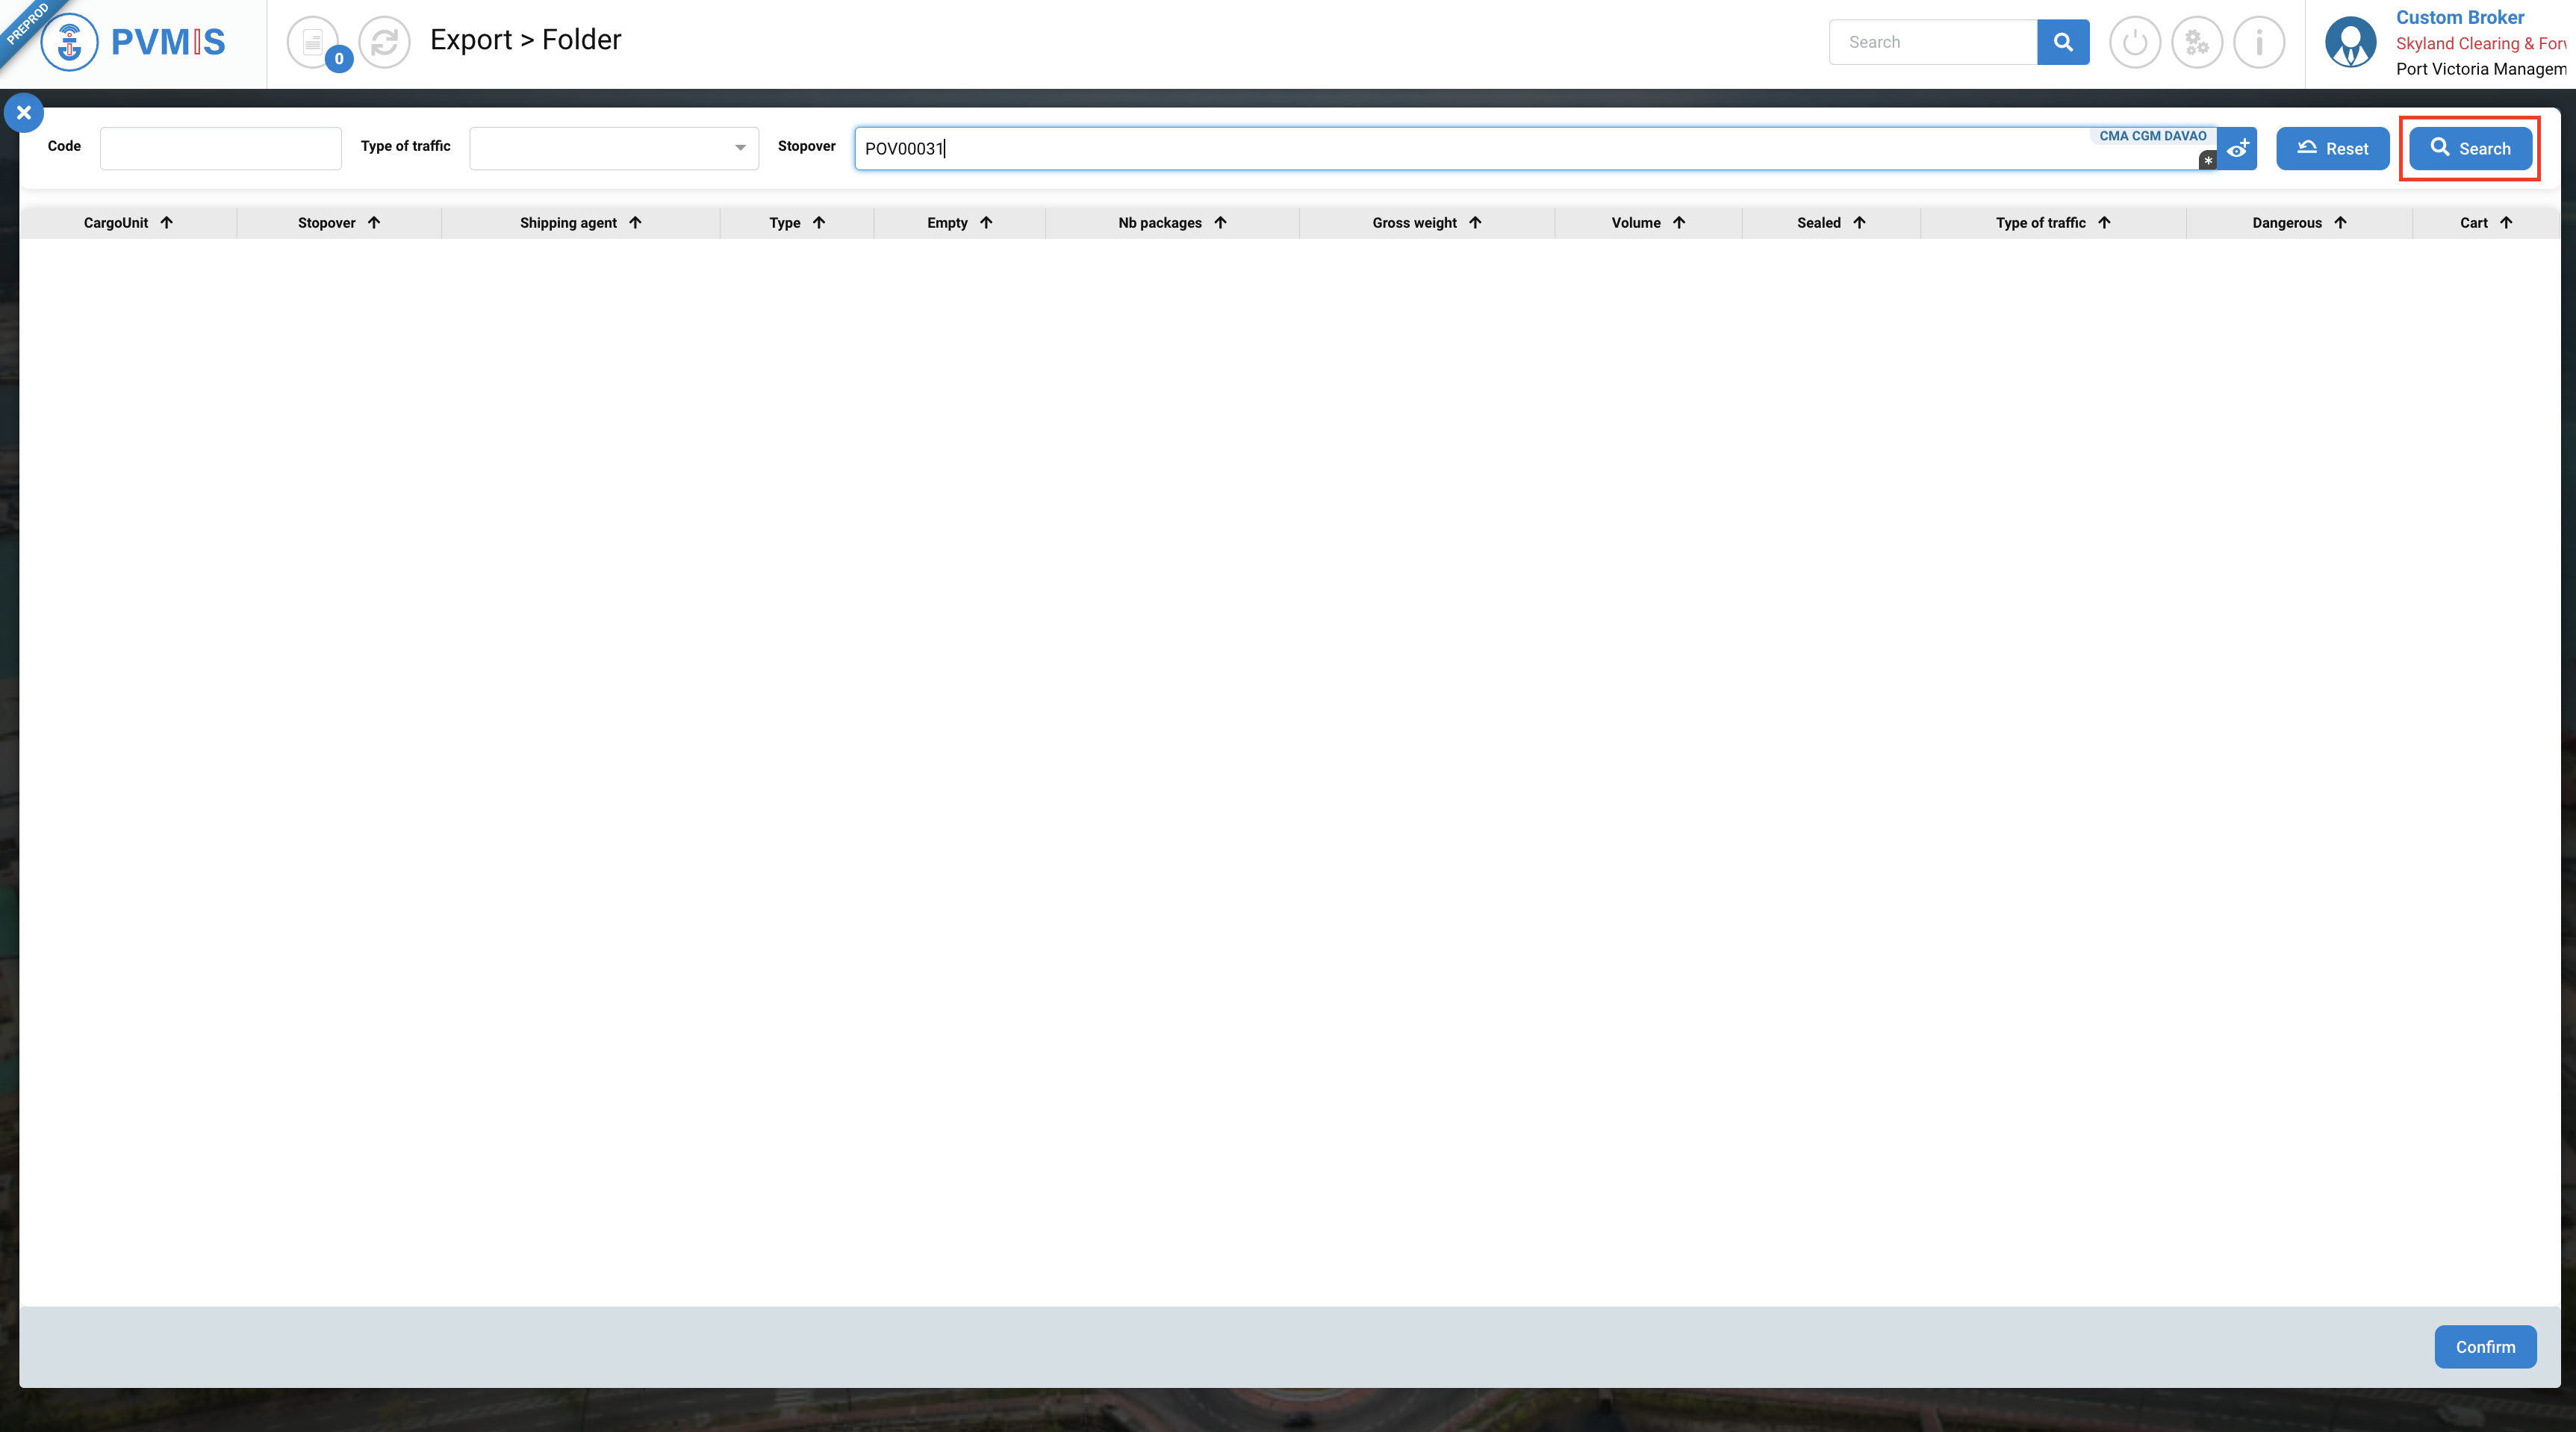
This action gives access to the list of CargoUnits. From there, you can search for the specific CargoUnit you want by using the search bar. You can enter the CargoUnit code, select the Type of traffic, and input the number of Stopover (mandatory fields). After filling in this information, click on the "Search" button.
Select the lines of the cargo unit that you should to include in the folder and click on Confirm button:
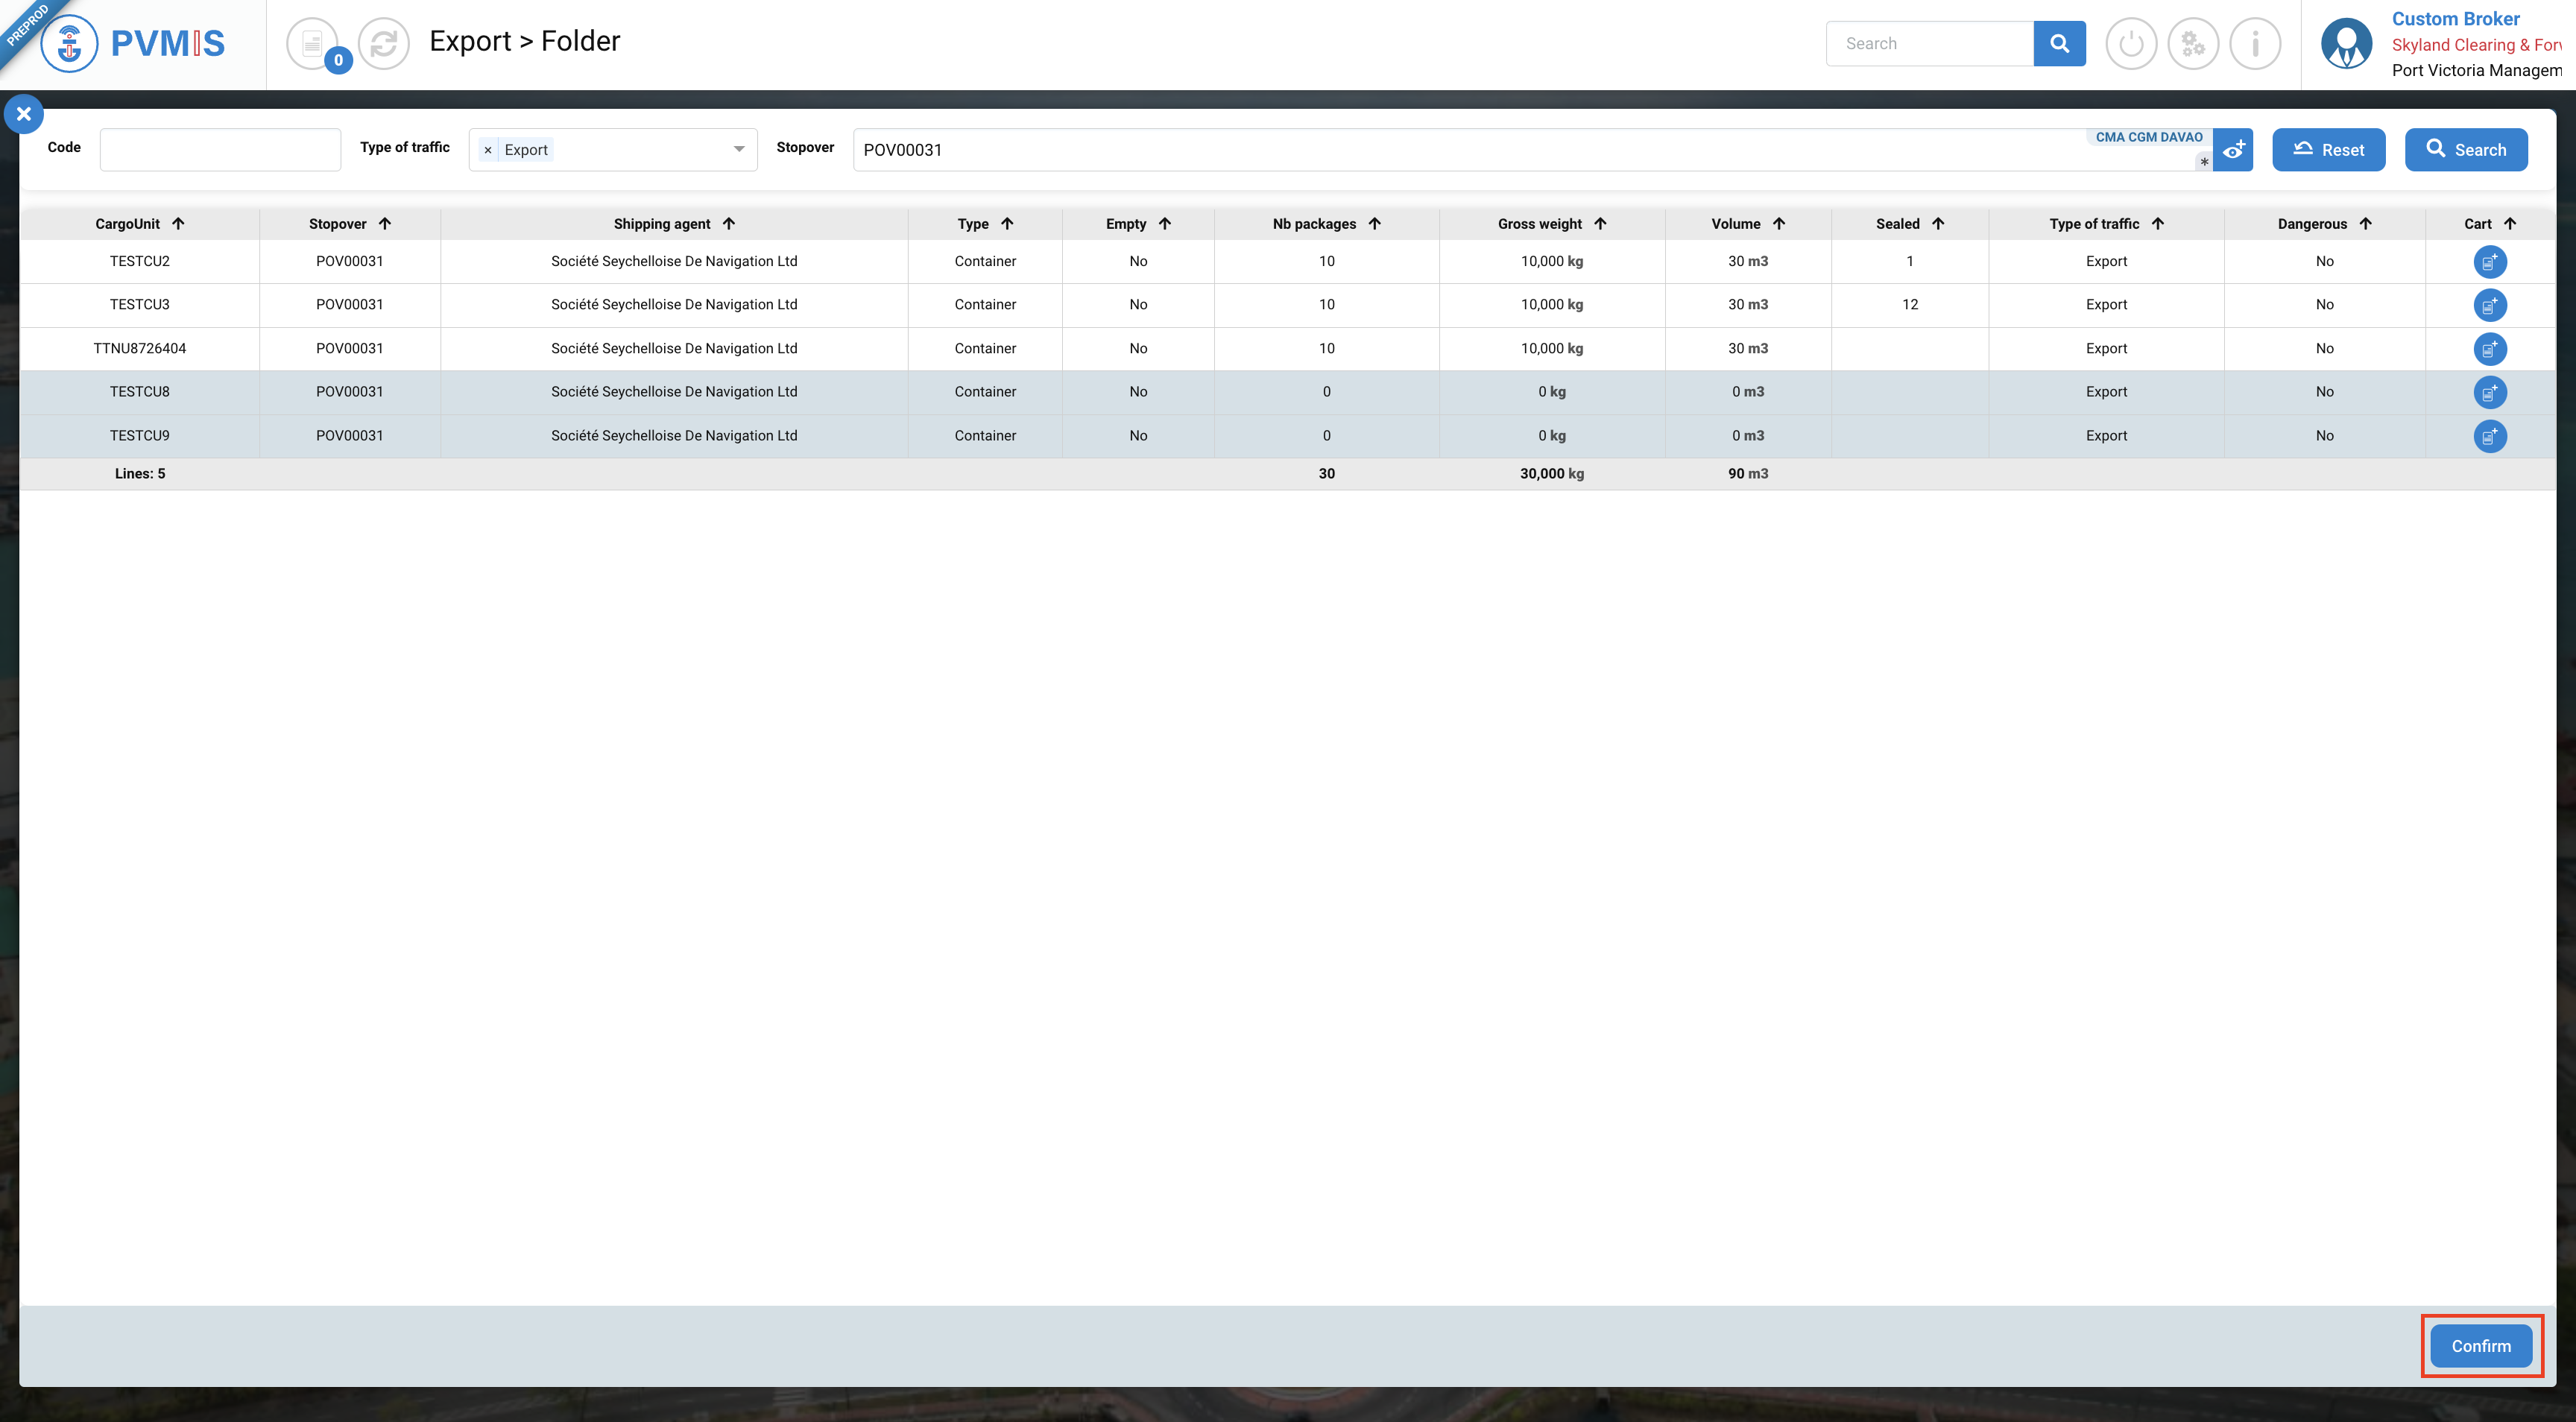
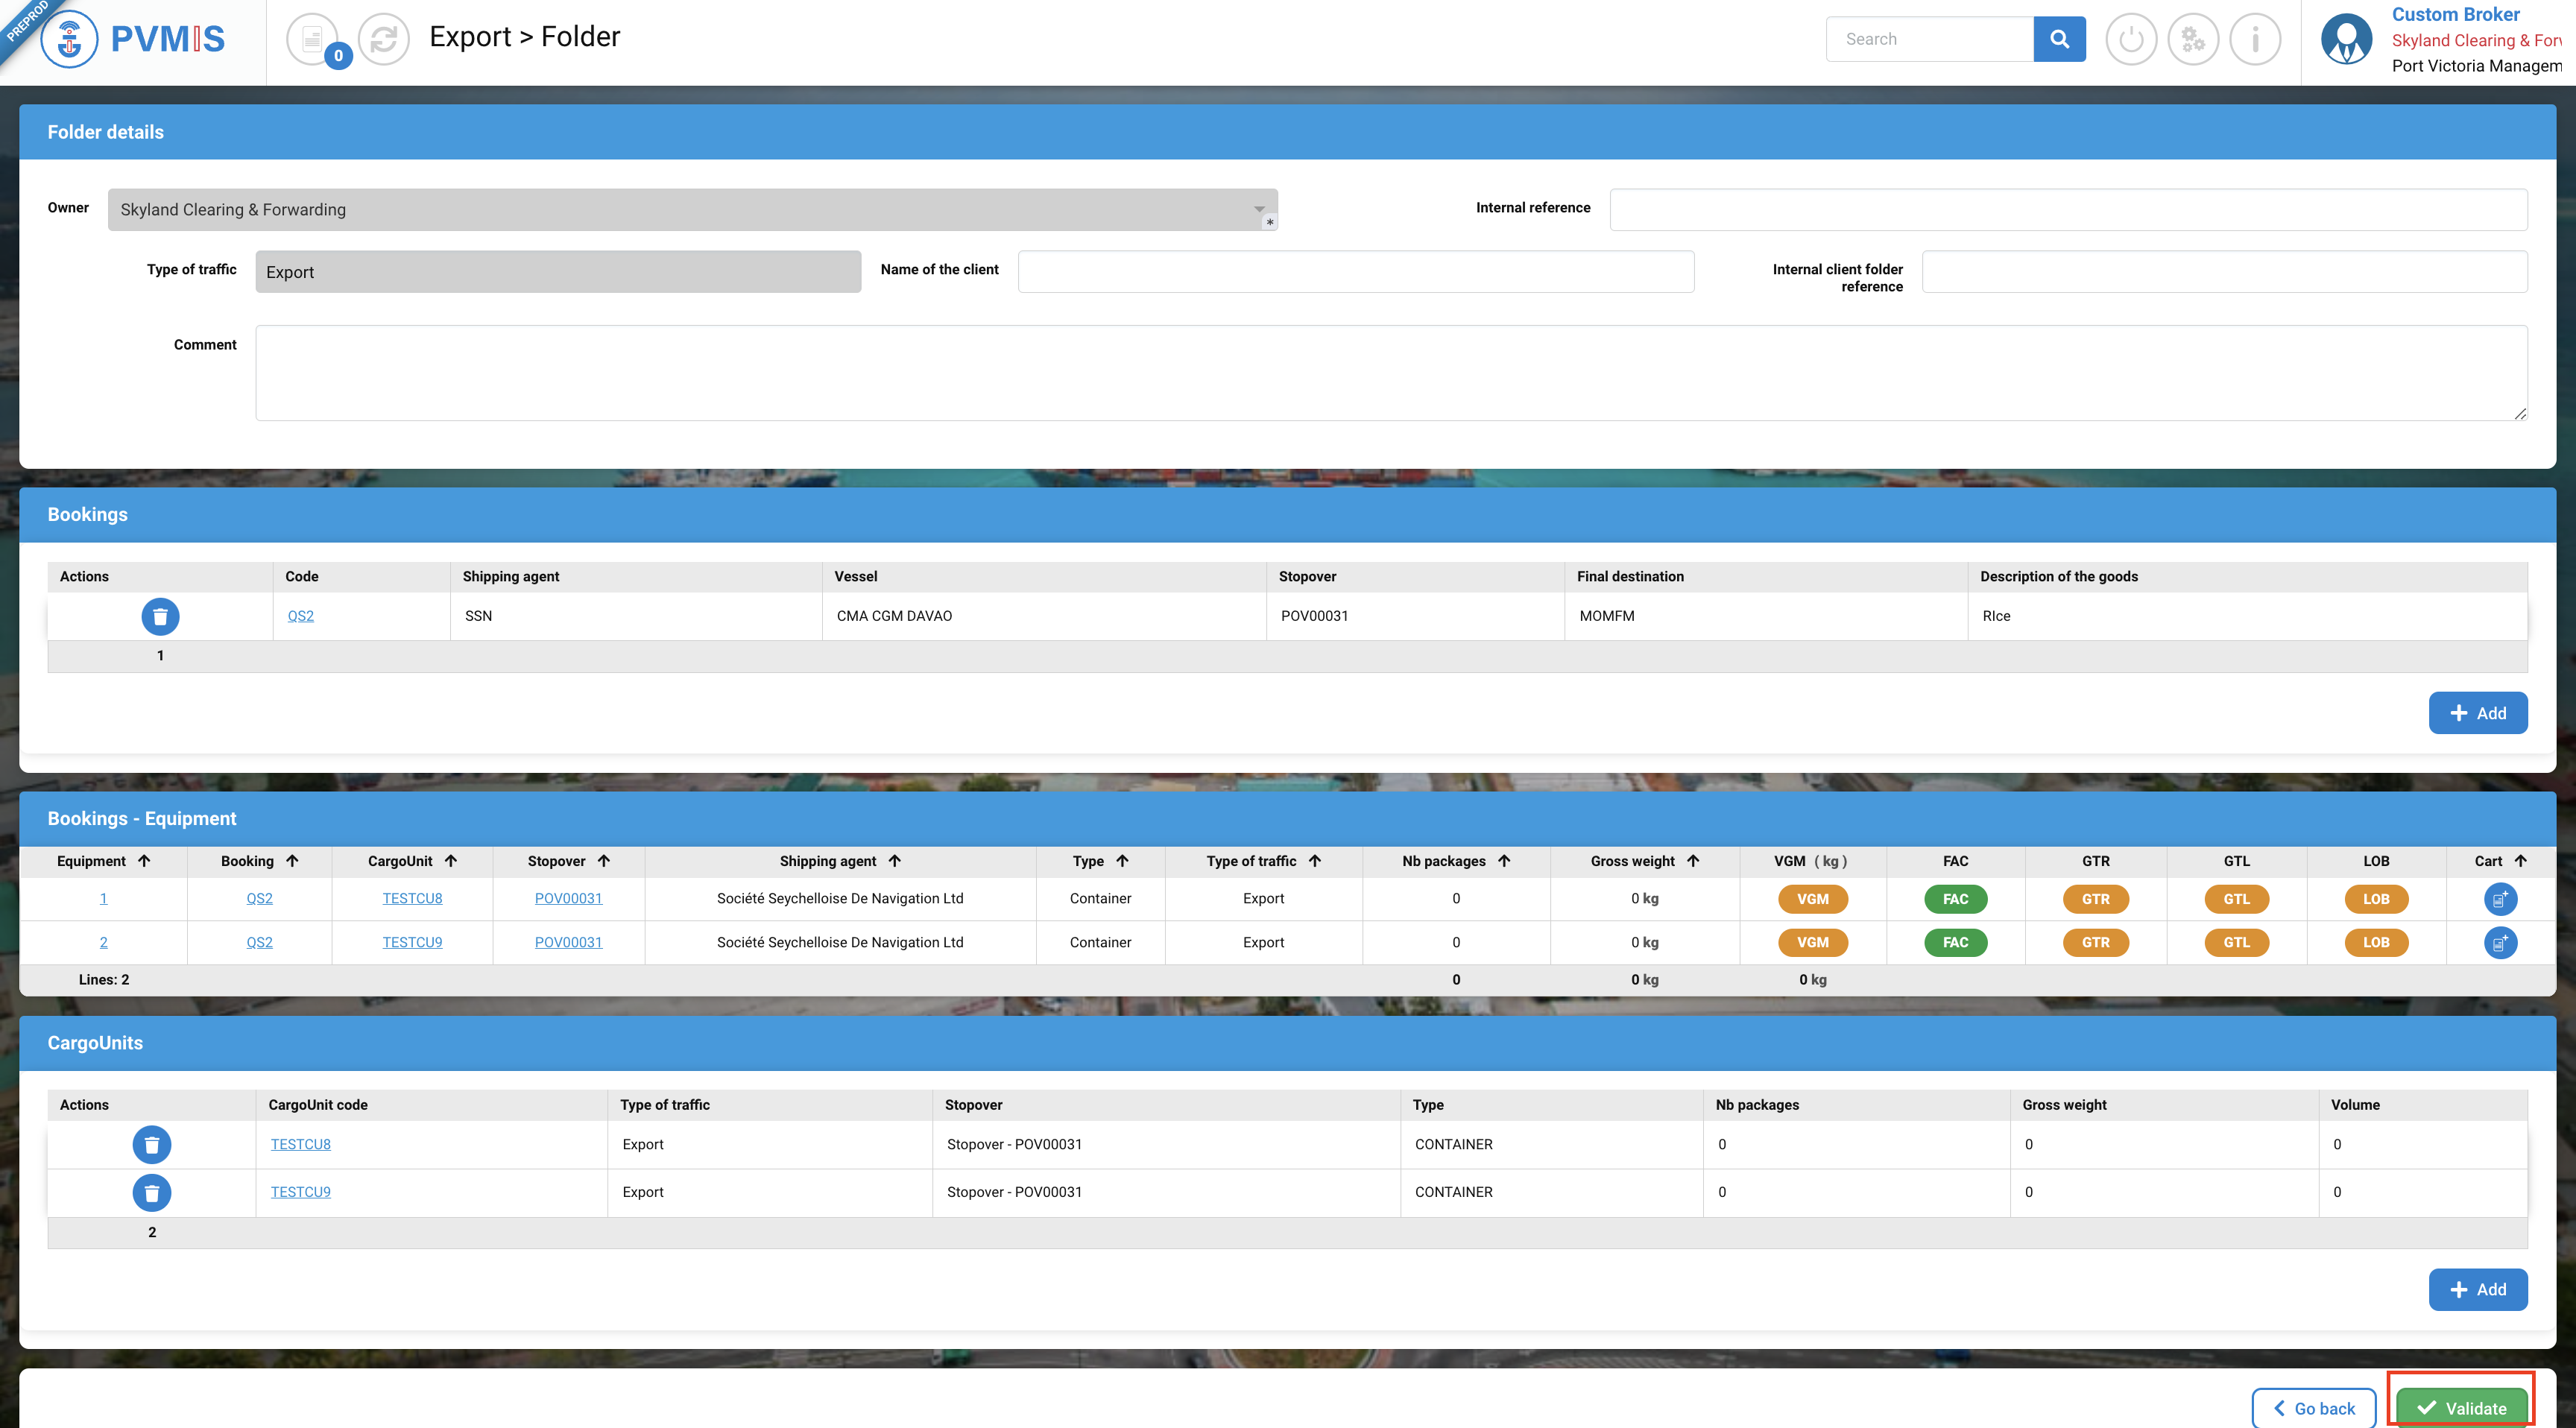
The cargo units that you selected, are added on the CargoUnits section. Once your form is completed click on Validate button:
The code generated by the CCS starting with "RCA" is to be indicated when establishing a customs formality. It provides a link between your completed declarations and your digital customs clearance tracking folder contained in the CCS.
The customs clearance folder is now ready to receive formalities attesting of customs clearance.
