|
Actors |
Shipping Agents |
|---|---|
|
Description |
Creating or updating a scheduled manifest for a stopover |
|
Visibility rights |
Freight Forwarder (FFN), Stevedore (CargoUnit), Customs, Shipping Agents, Administrator. |
Create a Scheduled Manifest
Access to the scheduled manifest
Two ways to access to the creation of a scheduled manifest.
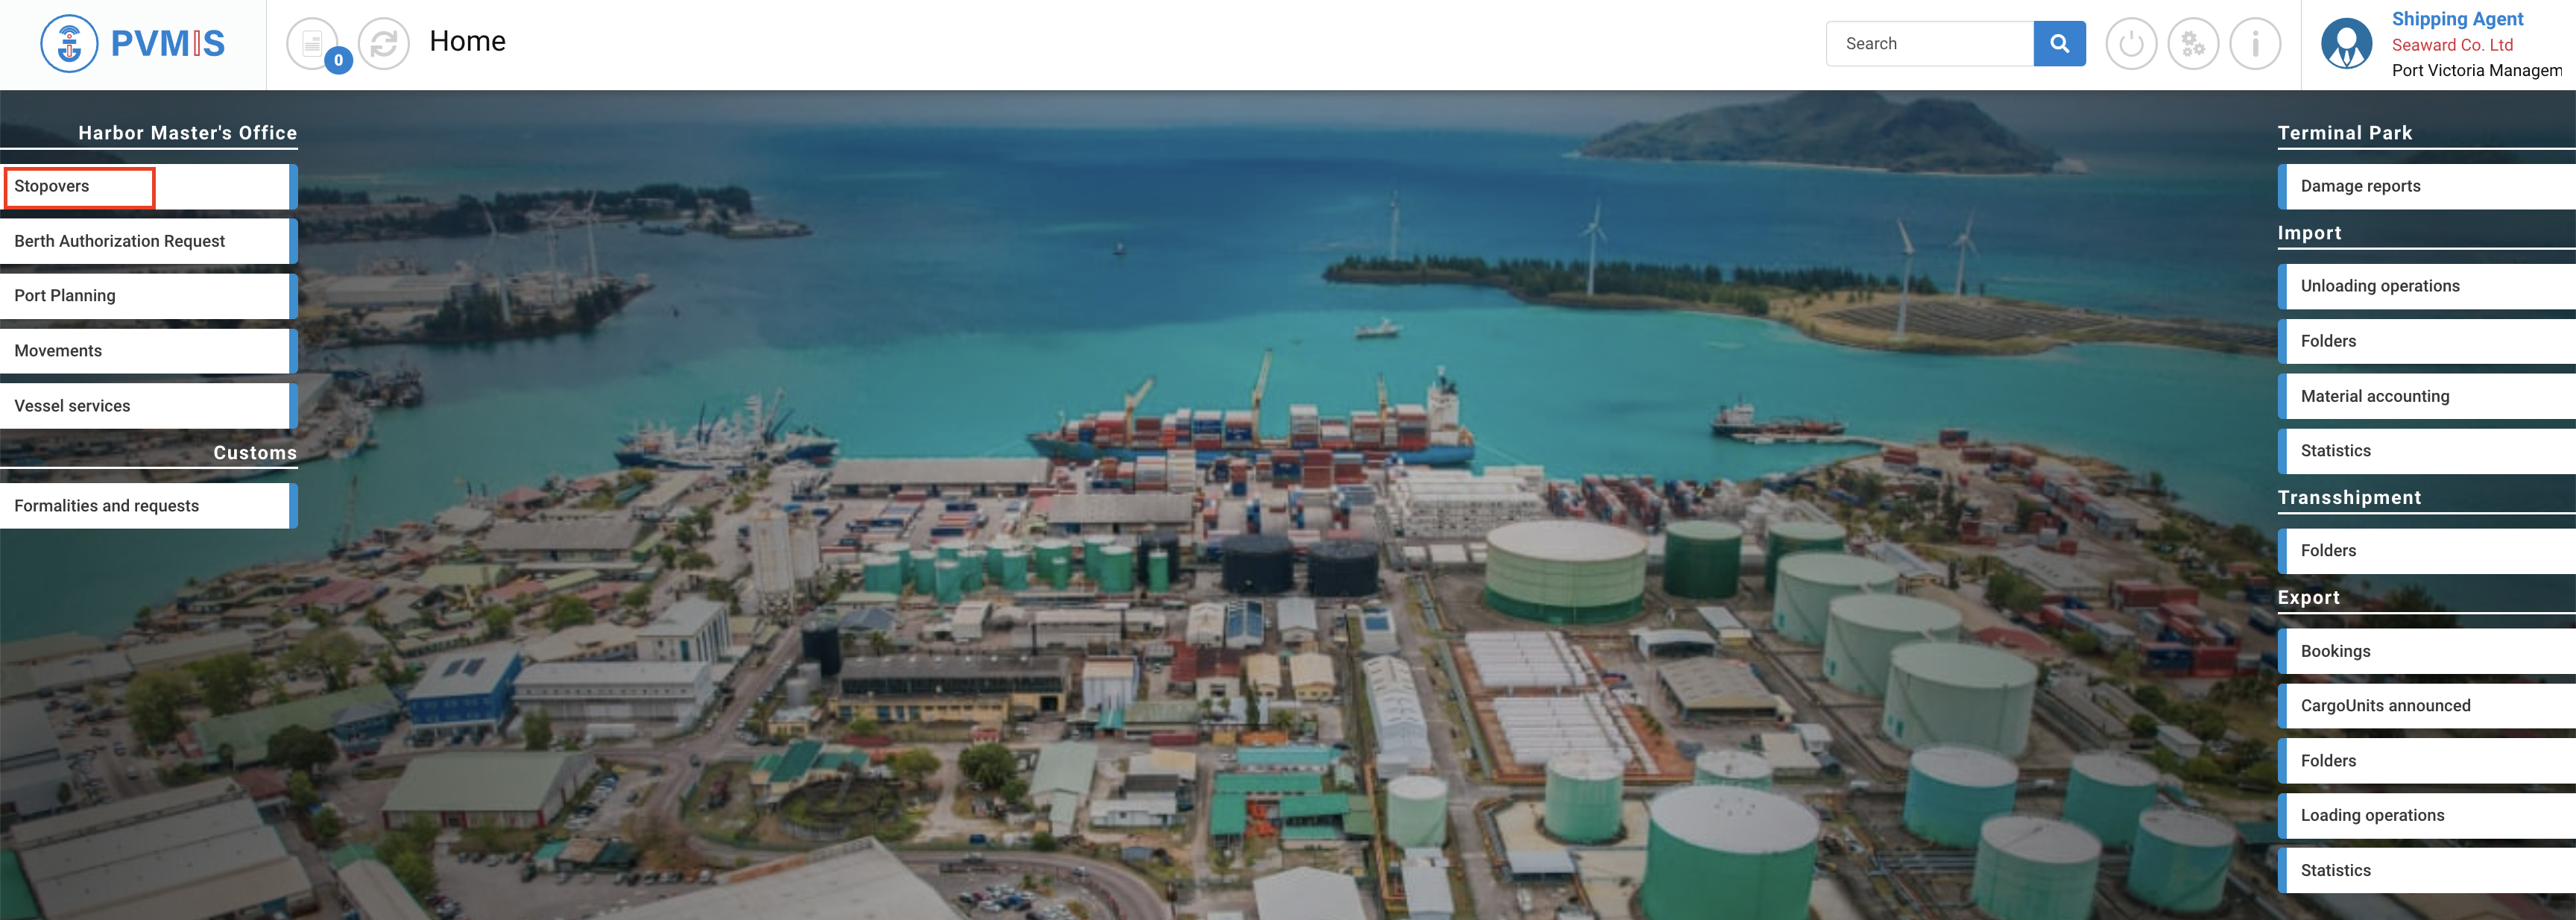
1 - By Stopover menu
Click on the “Stopovers” menu in the Harbor Master’s office section:
A list of all stopovers corresponding to the specified date range is presented. To access the stopover detail page, simply click on the appropriate code located in the first column of the table:
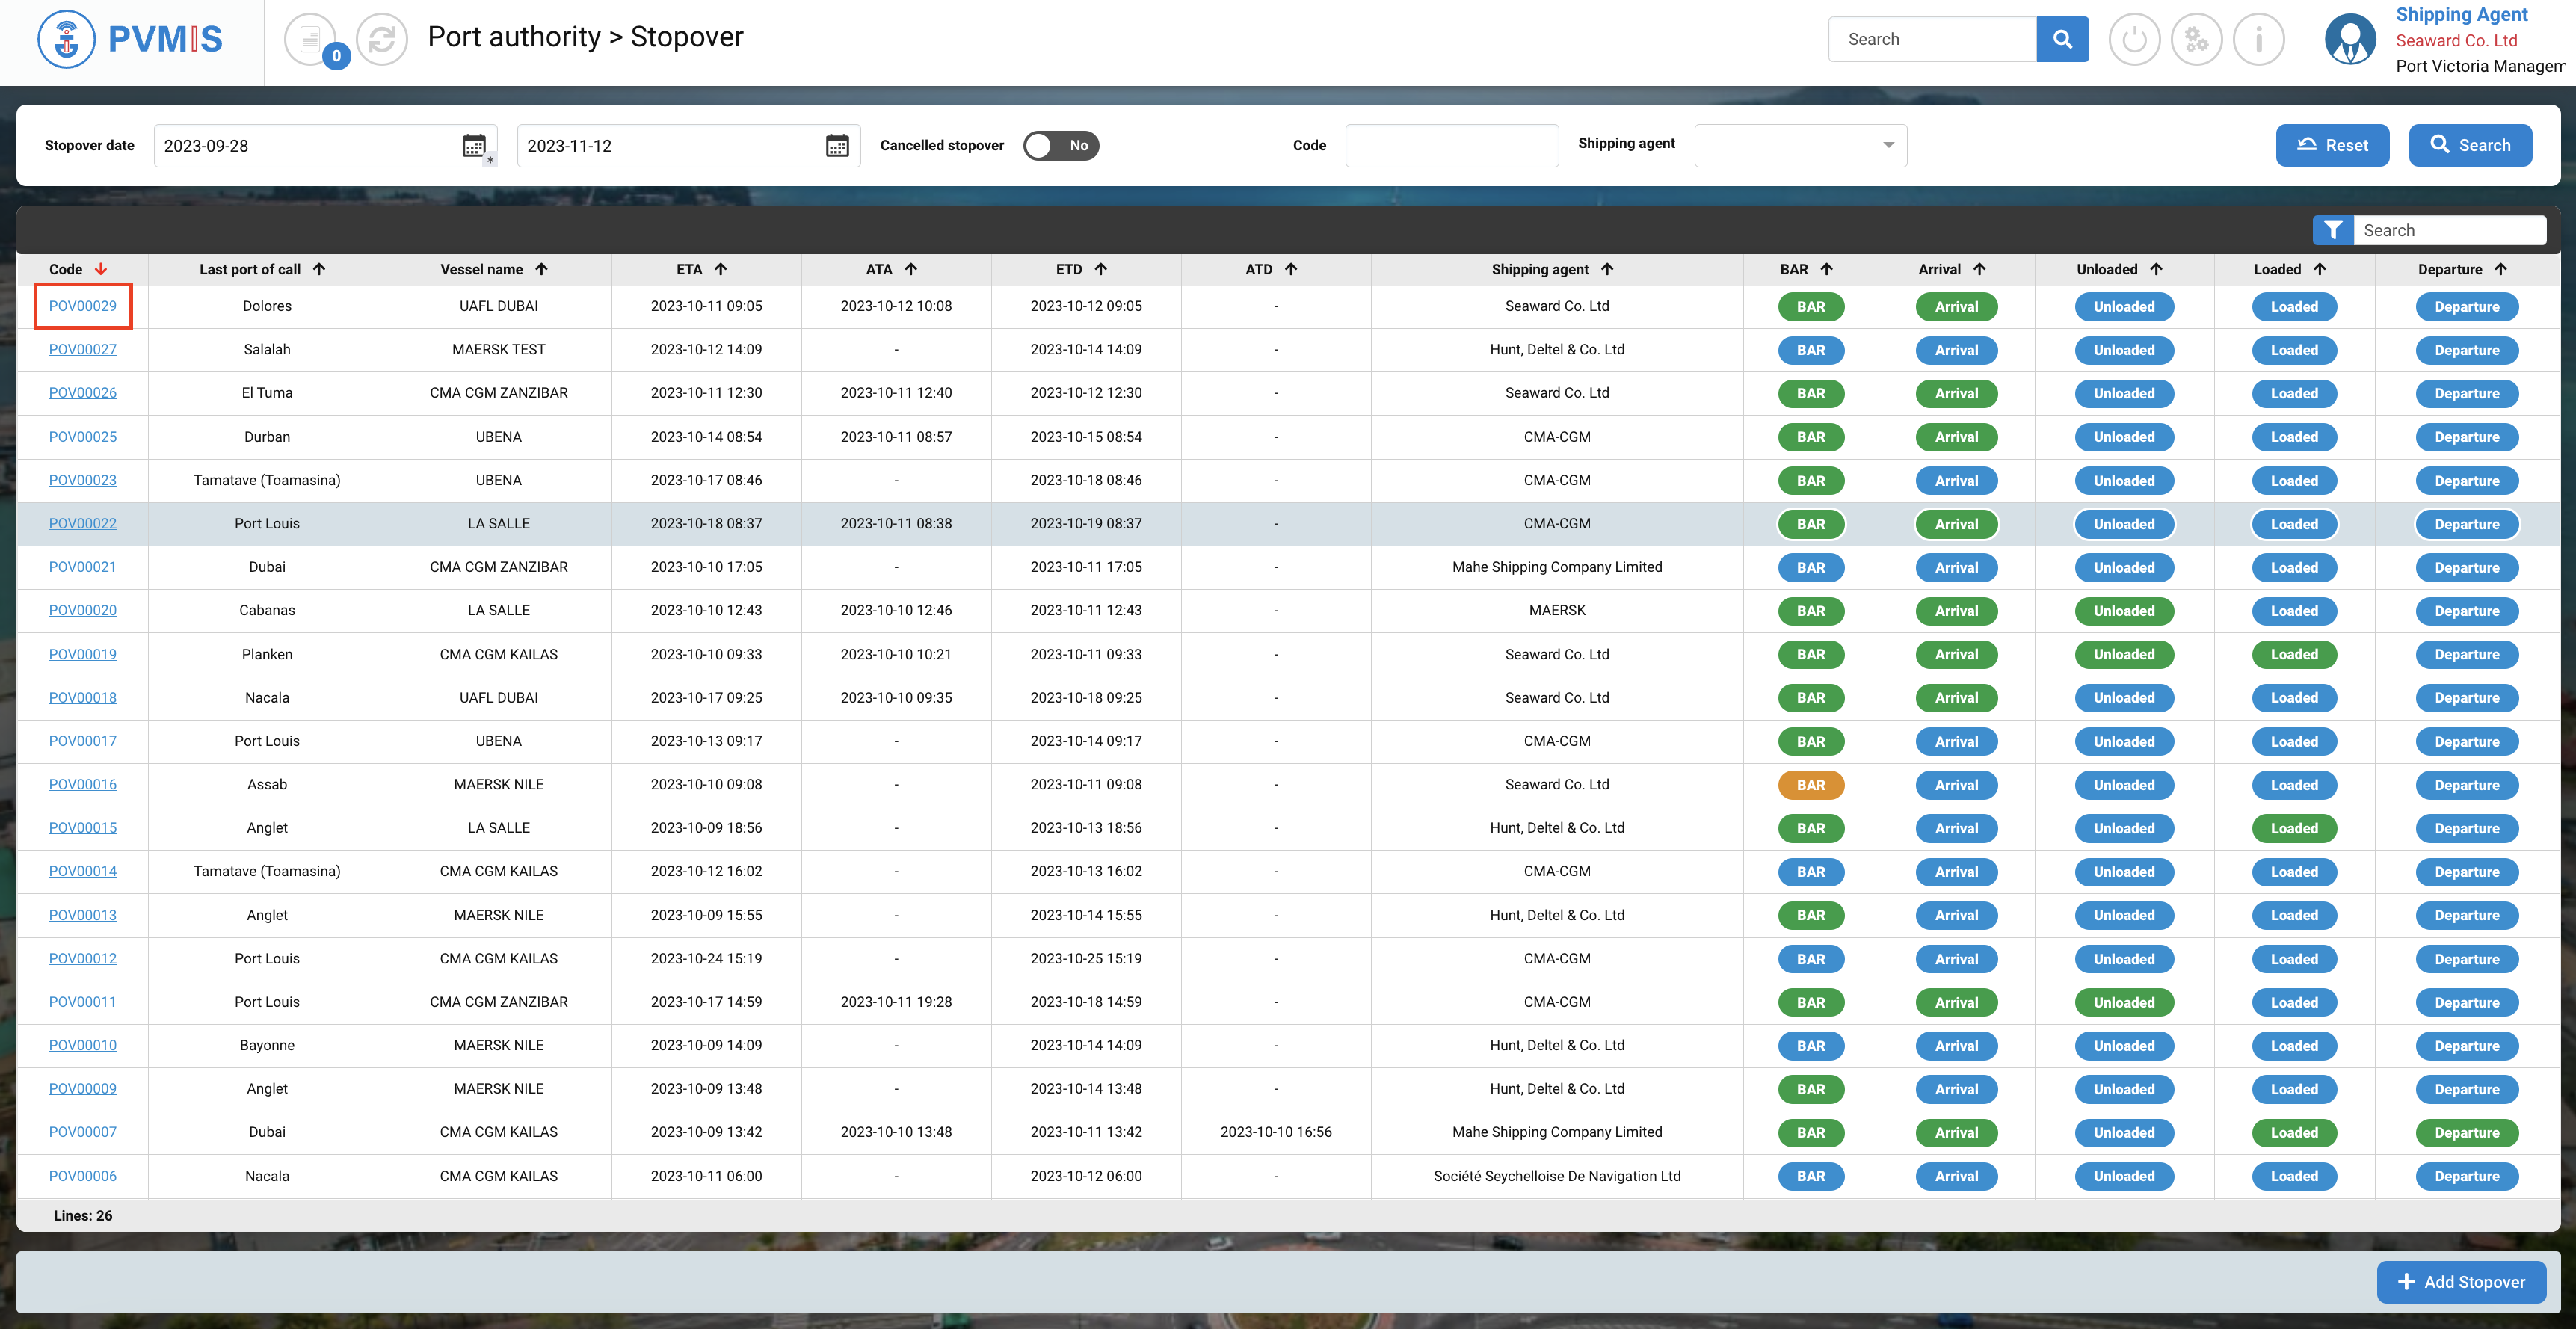
You can consult information about the stopover. Click on Create Manifest (Import).
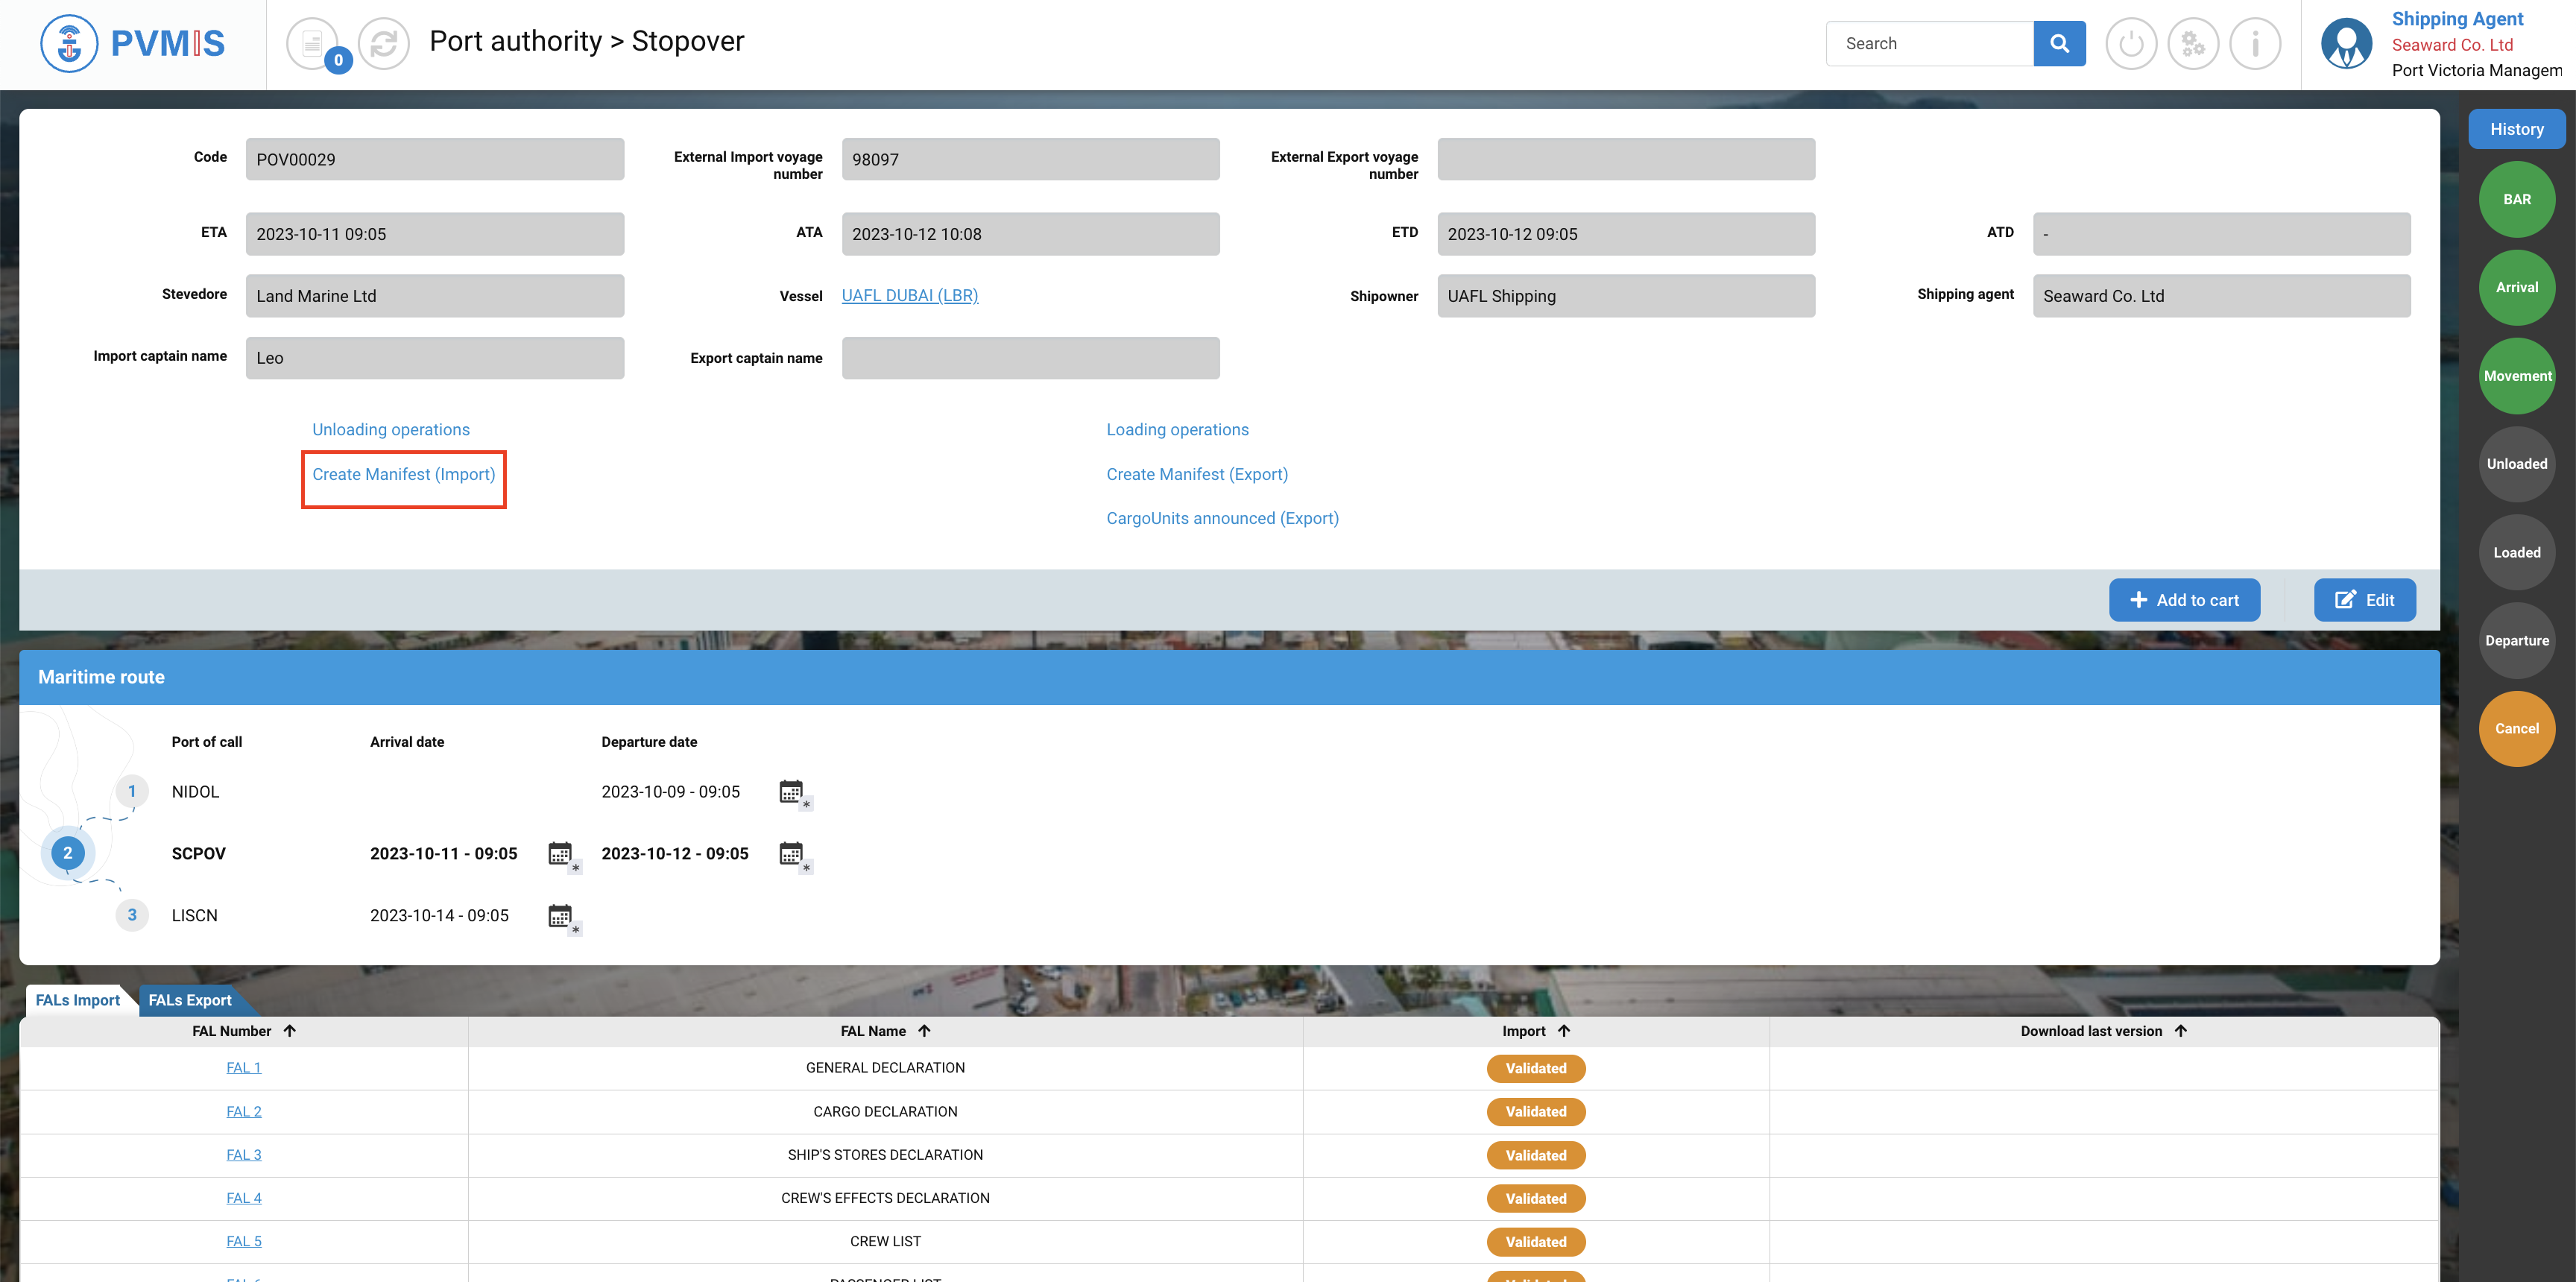
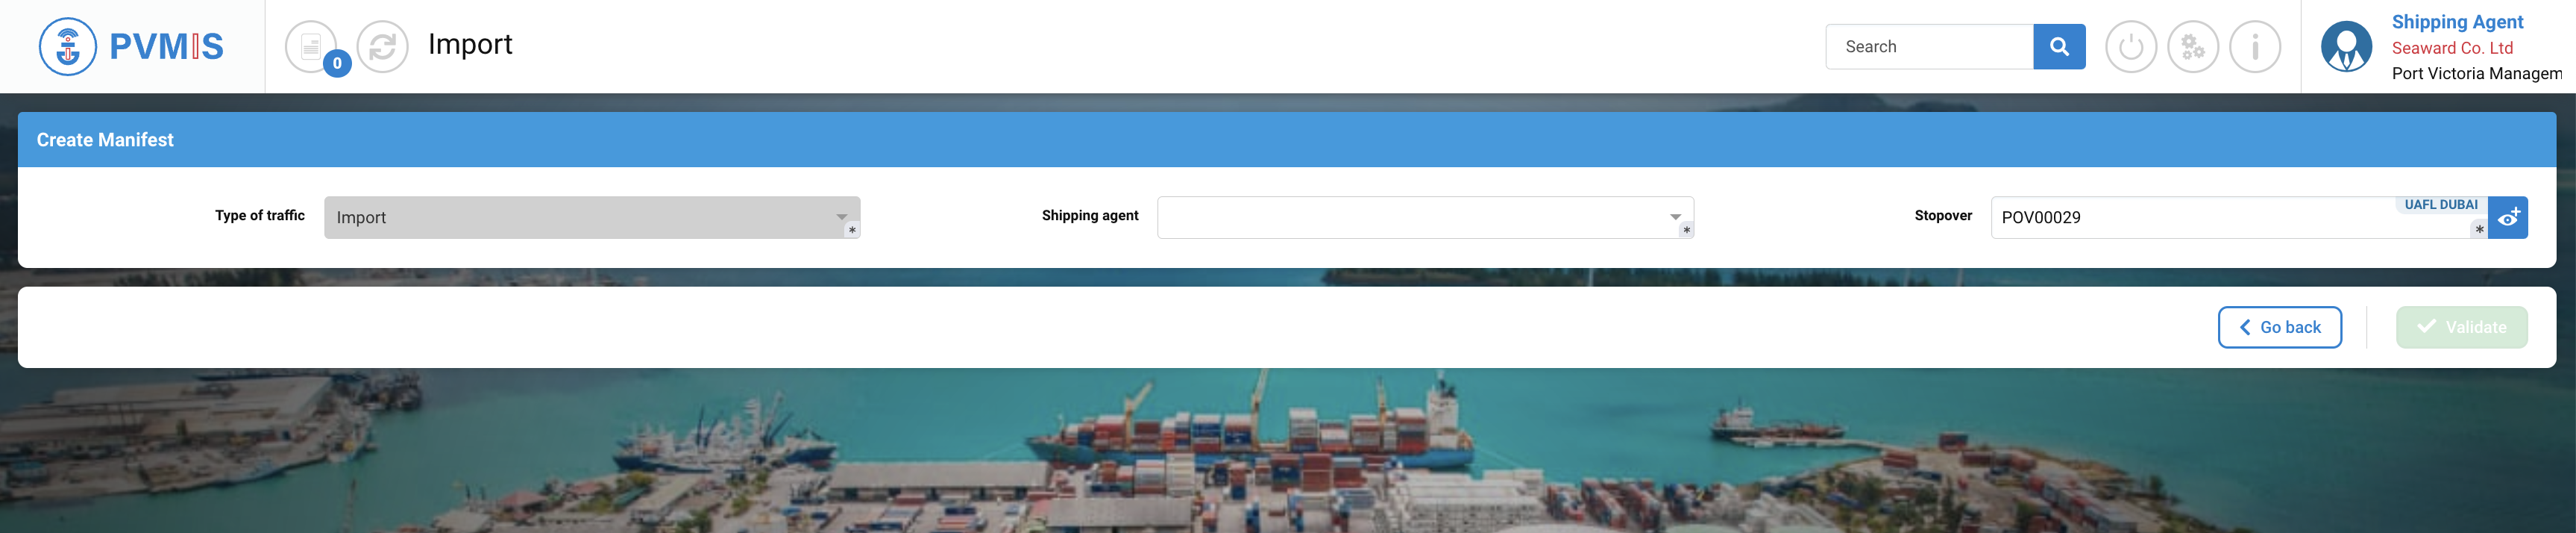
After clicking on Create Manifest (Import), you will be redirected to the Create Manifest form, and the Stopover field will be automatically filled in.
2 - By Unloading Menu
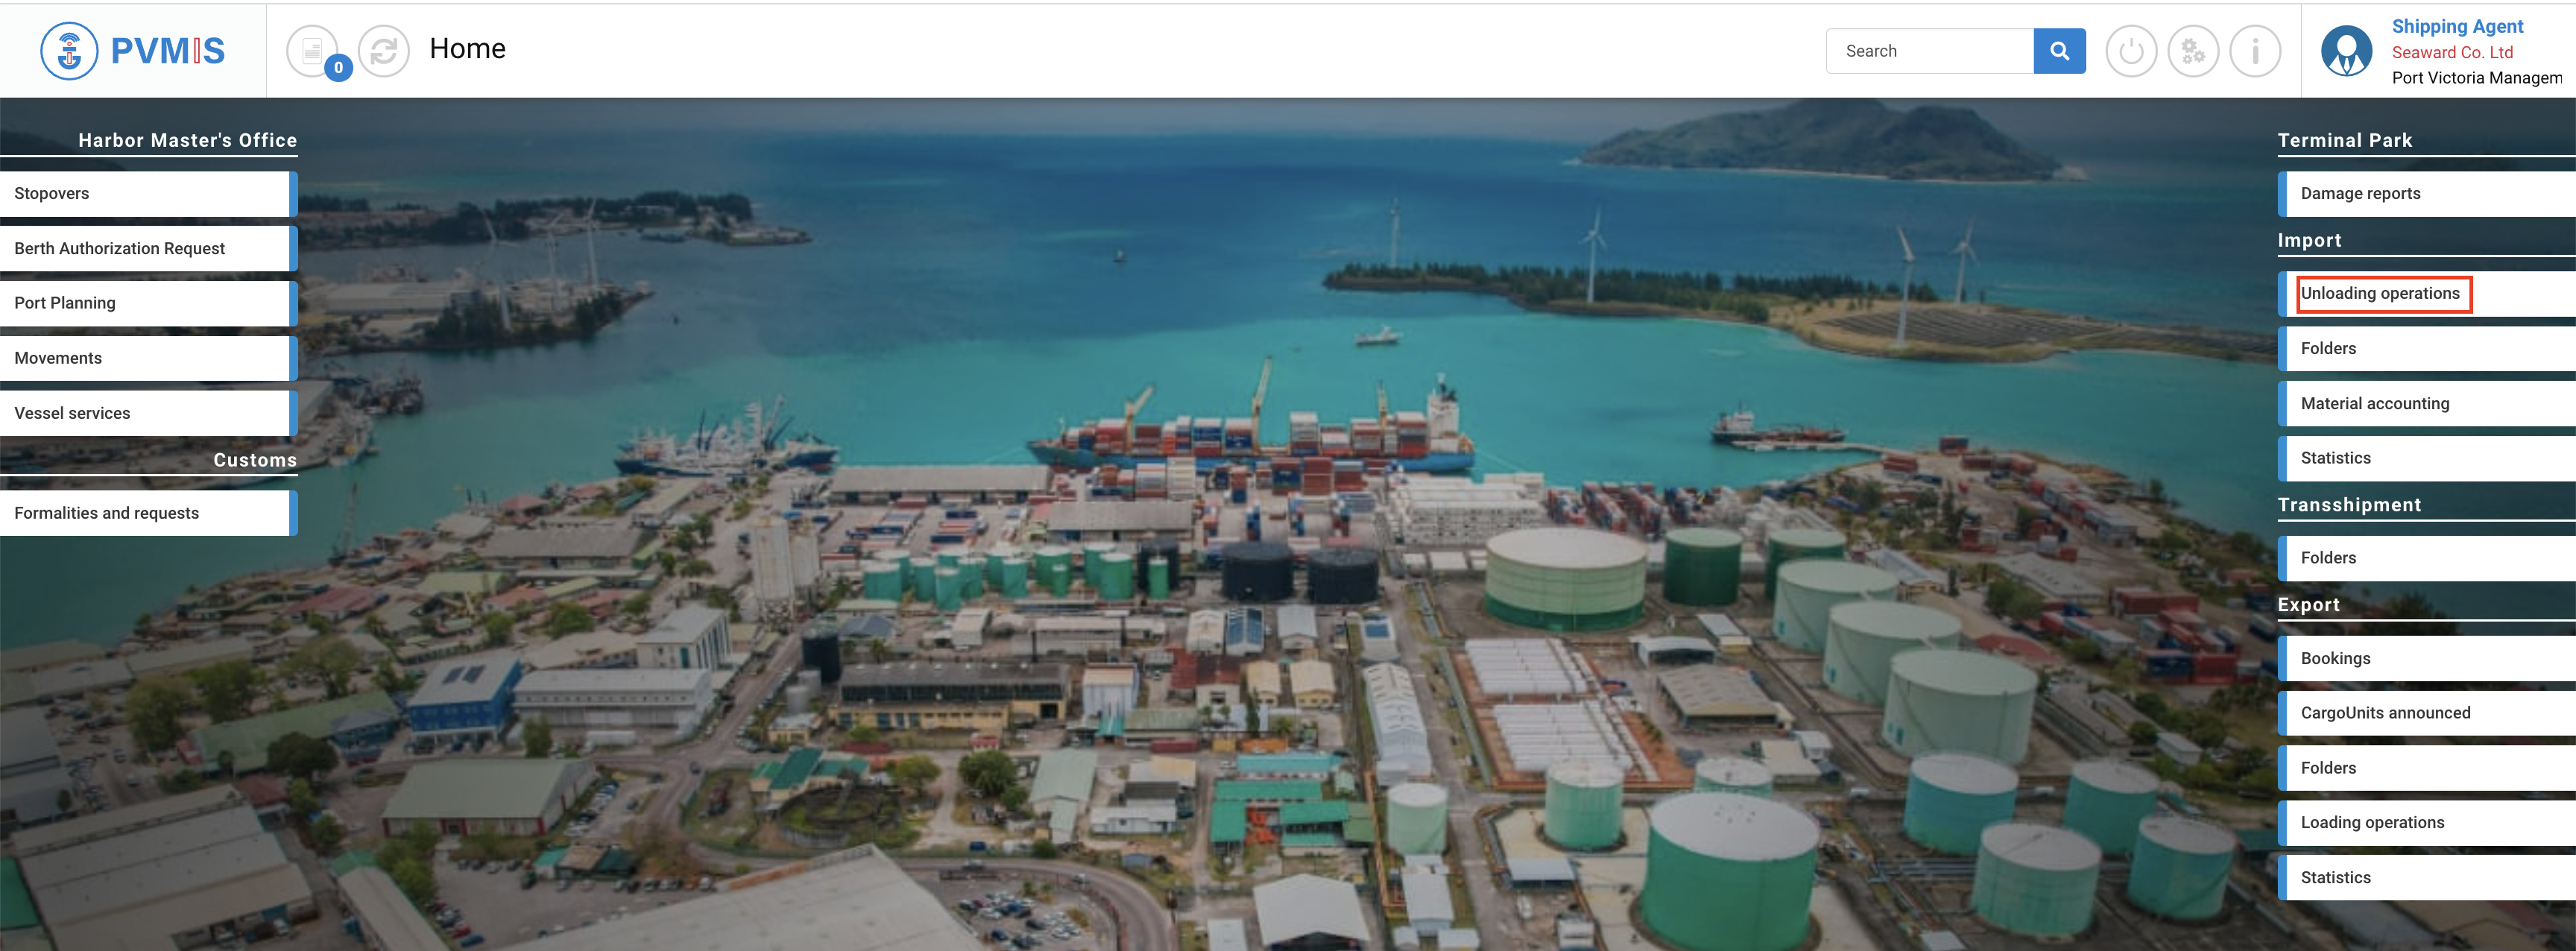
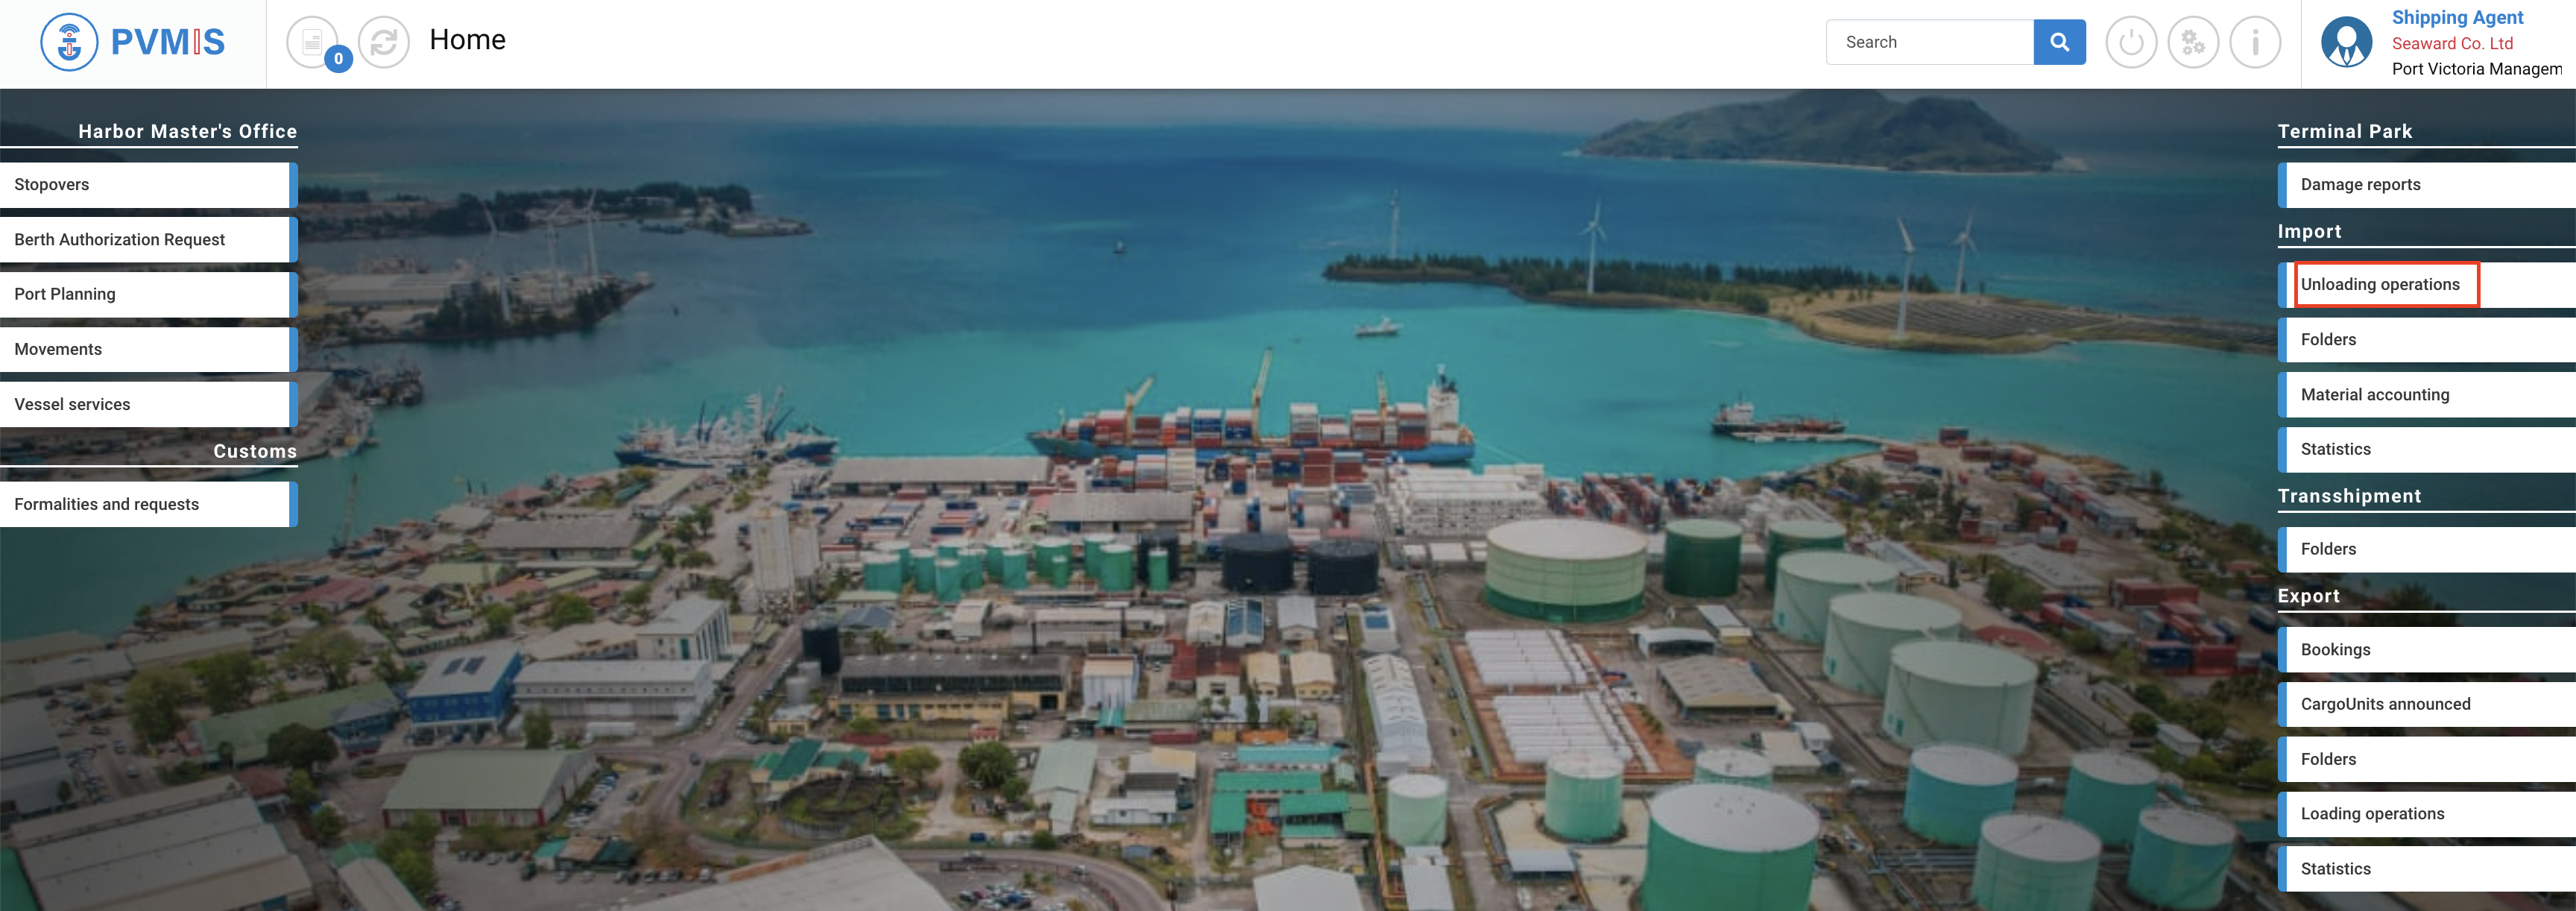
The second way to access to the create manifest form : Click on the “Unloading operations” menu in the Import section:
A list of all stopovers corresponding to the date range is displayed. Click on + Create Manifest.
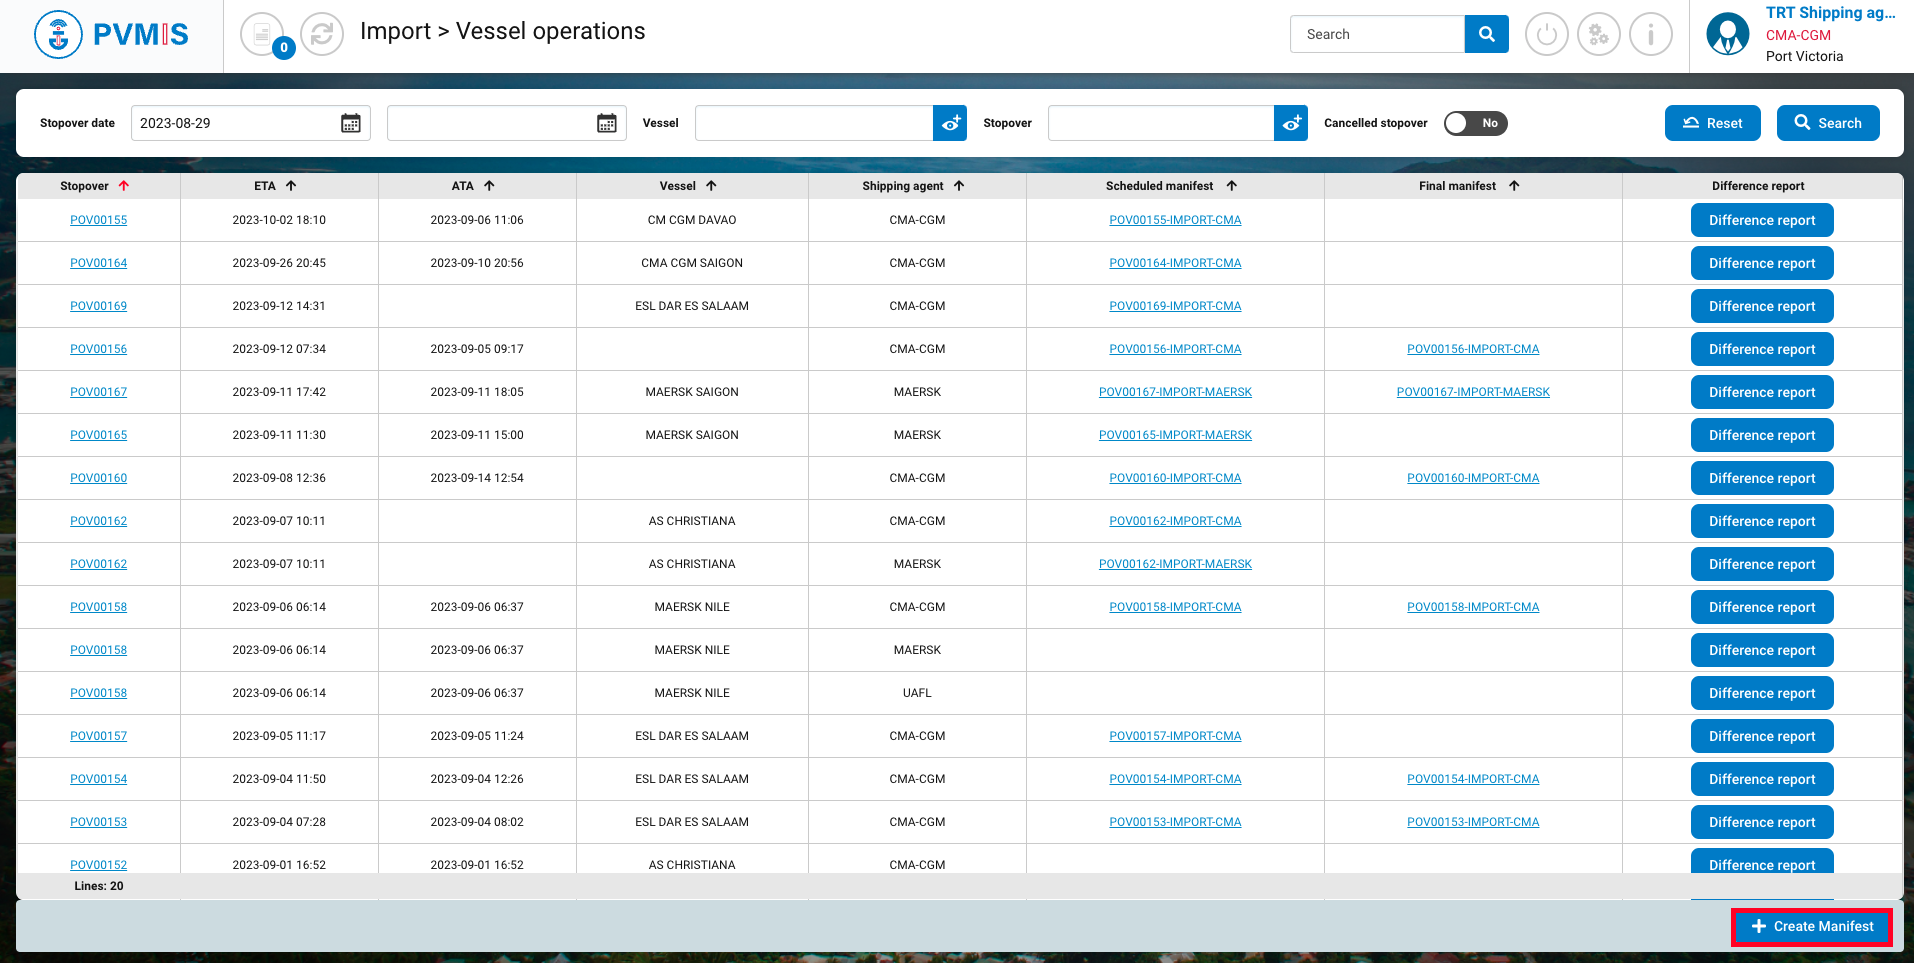
You will be redirected to the Create Manifest form, where you will be required to input the Stopover Code manually.

Create scheduled manifest
When you are in the Create Manifest form, you must select the shipping agent. then click on Validate.

After validation, your scheduled manifest is created, and you will have to create the Bill of Ladings.
The scheduled manifest is created empty, it now needs to be filled-up.
Declare Bill of Landing (BLs)
Add BL (full)
On the detail page of you manifest, click on + Add BL (full).
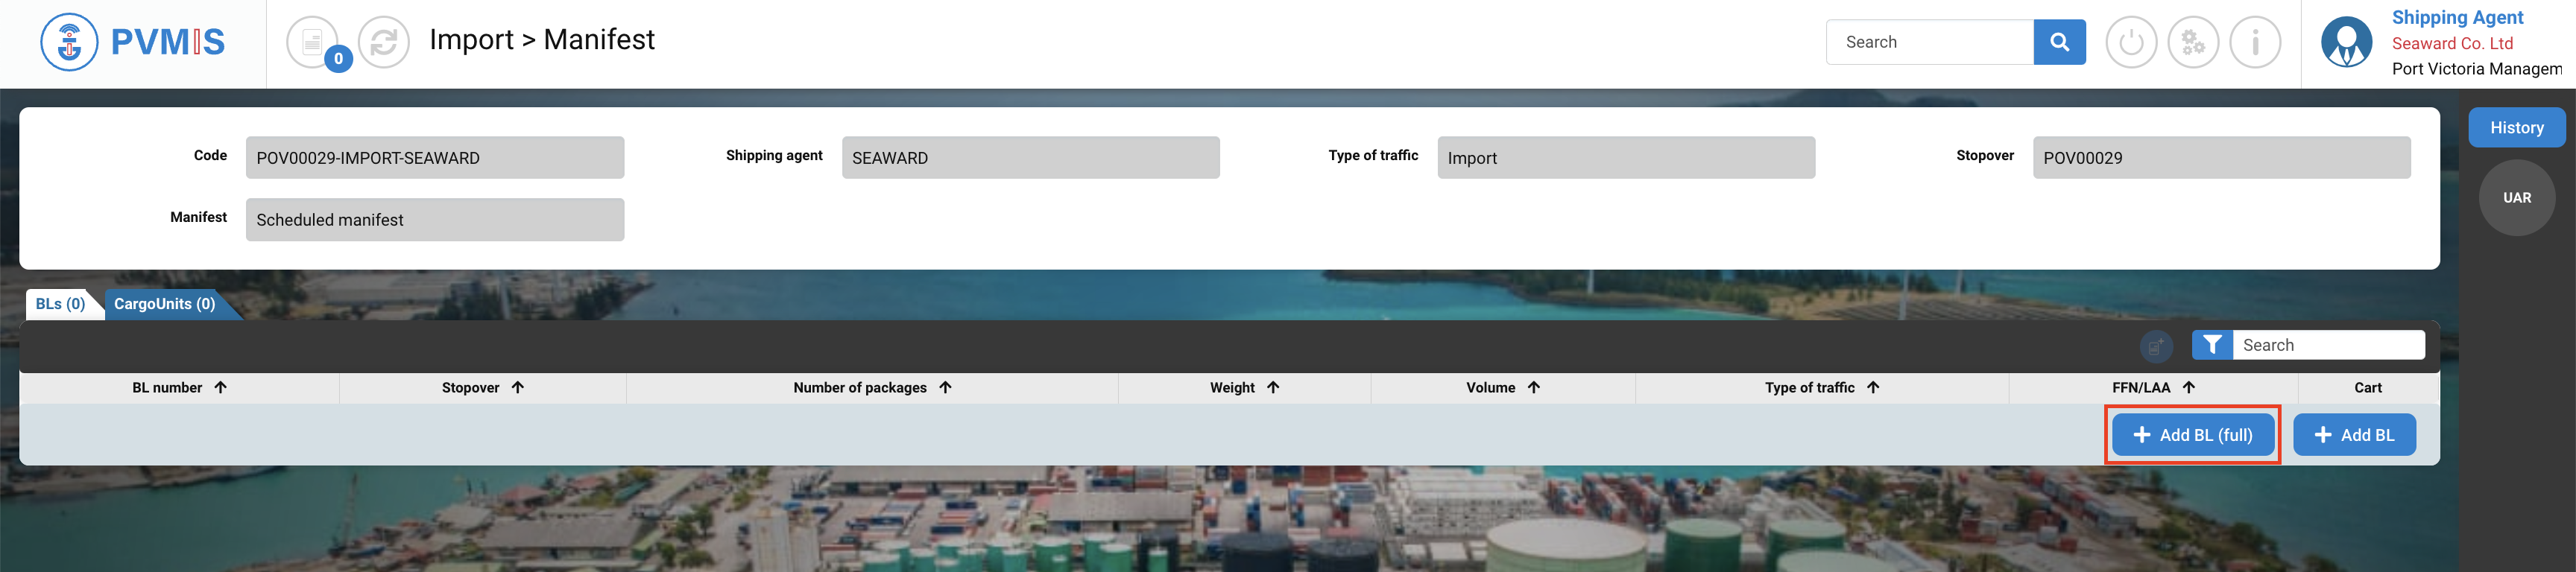
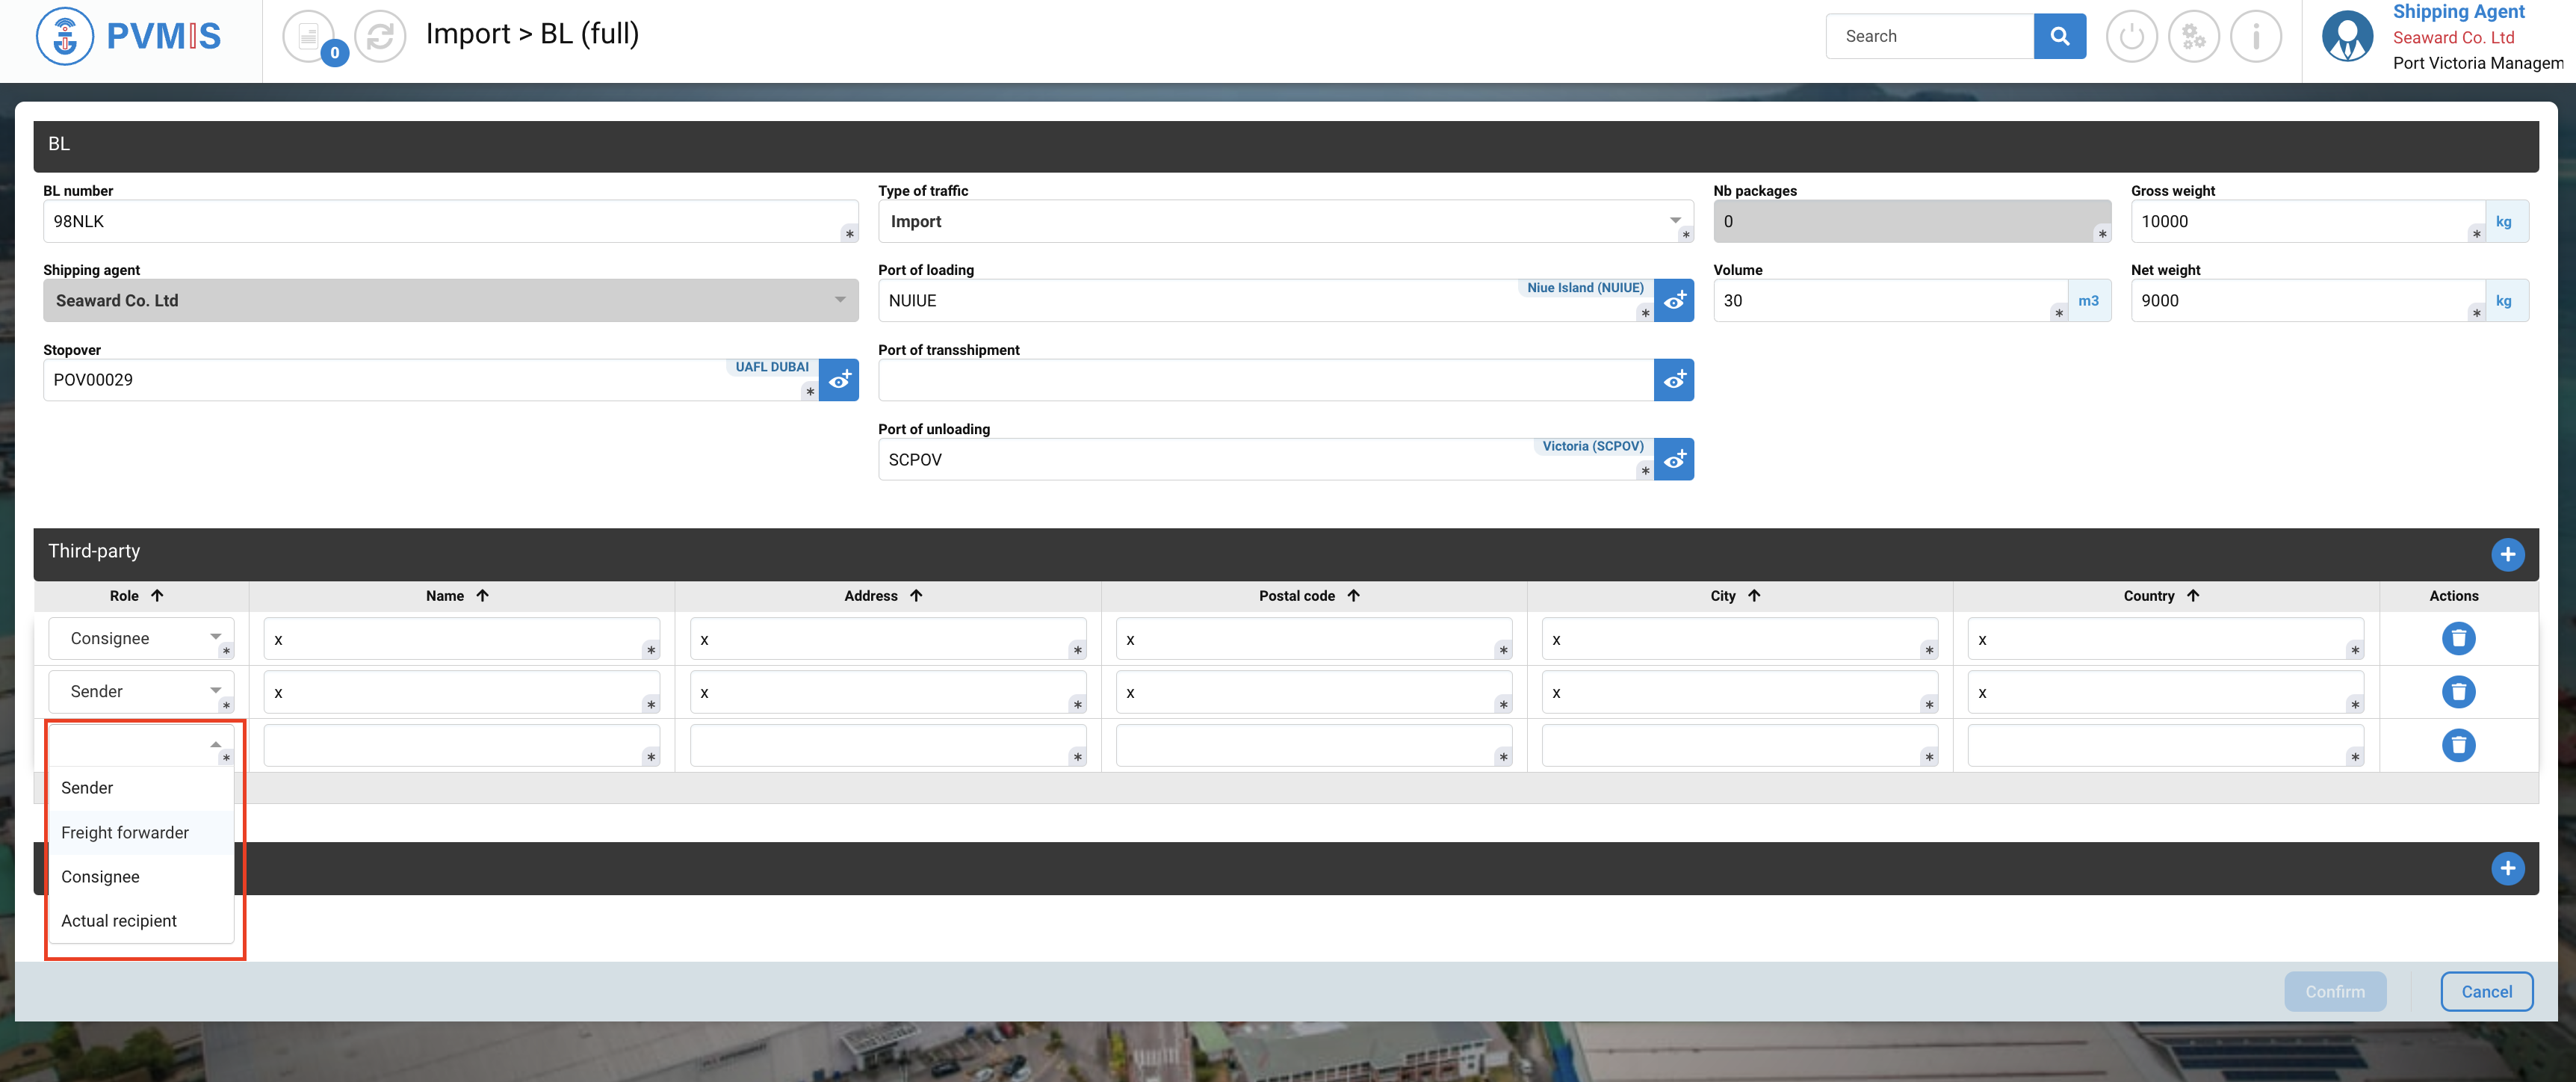
You are on the BL (full) form is divided in three section :
-
BL form
-
Designation of Third Party
-
BL items form
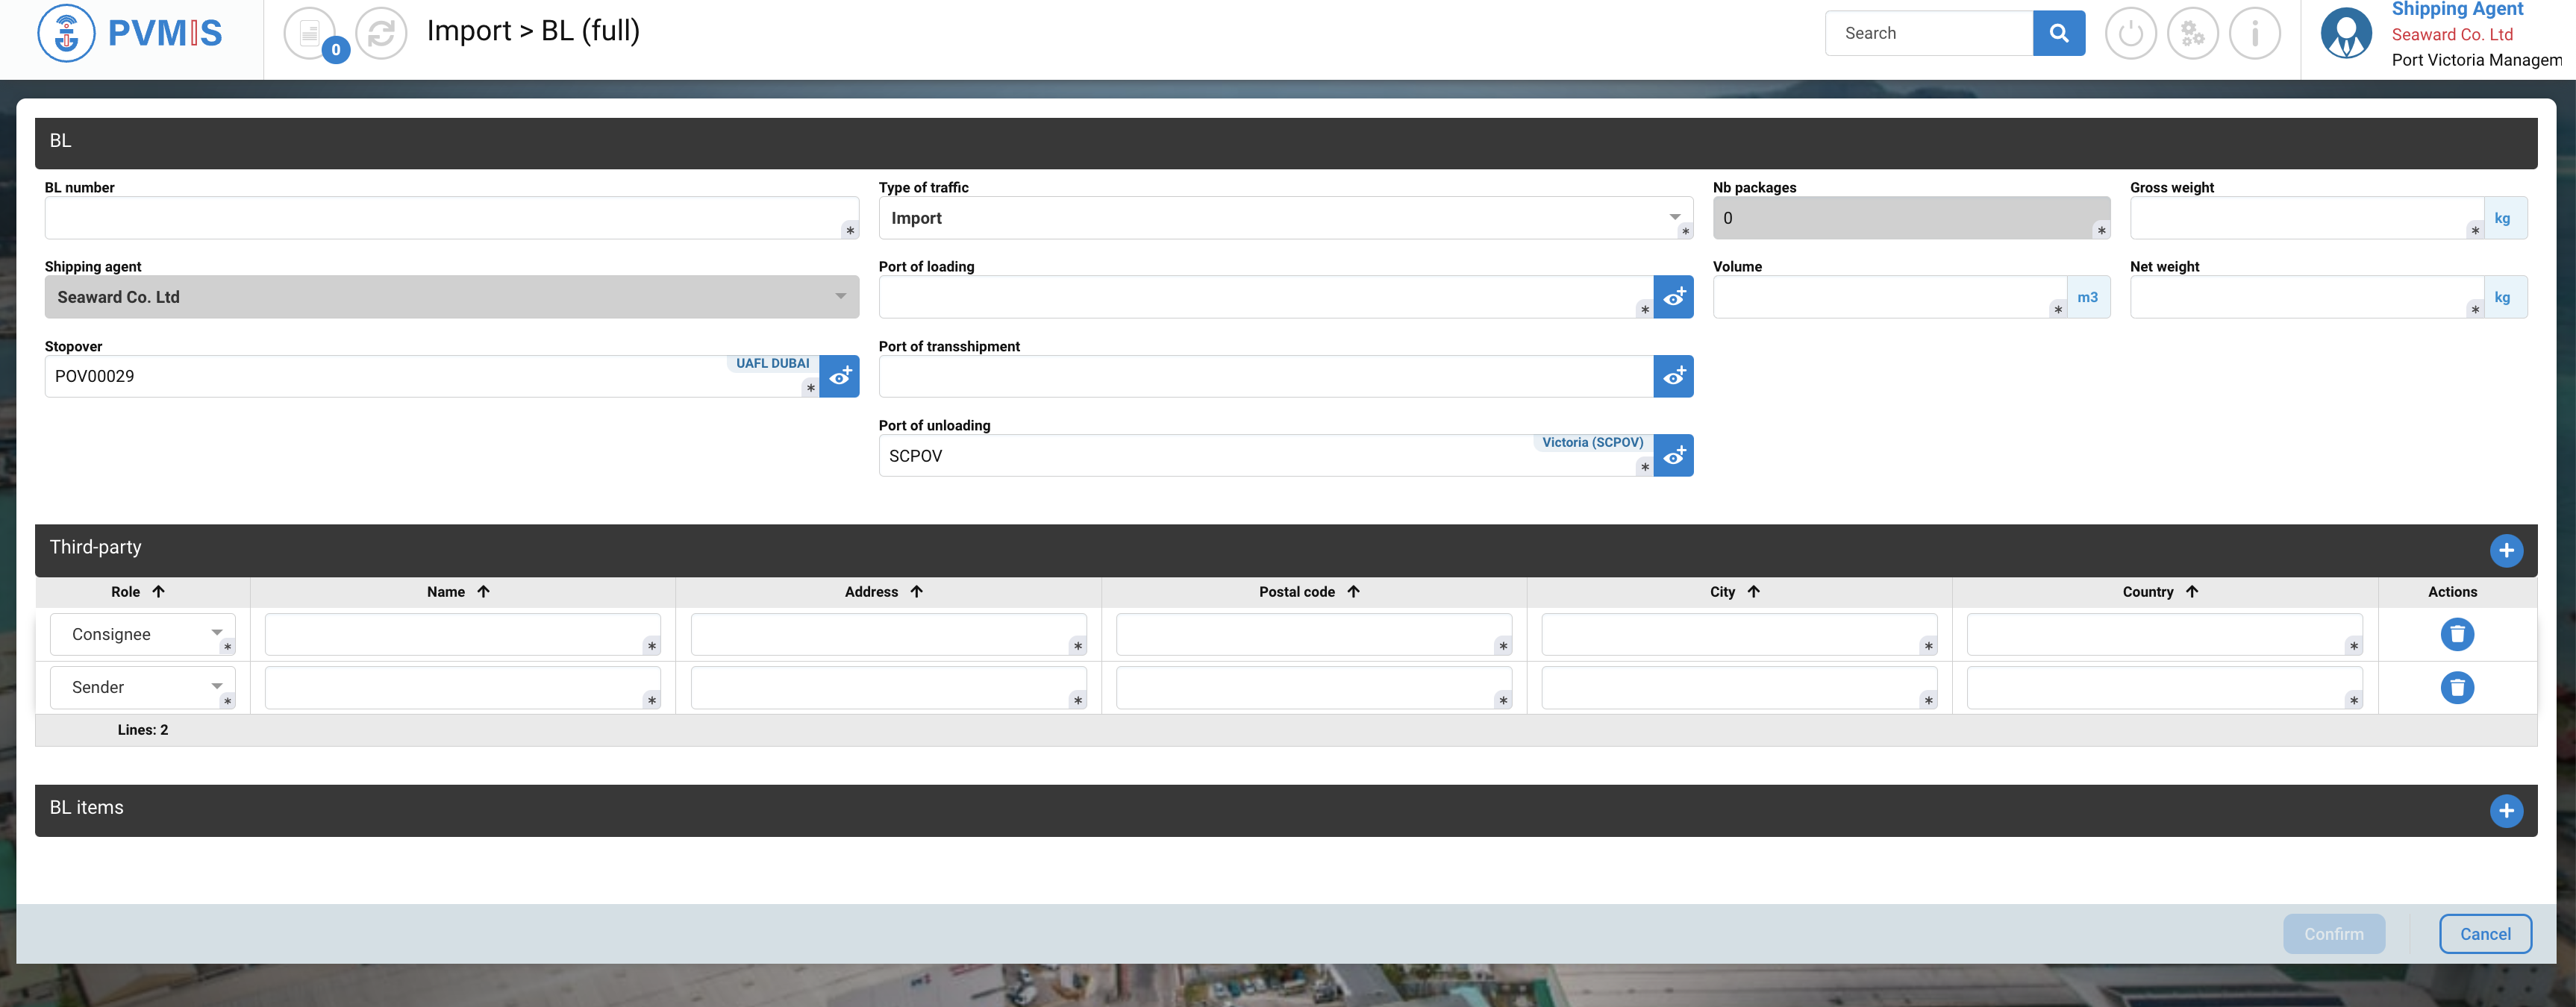
For the BL form you need to enter these fields :
|
Fields |
Description |
|---|---|
|
BL number* |
Corresponds to the code number of the BL. |
|
Type of traffic* |
Pre-filled by Import, but you have the option to choose Export or Transshipment as well, depending on the specific process. |
|
Nb packages* |
Disabled field, it will be completed after the creation of BL items. |
|
Gross weight (kg)* |
Total weight of the BL, calculated as the sum of Net weight and Tare. |
|
Shipping agent |
Pre-filed with the shipping agent information that was entered during the creation of the scheduled manifest. |
|
Port of loading* |
Port of loading of goods of this BL |
|
Volume (m3)* |
Volume of the BL container. |
|
Net weight (kg)* |
The weight of the goods contained within the container. |
|
Stopover* |
Pre-filled with the stopover code that was associated with the manifest. |
|
Port of transshipment |
This refers to the port through which the goods will pass or transit on their way to another port. |
|
Port of unloading* |
Pre-filled by SCPOV, in the Import process, Victoria port is the port of unloading. |
The Gross weight and Net must be consistent. If the total Net weight of the BL is not also the sum of the net weights of each CargoUnit present in the Bill of lading, an error message will appear.
The Gross weight is the total weight of the container, calculated as the sum of Net Weight and Tare.
For the Third -party, you must complete all information about the Sender and the Consignee.

In optional, you can add a freight forwarder and actual recipient.
You can delete a third-party line by the icon trash.
For the BL items, click on +.
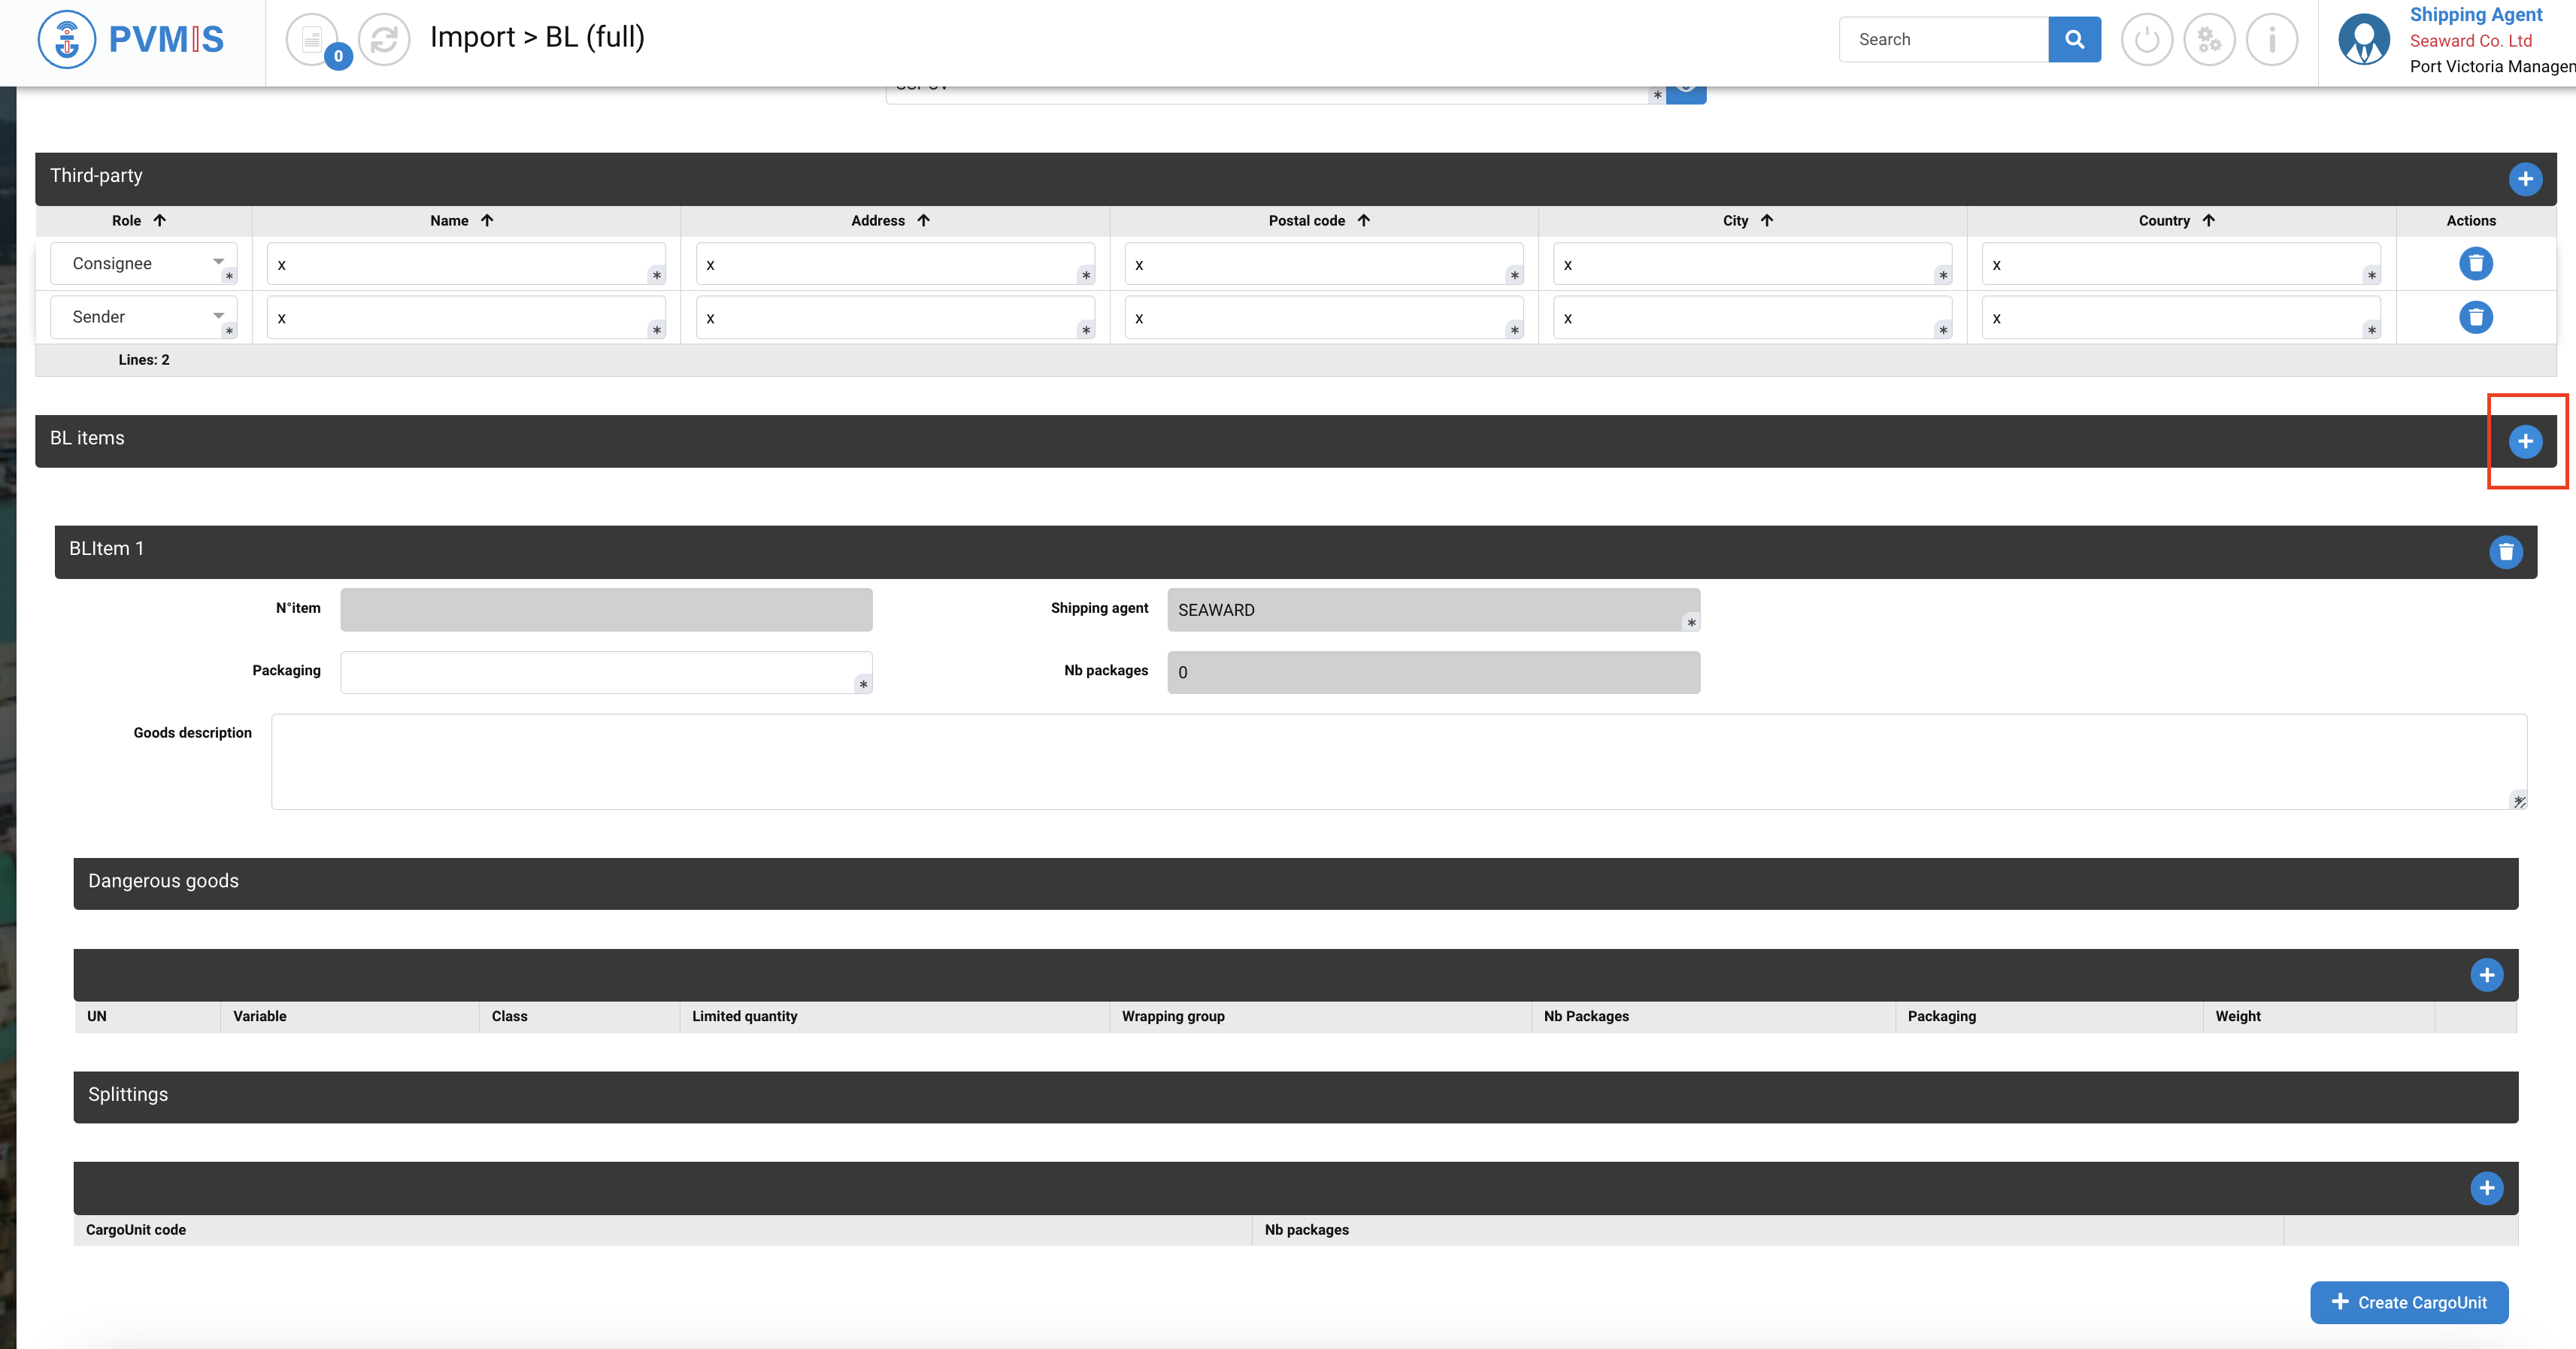
Create a BL item
A Bill of Lading item or BL item represents a link between a Bill of Lading and a cargo unit. It is a goods line.
The BL item form is divided different section.
-
General BL Item information
-
Dangerous goods (optional)
-
Splitting
List of fields of BL item form:
|
Fields |
Description |
|---|---|
|
N° item |
Disabled field, will be complete after the validation BL. |
|
Shipping agent |
Disabled and pre-filed by the shipping agent which was entered during the creation of the scheduled manifest. |
|
Packaging* |
Type of package. |
|
Nb packages |
Disabled field, will be complete after having informed the CargoUnit. |
|
Goods description* |
Description of type of goods for example. |
You can delete the BL item using the trash icon.

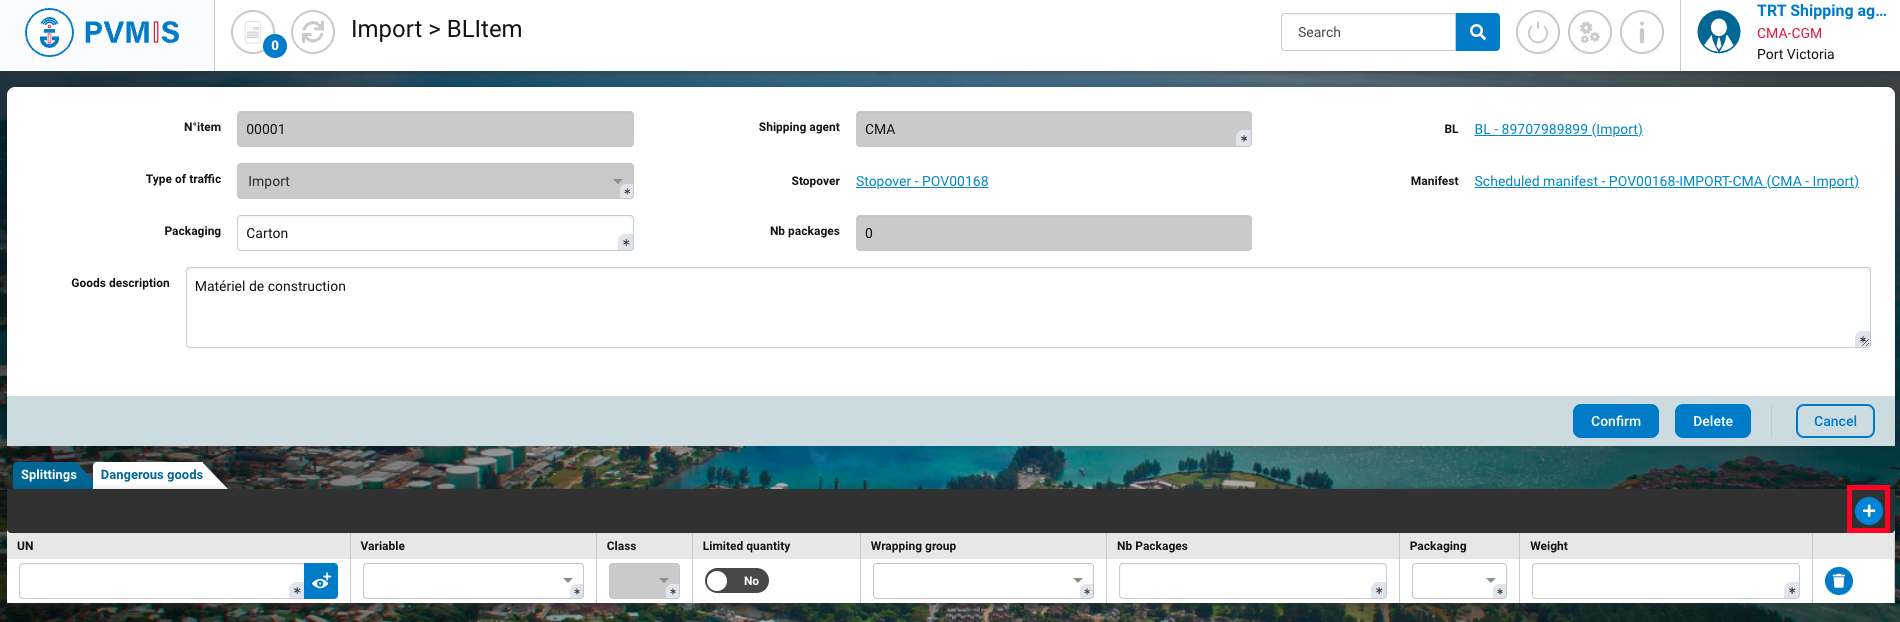
Declare dagerous goods (optional):
Click on + to add a dangerous good.

List of fields to declare dangerous goods:
|
Fields |
Description |
|---|---|
|
UN* |
This is the product identifier dangerous. |
|
Variable* |
Select A, B, C, D, E or F. |
|
Class* |
Disabled and pre-filed in condition of the selection of UN field. |
|
Limited quantity |
Switch of “No” by default. |
|
Wrapping group* |
Select I, II or III. |
|
Nb Packages* |
Number of packages of dangerous goods. |
|
Packaging* |
Type of package. |
|
Weight (kg)* |
Weight of the dangerous goods. |
You can delete a ligne by the icon trash.
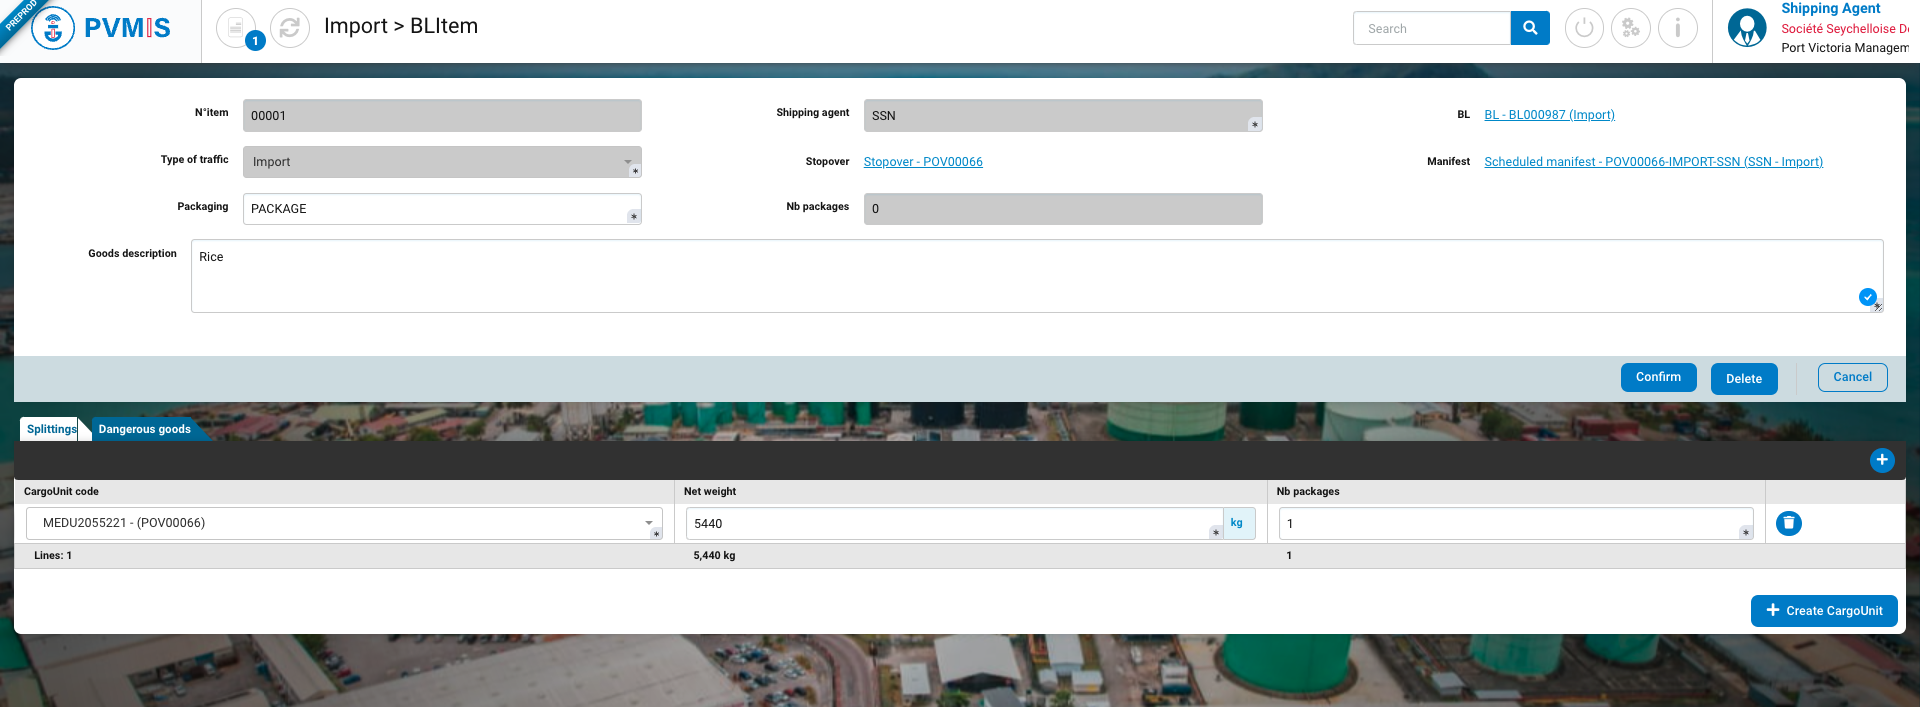
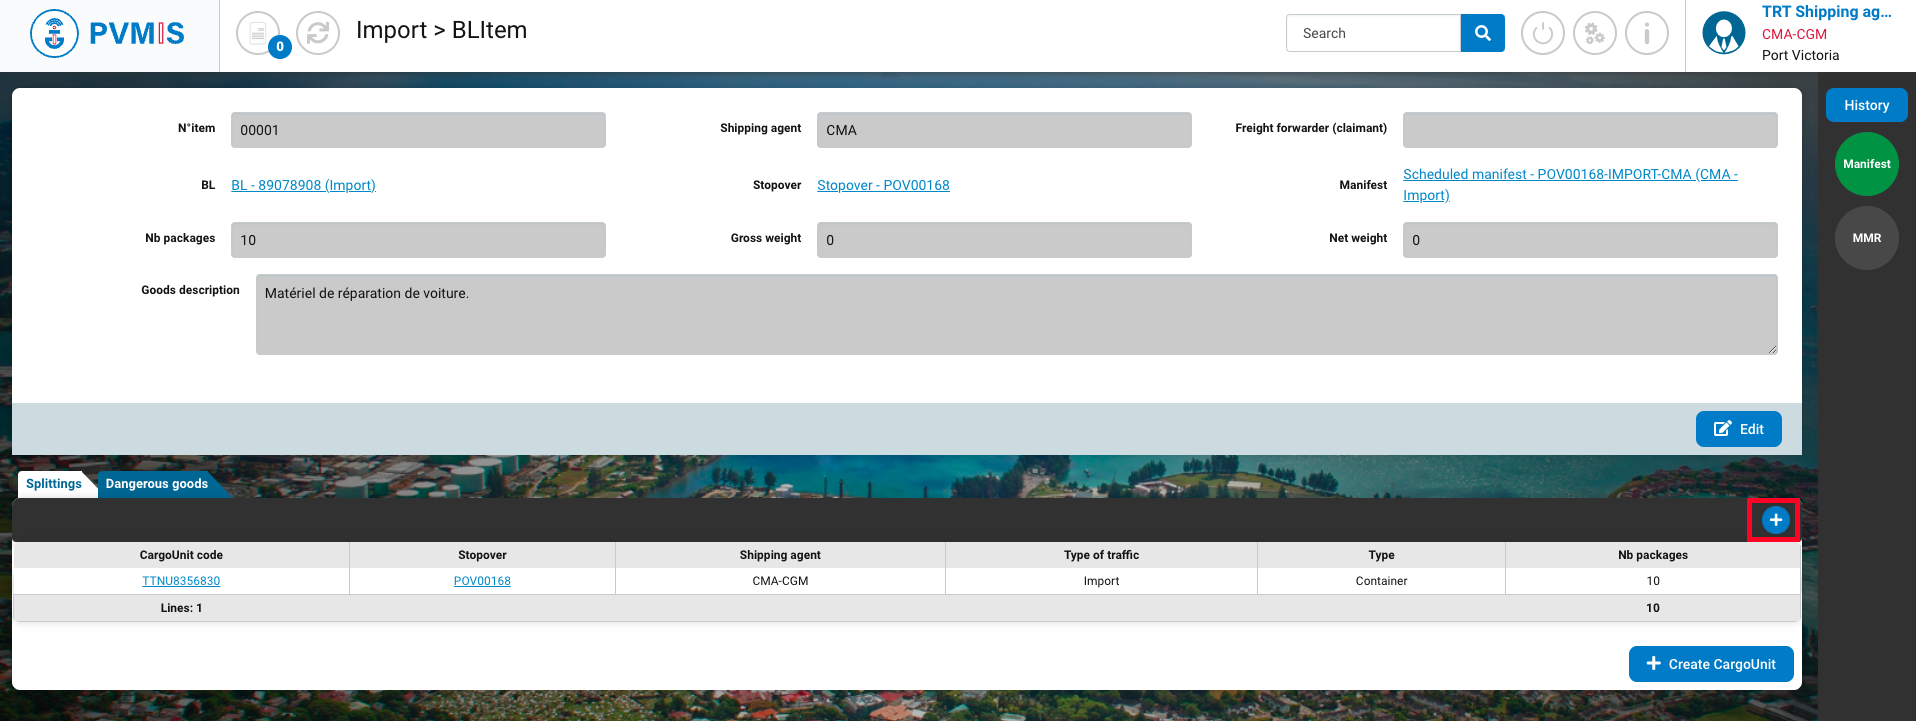
Splittings : create a cargo unit
Please specify the cargo unit concerning the goods line in the 'Splittings' section. It is on this cargo unit and BL (Bill of Lading) item link where we will record the number of packages.
Click on + CreateUnit.

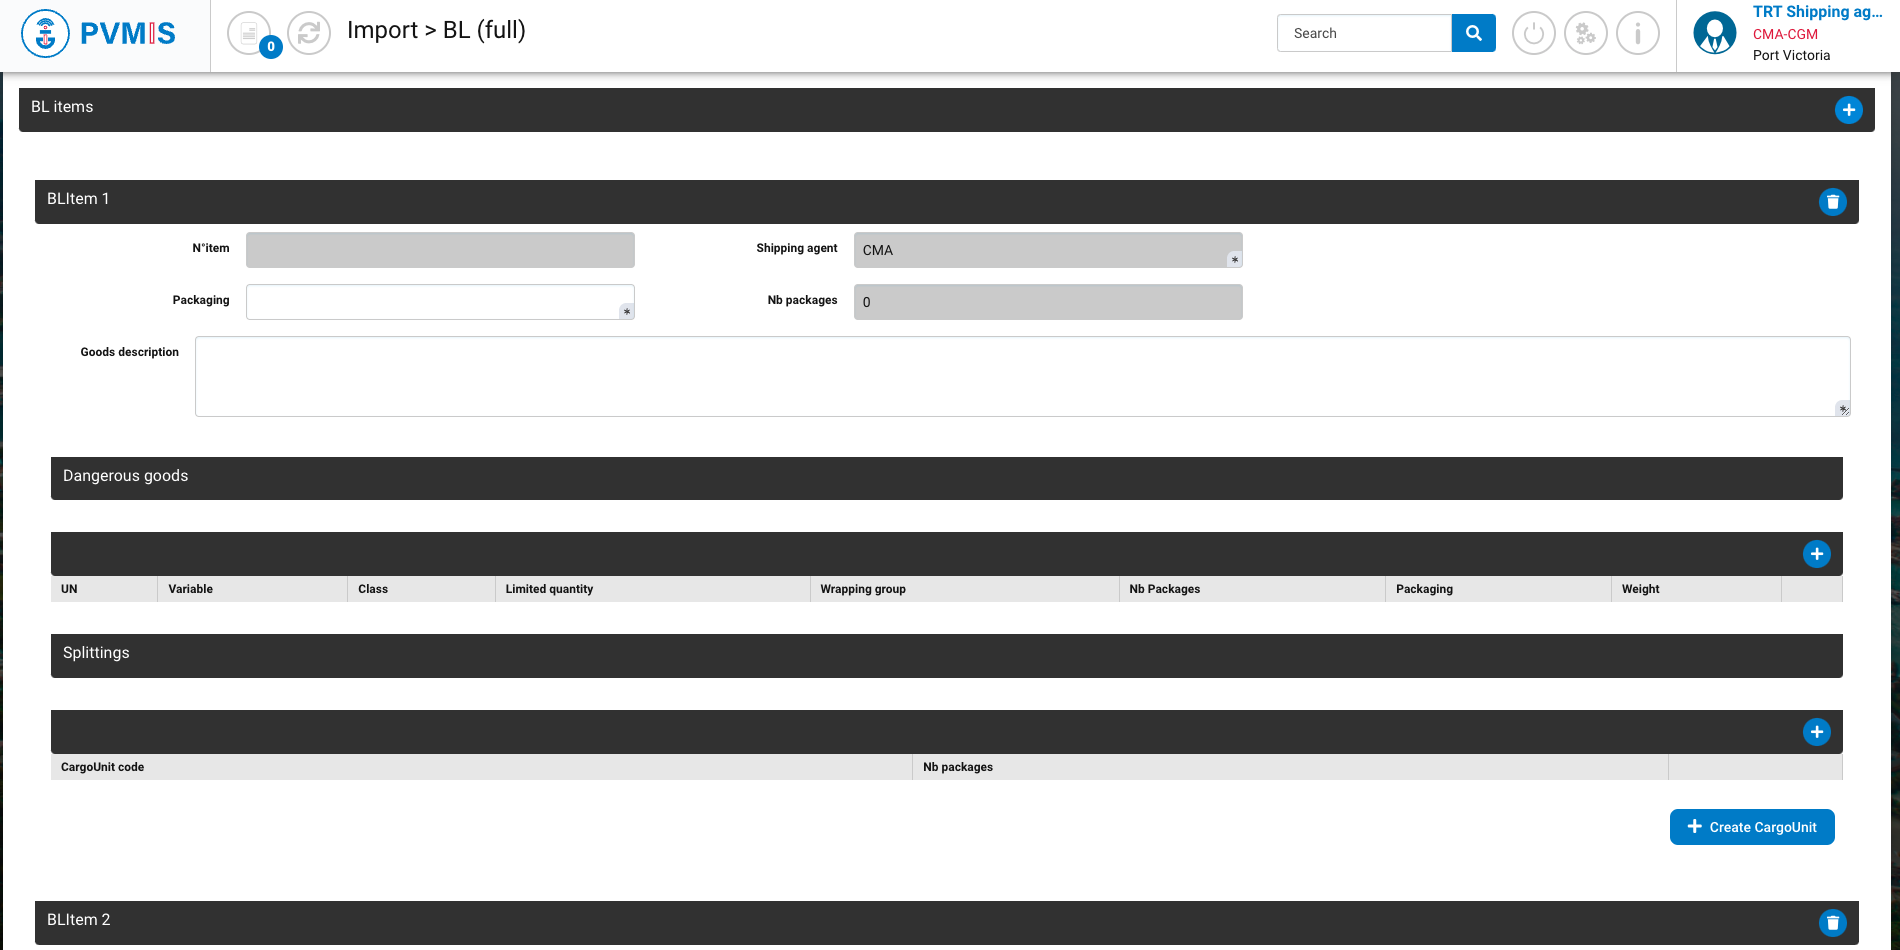
The new CargoUnit is now available, and it is necessary to provide the required information:
|
Fields |
Description |
|---|---|
|
CargoUnit code* |
Cargo number. |
|
Type of traffic* |
Disabled and pre-filed by Import. |
|
Type* |
Type of cargo (Container, Conventional, Vehicle, Bulk). If you select Container, ISO mandatory field will appear. |
|
Stopover |
This is the link of the corresponding stopover. |
|
Nb packages |
Disabled field, will be completed after validation. |
|
Volume (m3) |
Volume of the cargo. Pre-filed by the informations of BL. |
|
Tare (kg) |
Empty container weight, typically around 3750kg for a 40' container. |
|
Shipping Agent |
The field is disabled and already pre-filled with the shipping agent information that was provided during the creation of the scheduled manifest |
|
Sealed |
Sealed cargo number. It’s a multiple fiel, enter the number and select it or push on entter touch. |
|
ISO* |
Conditional display if Container Type is selected. |
|
Empty |
Switch off “No” by default. |
Complete the form:

Cargo Unit types
-
Container
→ Gross Weight = Net Weight + Tare
Considering both Net Weight and Tare is essential to calculate the Gross Weight for containers.
-
Vehicle
→ Gross Weight = Net Weight
Since vehicles are typically not packaged, there is no additional structure around them, and therefore, no tare. The quantity is always 1 to represent a single vehicle.
-
Bulk Cargo
→ Gross Weigh = Net Weight
The emphasis here is on the weight, not the quantity. For example, receiving a bulk cargo unit representing 1000 tons of fuel or 1000 tons of grain; the focus is on the weight, and we don't count the individual grains in each cereal.
-
Conventional Cargo
→ Gross Weight = Net Weight
In contrast to bulk cargo, the focus is on quantity. For instance, if the cargo consists of 2 wind turbines, the crucial aspect is the quantity, not necessarily the weight. This distinction is crucial, especially when declaring to customs, as indicating a different quantity may lead to significant issues (2 wind turbines vs 1 wind turbine).
After to complete, click on Confirm button:
Once you have created your cargo unit, the allocation is automatically set to “1” if the Type is bulk. You can then adjust the number of packages as needed and the Net weight of the CargoUnit.

The Net weight per CargoUnit is multiplied by the number of packages allocated, the product of this operation will be added to the sum of the total Net Weight of the Bill of lading.
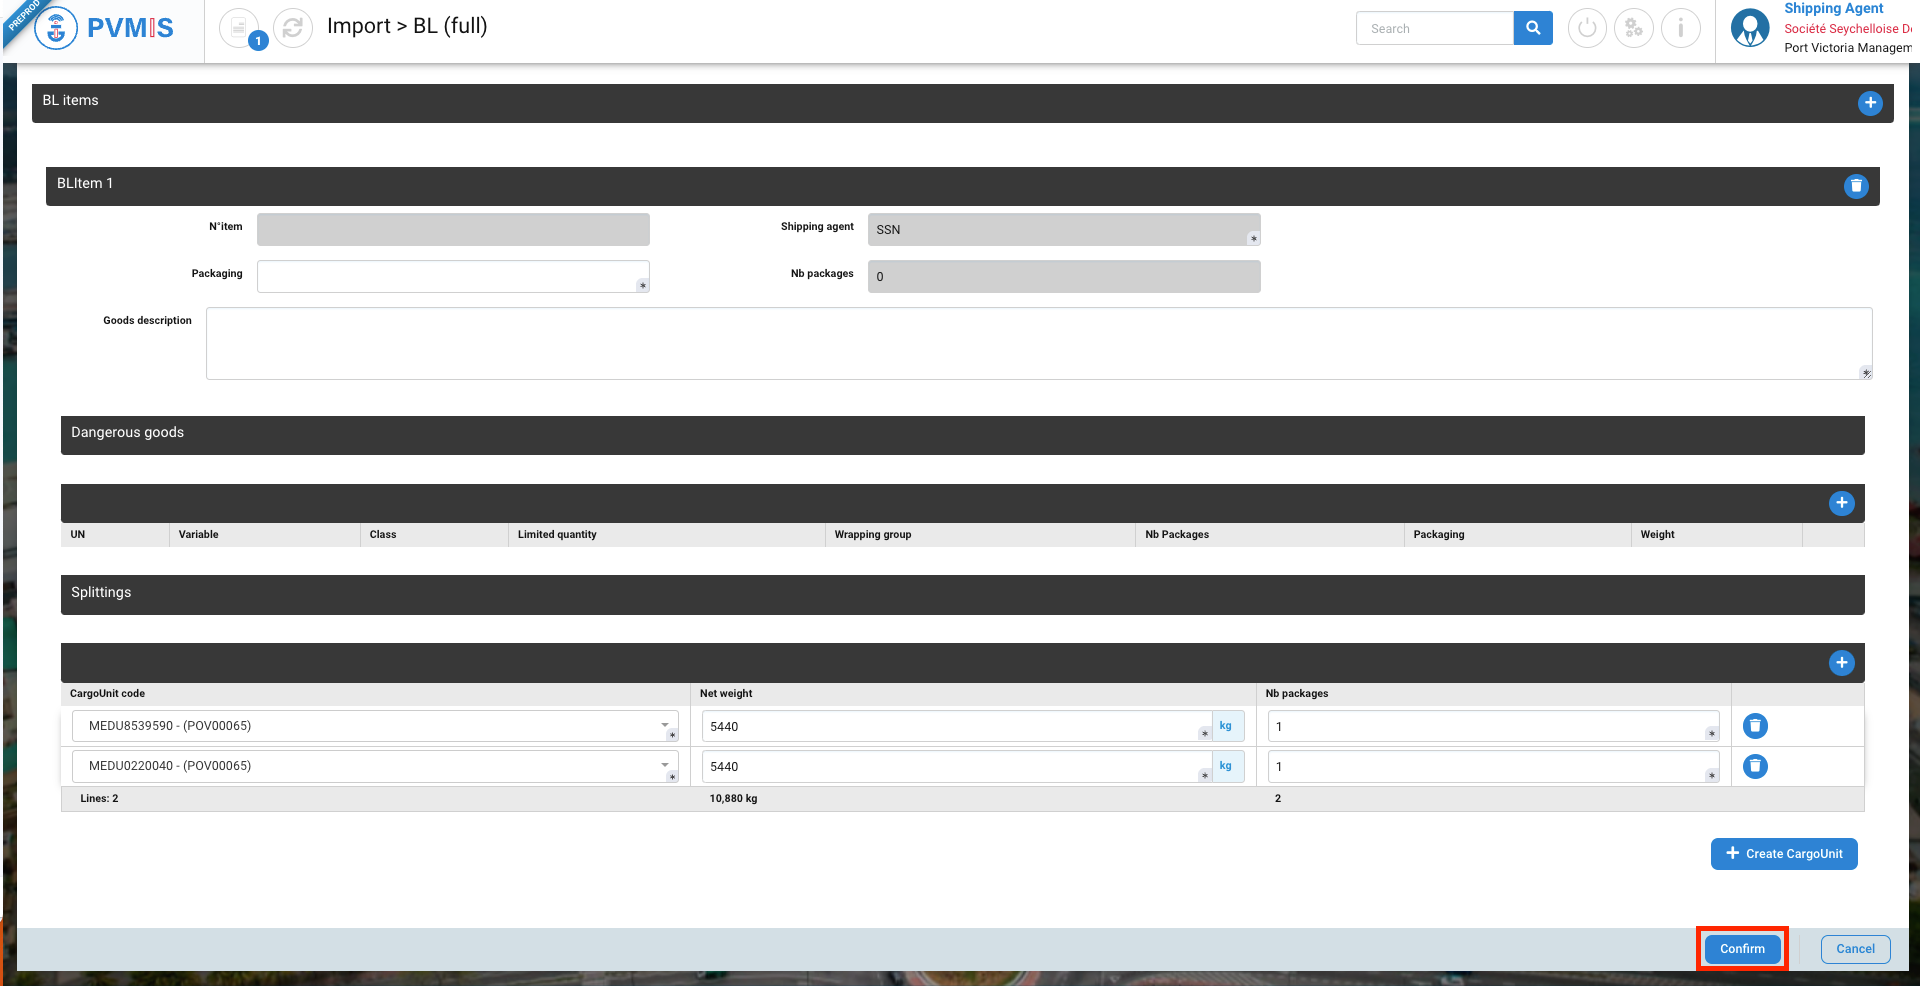
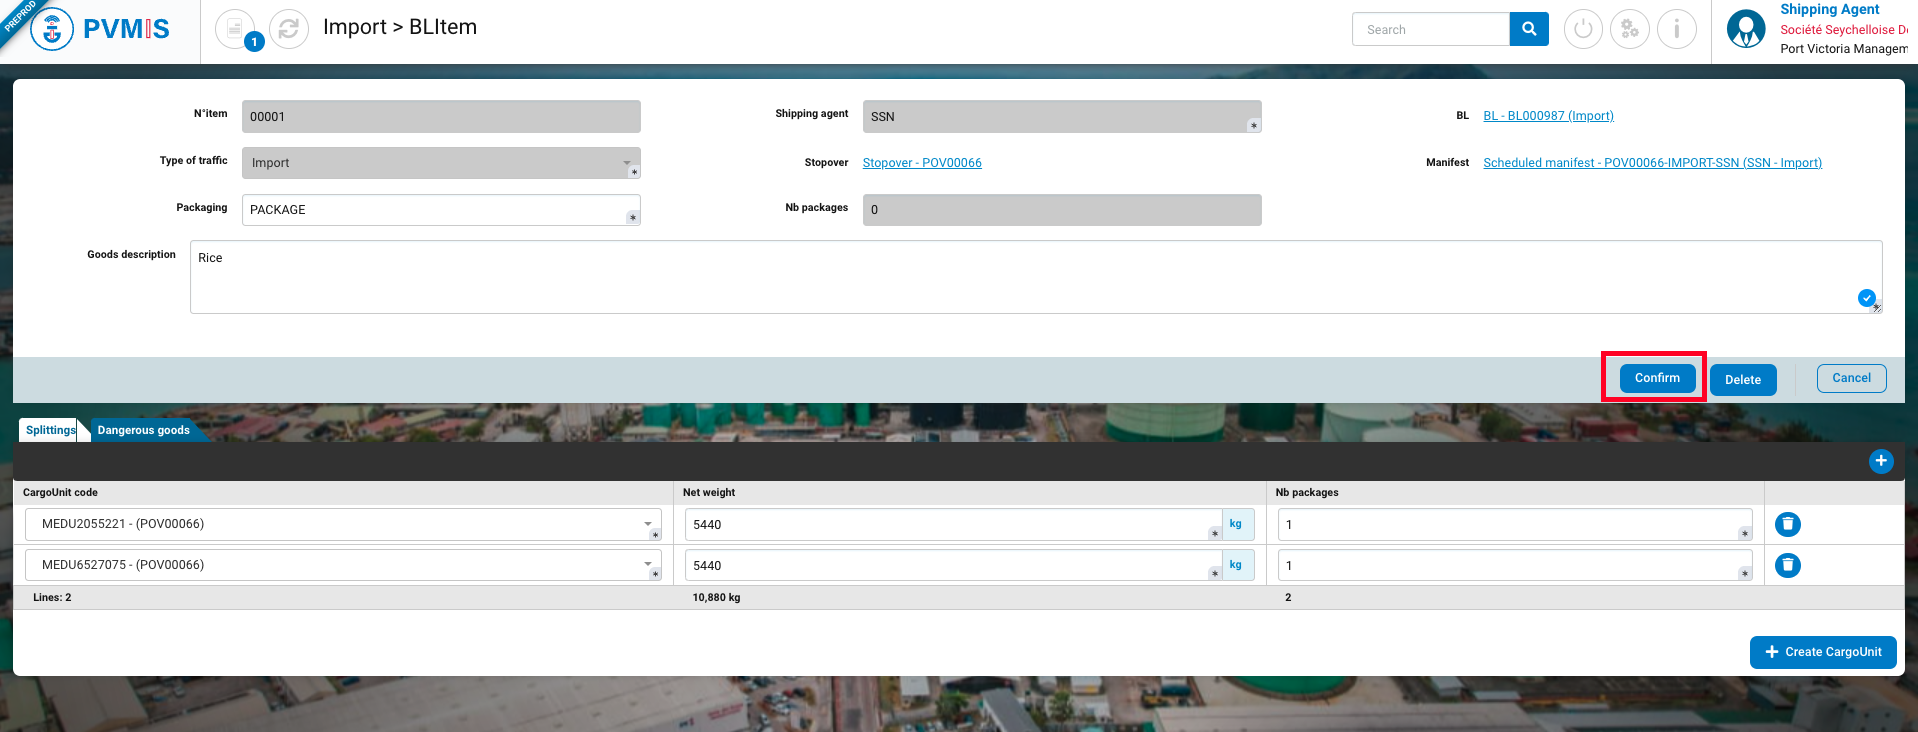
If you need to add another item, which means adding another line of merchandise, click on the "+" icon in the "BL Items" section. If you need to create additional cargo units within your line of merchandise, click on the "+Create Cargo Unit" button. Once the Bill of Lading is fully filled out, click on "Confirm".
You have entered a bill of lading. Please restart the process from the beginning to initiate a new one.
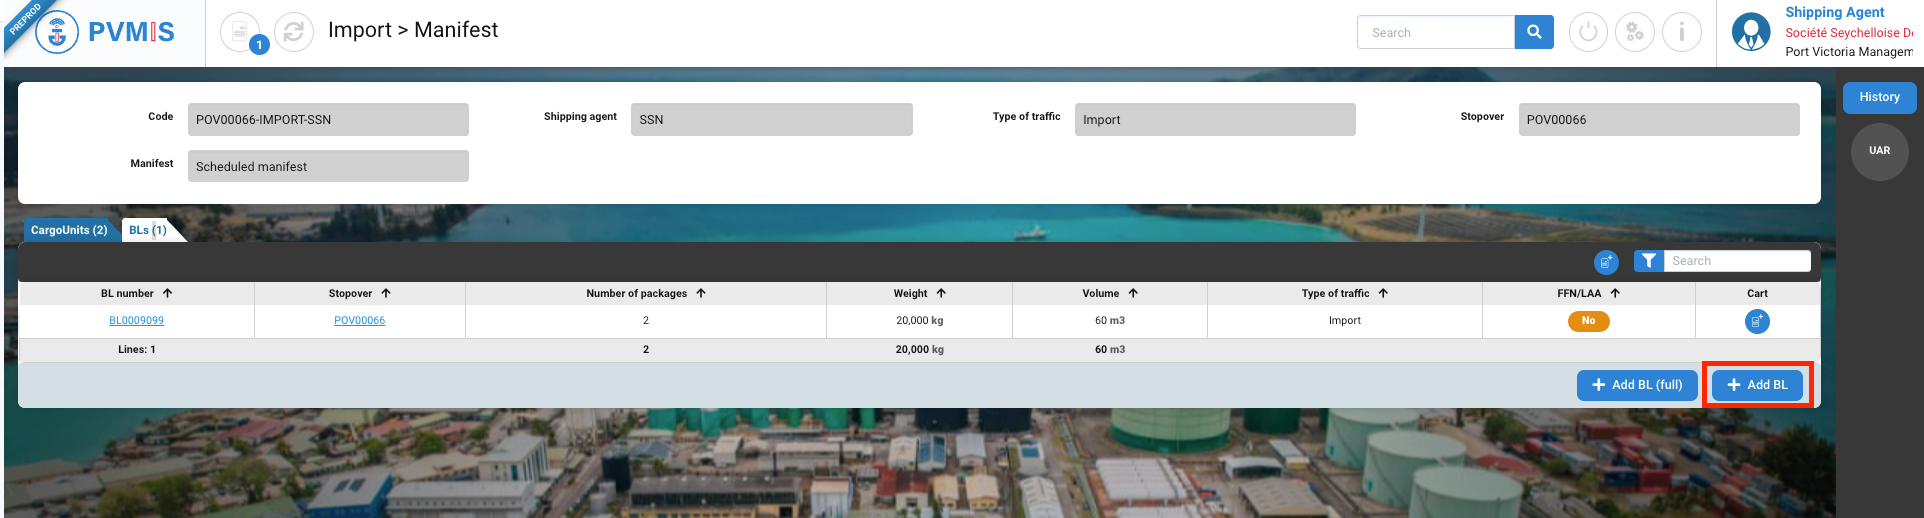
Add BL
On the manifest detail page, you have the option to either enter the full Bill of Lading (BL) directly or create each party separately, depending on your preference and the specific requirements of your process. For this, click on +Add BL.
You will be redirected to the Bill of Lading (BL) form, and you can create it by providing the contract's general information and filling out the Third-party section. After entering all the necessary fields, you can proceed with the BL creation, click on Confirm.

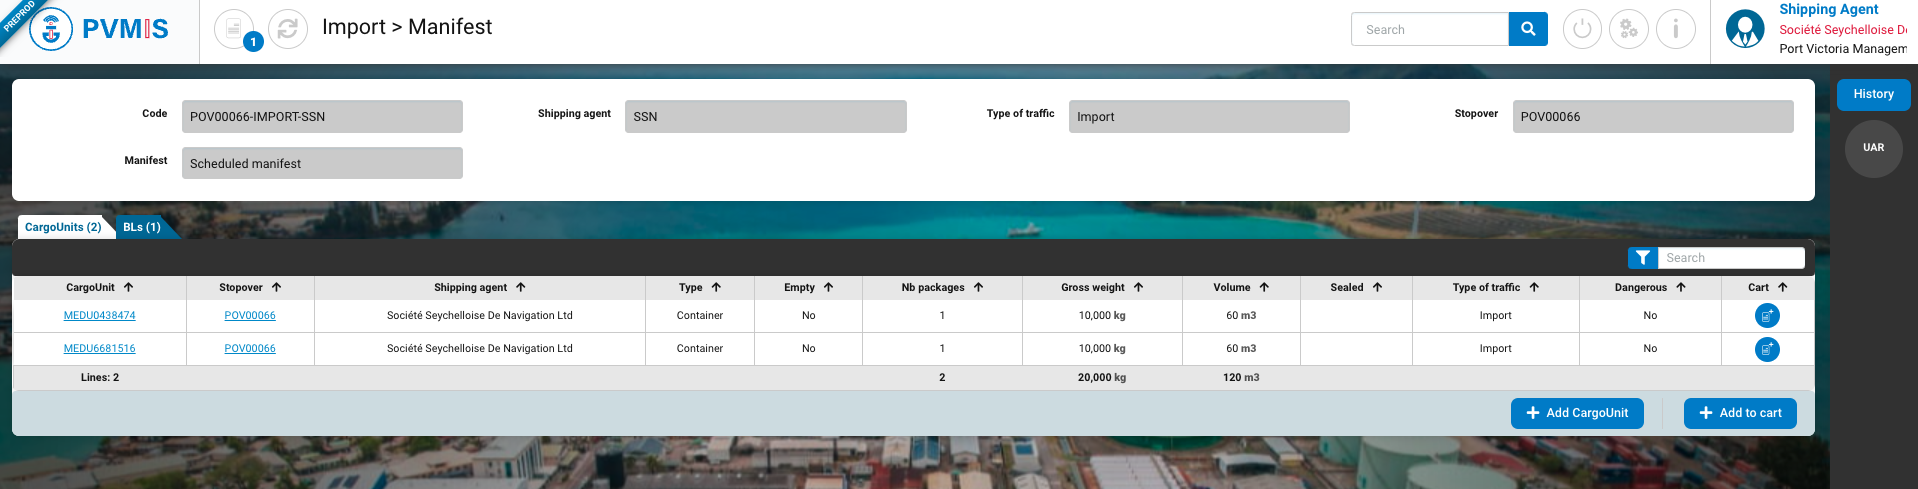
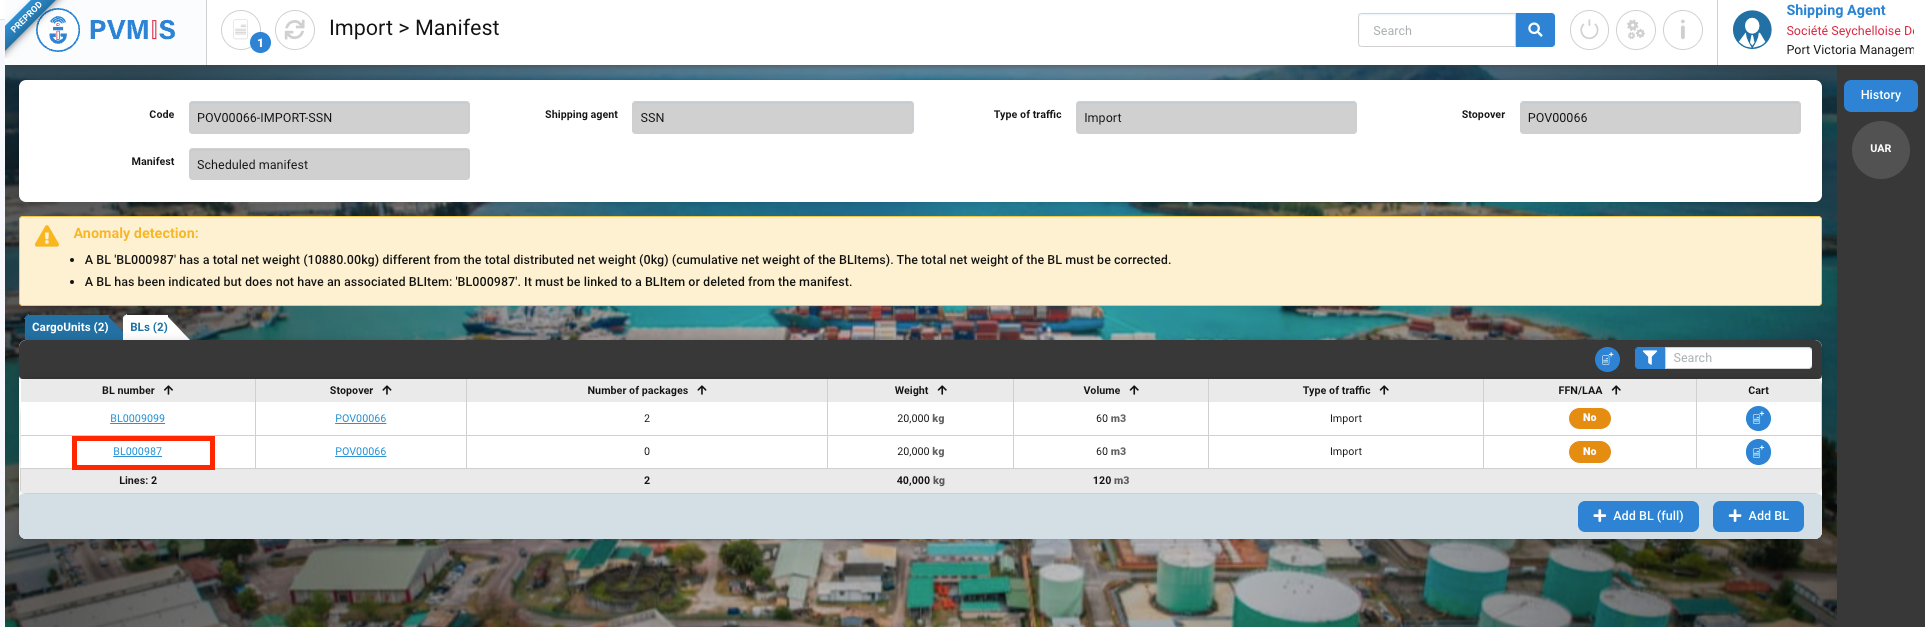
After confirmation, you will return to the manifest page, and the new Bill of Lading (BL) entry will have been added.
Additionally, you will see an alert message reminding you that this BL does not have an associated BL Item.It also informs of the inconsistency of the weight entered on the BL because there is no cargoUnit present.
To associate a BL Item to this new BL, click on its BL number.
You can consult information about this BL. Click on Items section:
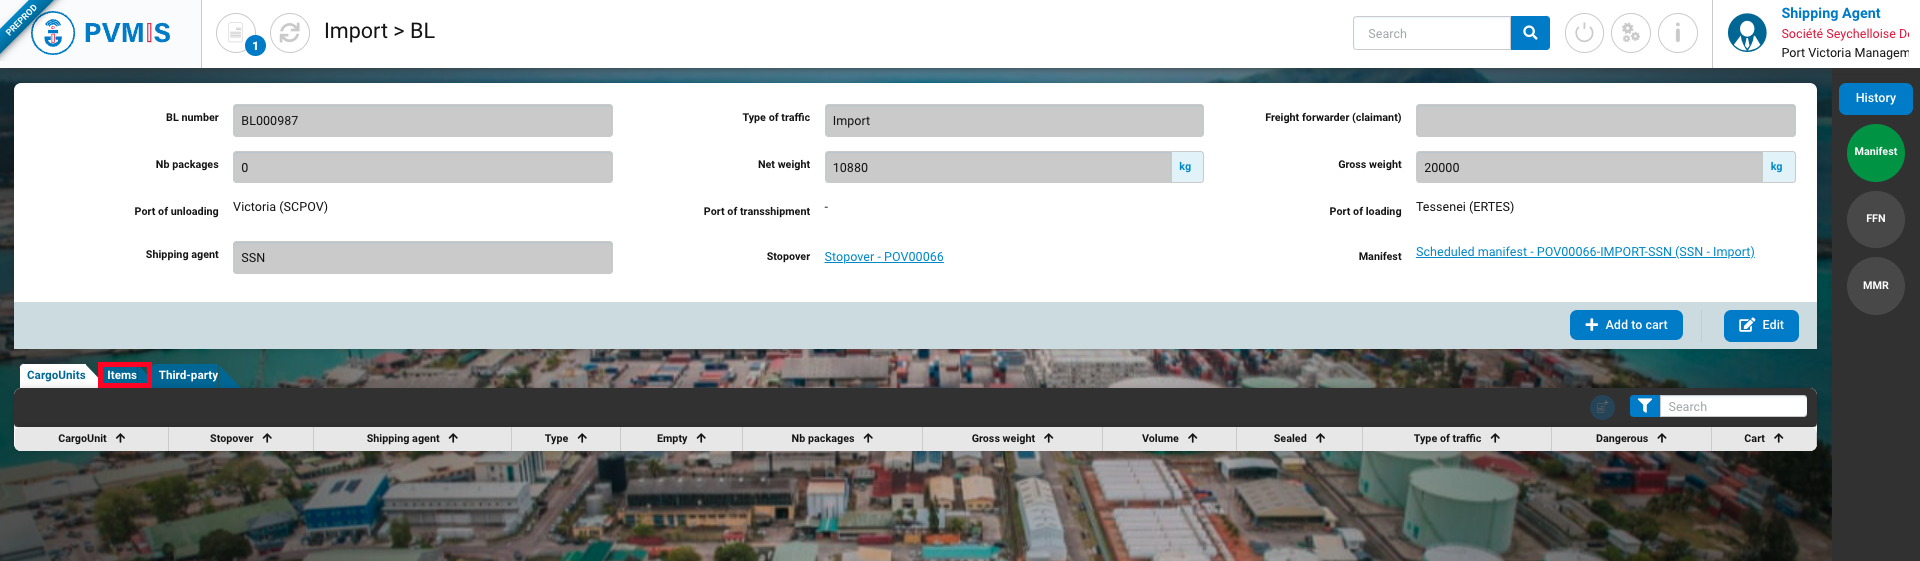
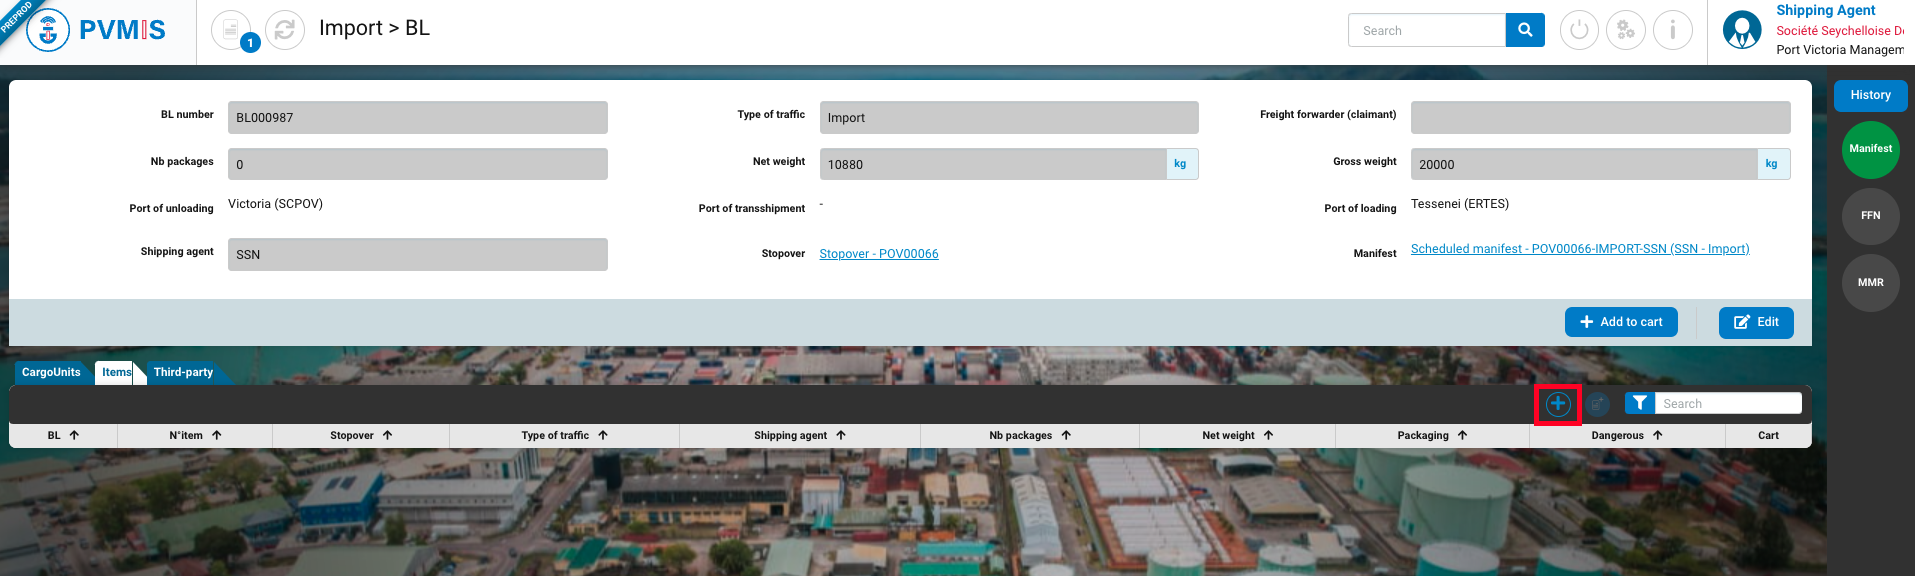
You are in the Items section, and click on + to add a BL Item.
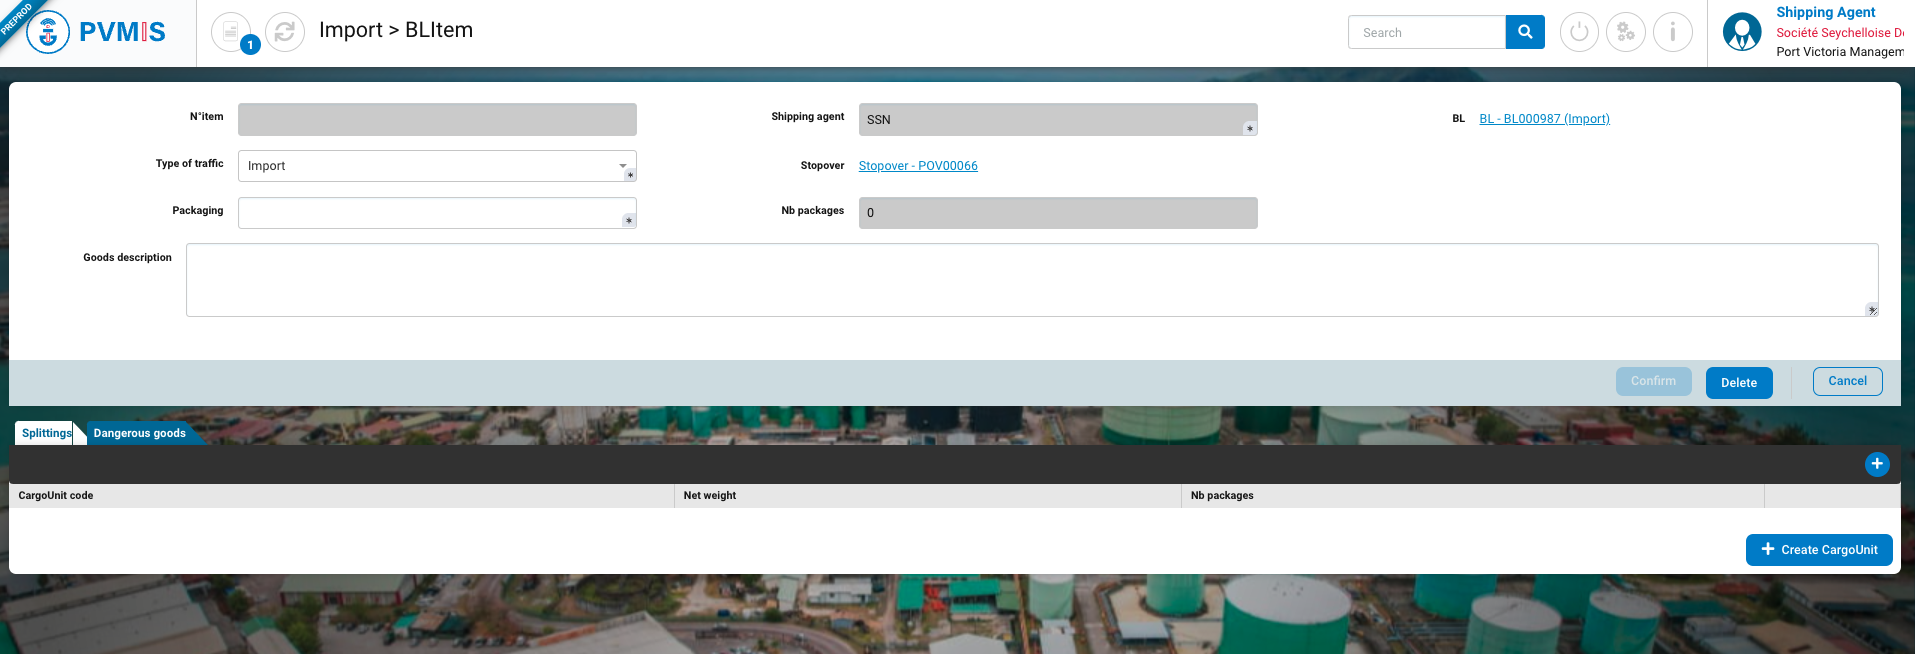
You will be redirected on the BL Item form, enter the mandatory fields : Packaging and Good description.
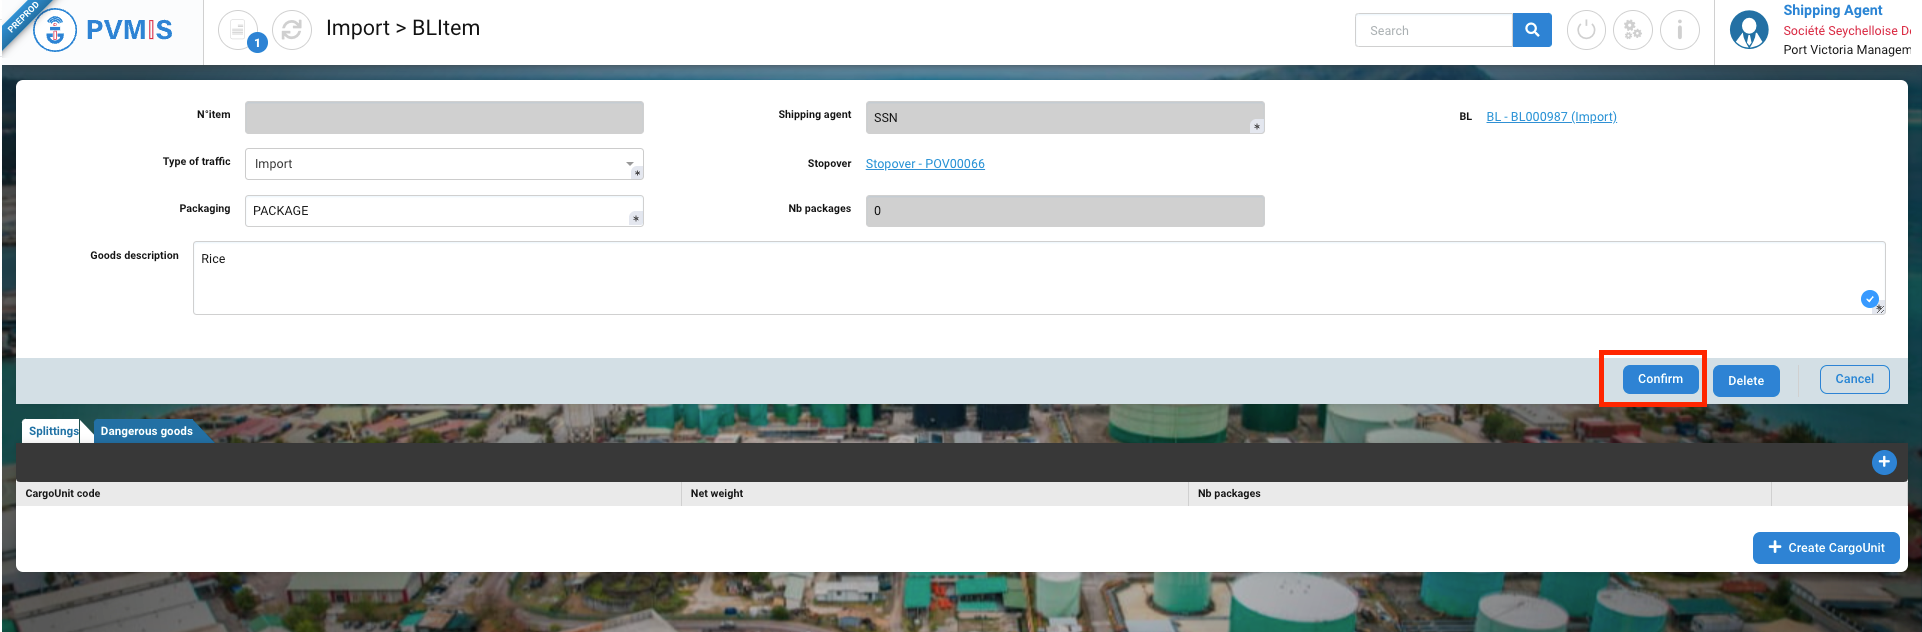
Then click on Confirm to create first the Blitem:
If you have items classified as Dangerous goods, you can click the "+" icon in the Dangerous goods section to add them and complete the necessary fields. If you need to remove any of them, you can click on the trash icon to delete the respective entry.
Following that, you have the option to associate this BL Item with a CargoUnit directly in the Splittings section. Click "Confirm" to create the BL Item first and then make the association at a later time.

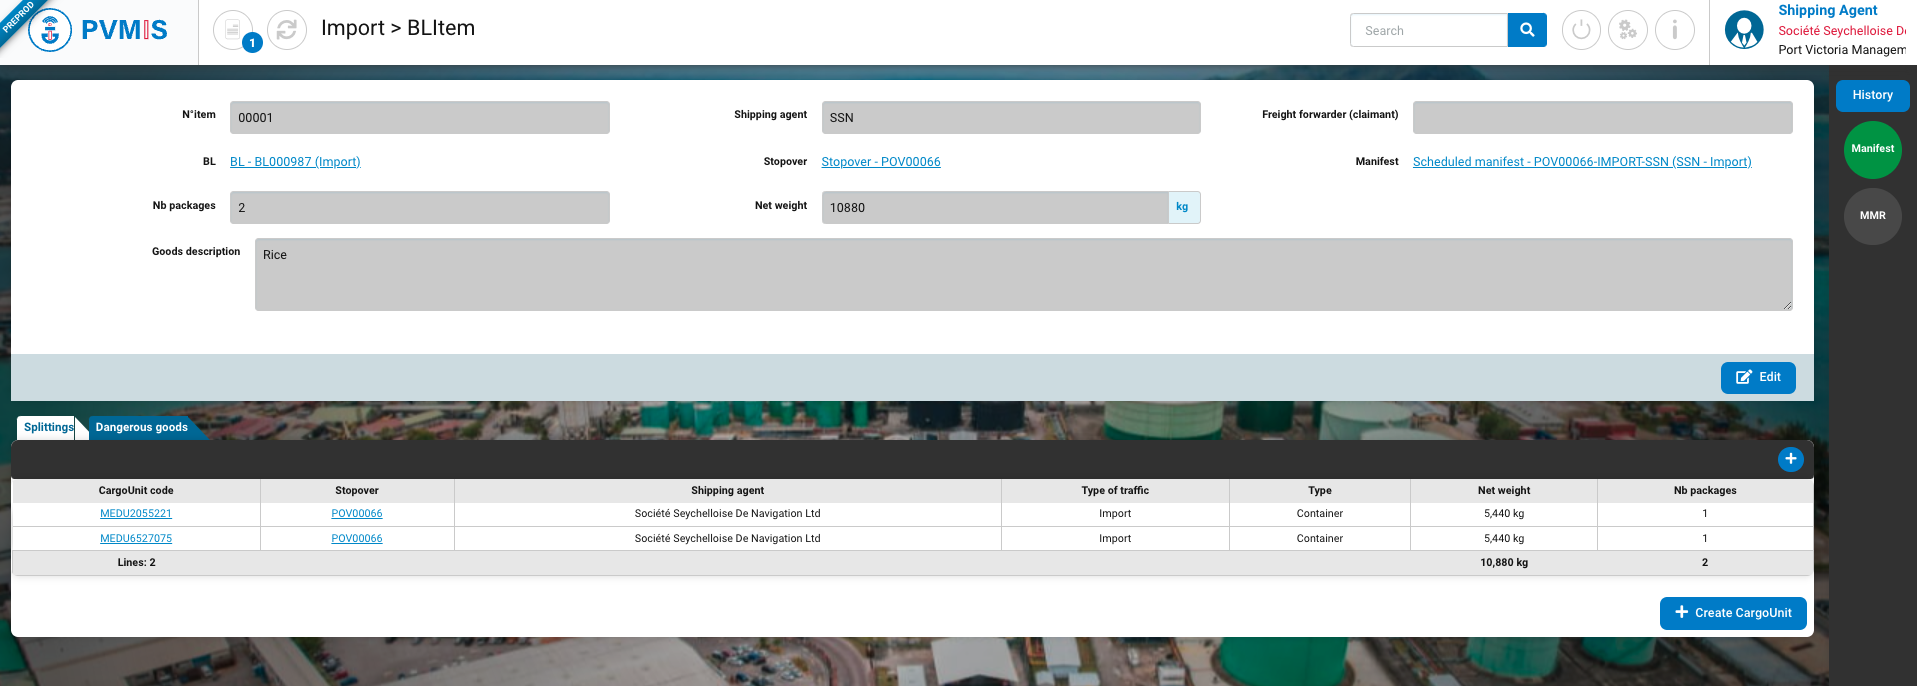
By clicking on "Confirm" your BL Item is created, and you have the option to modify the information, associate it with a Cargo Unit, or report dangerous goods by clicking on "Edit".
BL and CargoUnit association
Cargo Unit association by Splittings section in BL Item
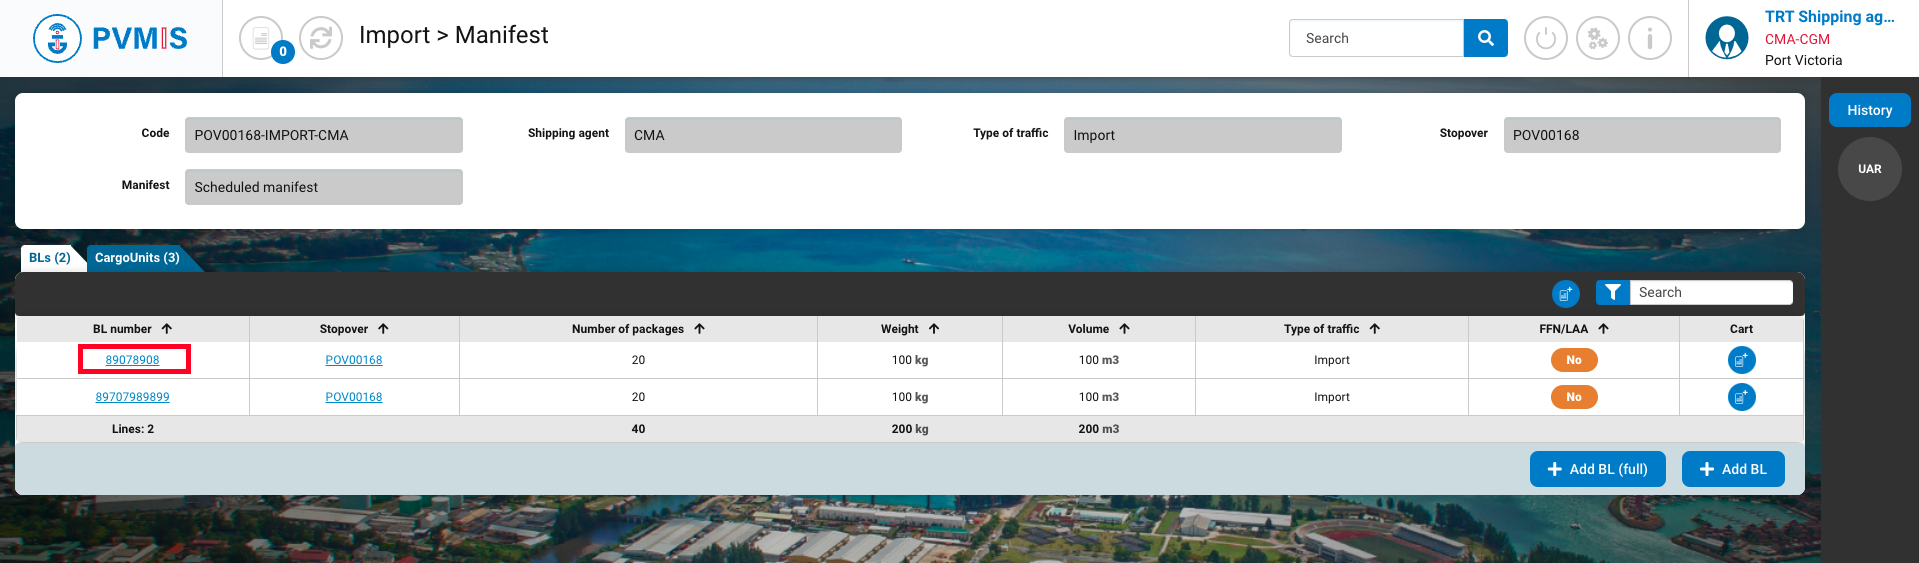
Click on the “Unloading operations” menu in the Import section:
A list of all stopovers within the specified date range is presented. To access the scheduled manifest page, click on the appropriate code in the sixth column of the table.

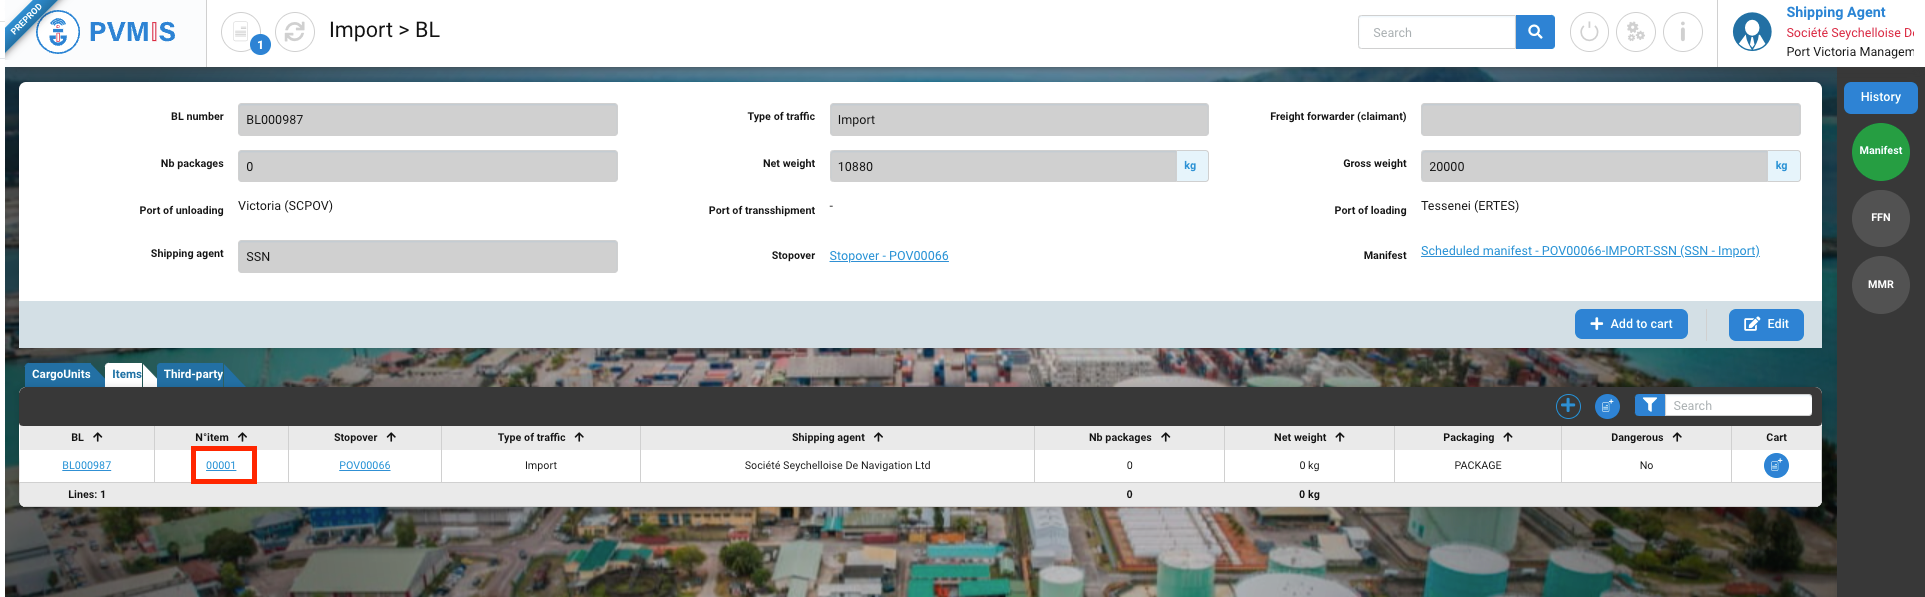
You can view information about the manifest. Click on a BL number.
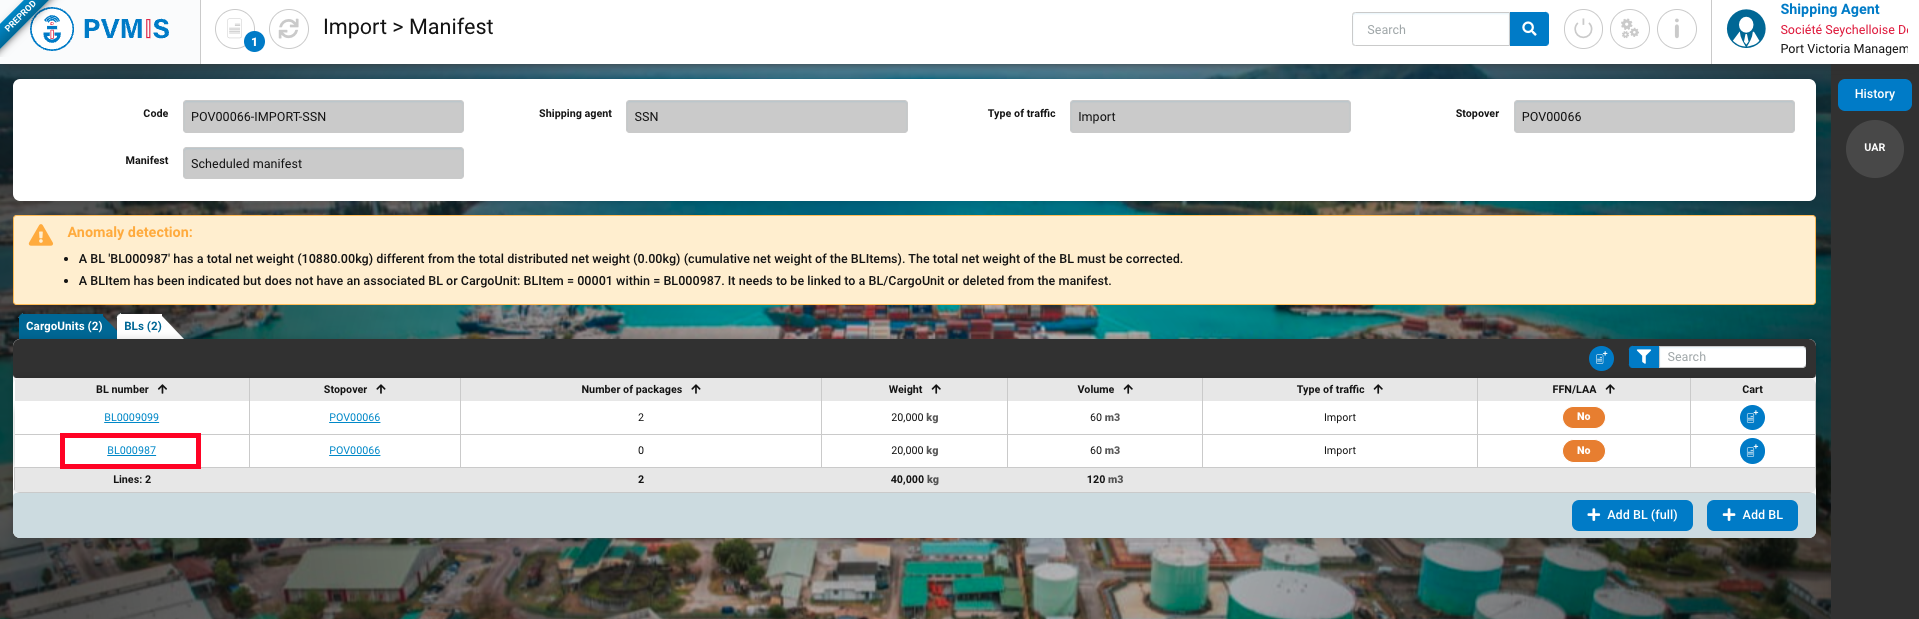
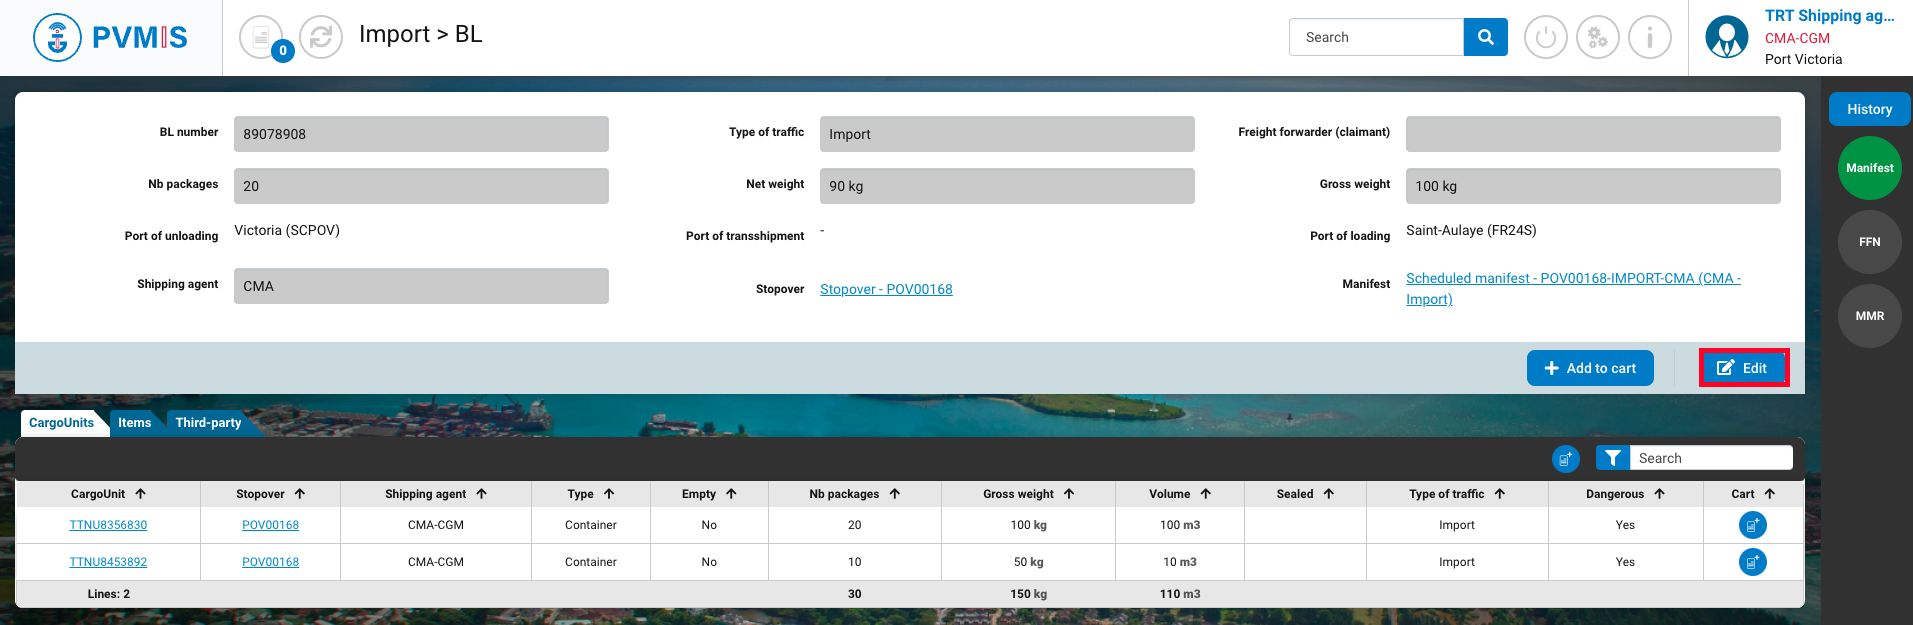
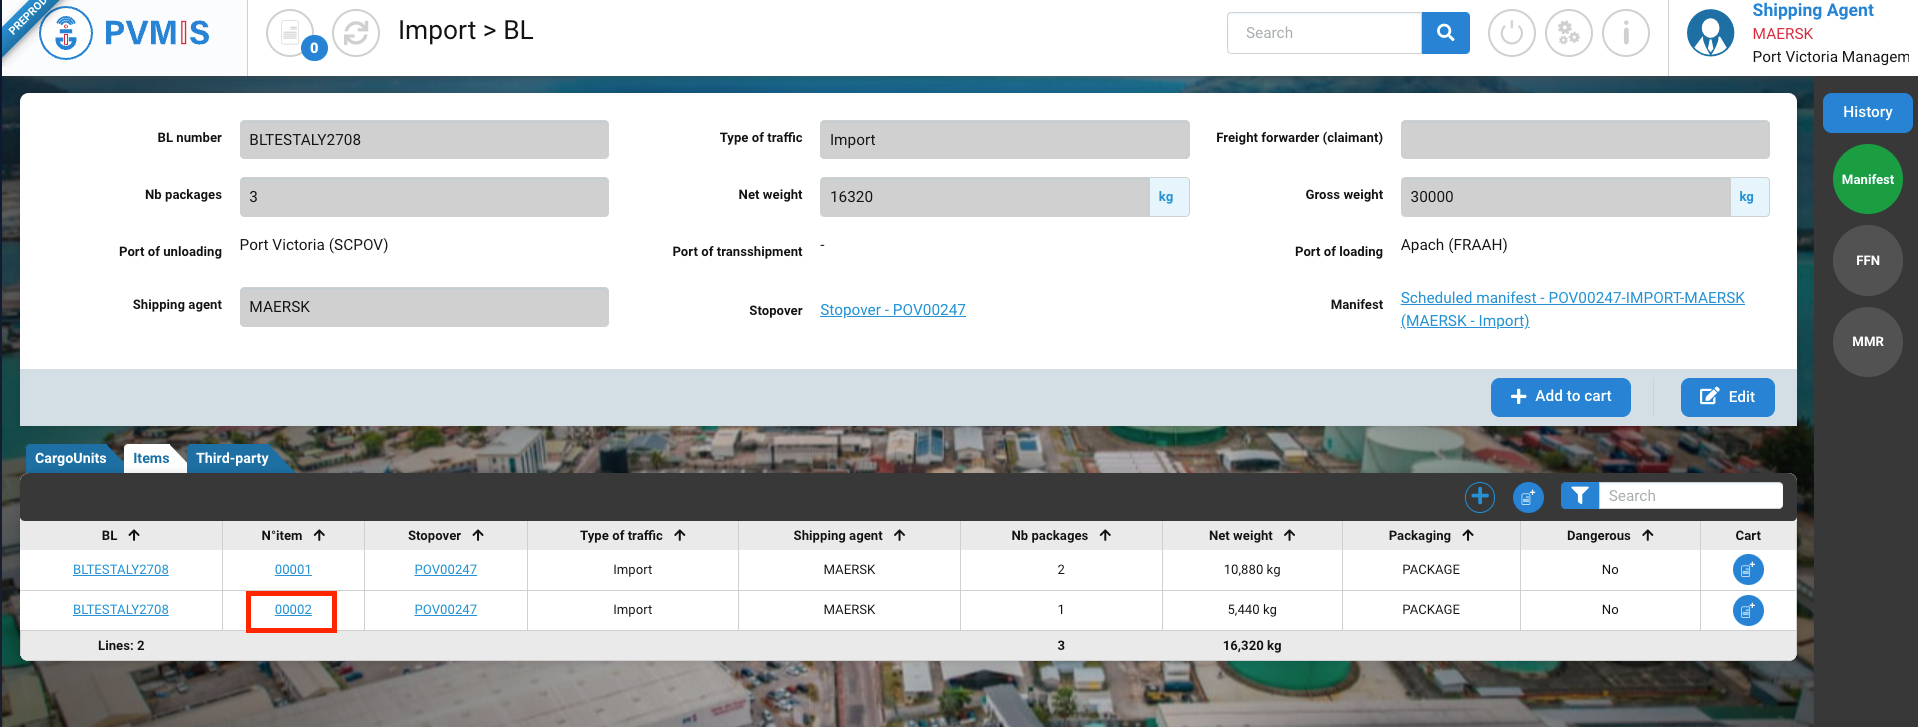
You can view information about the BL. Select the section Item and then click on N°item.
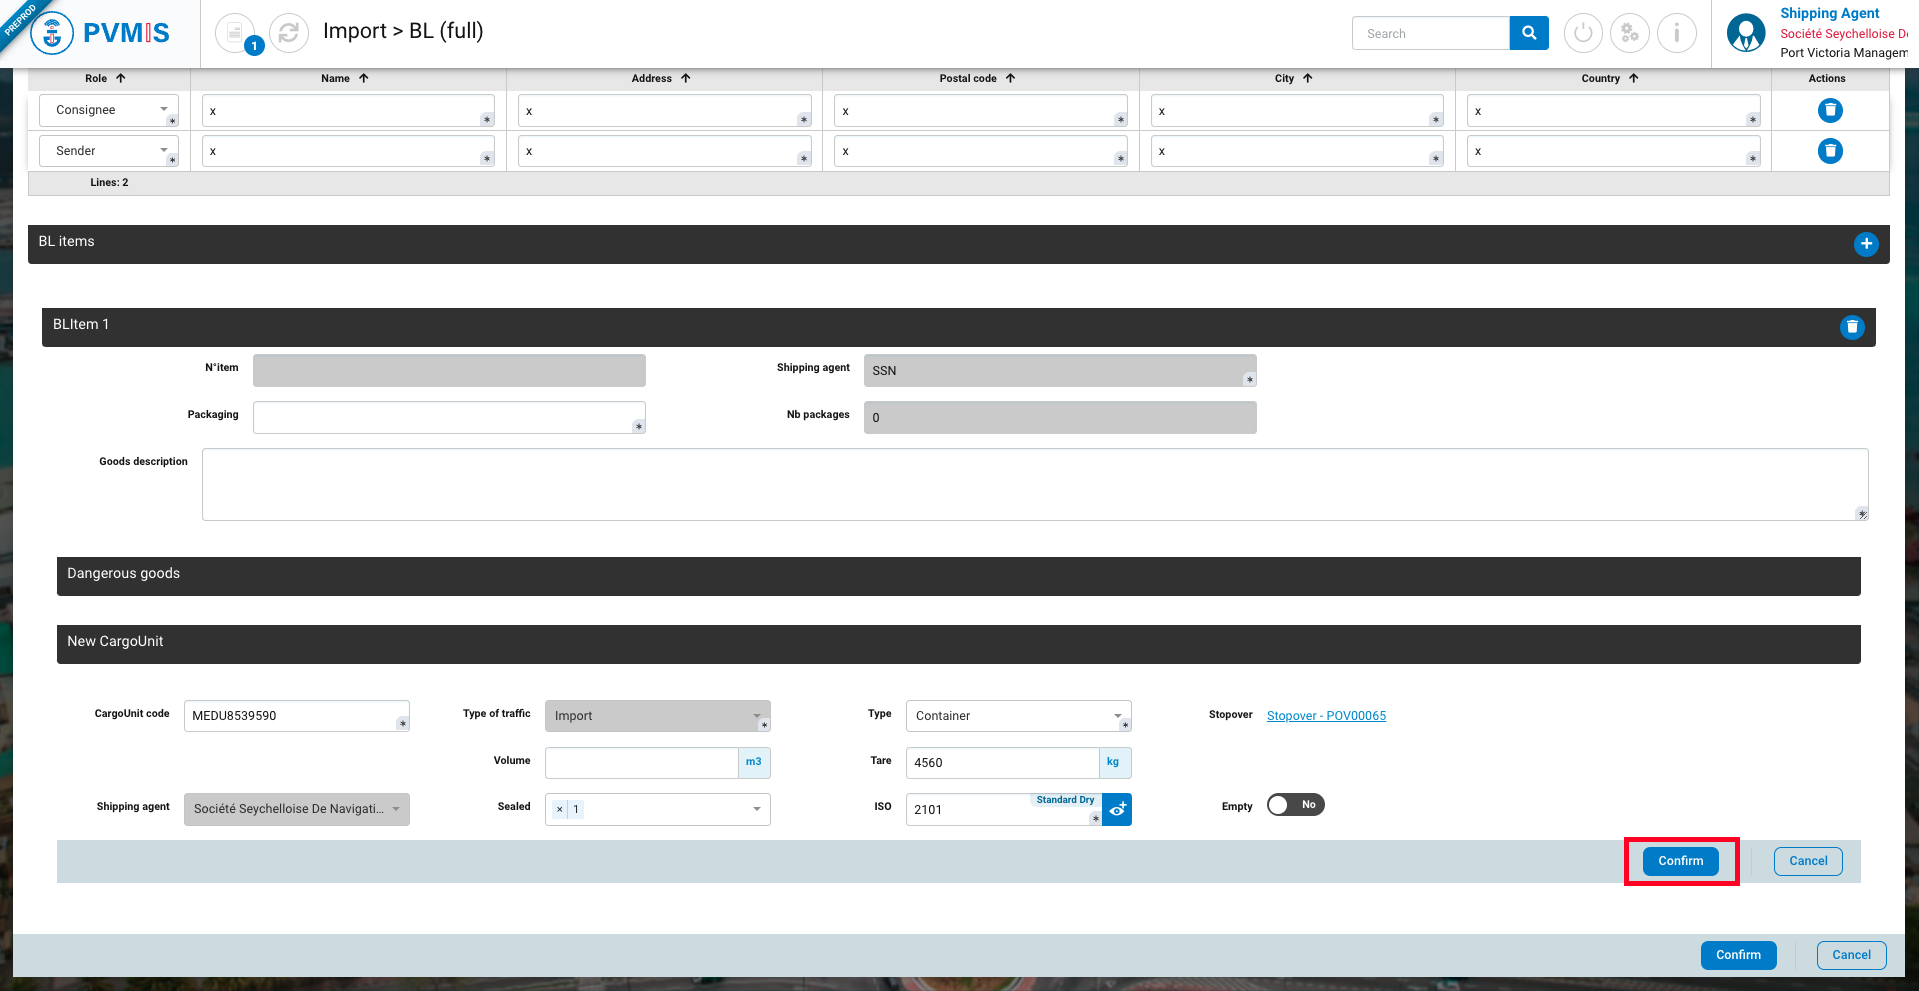
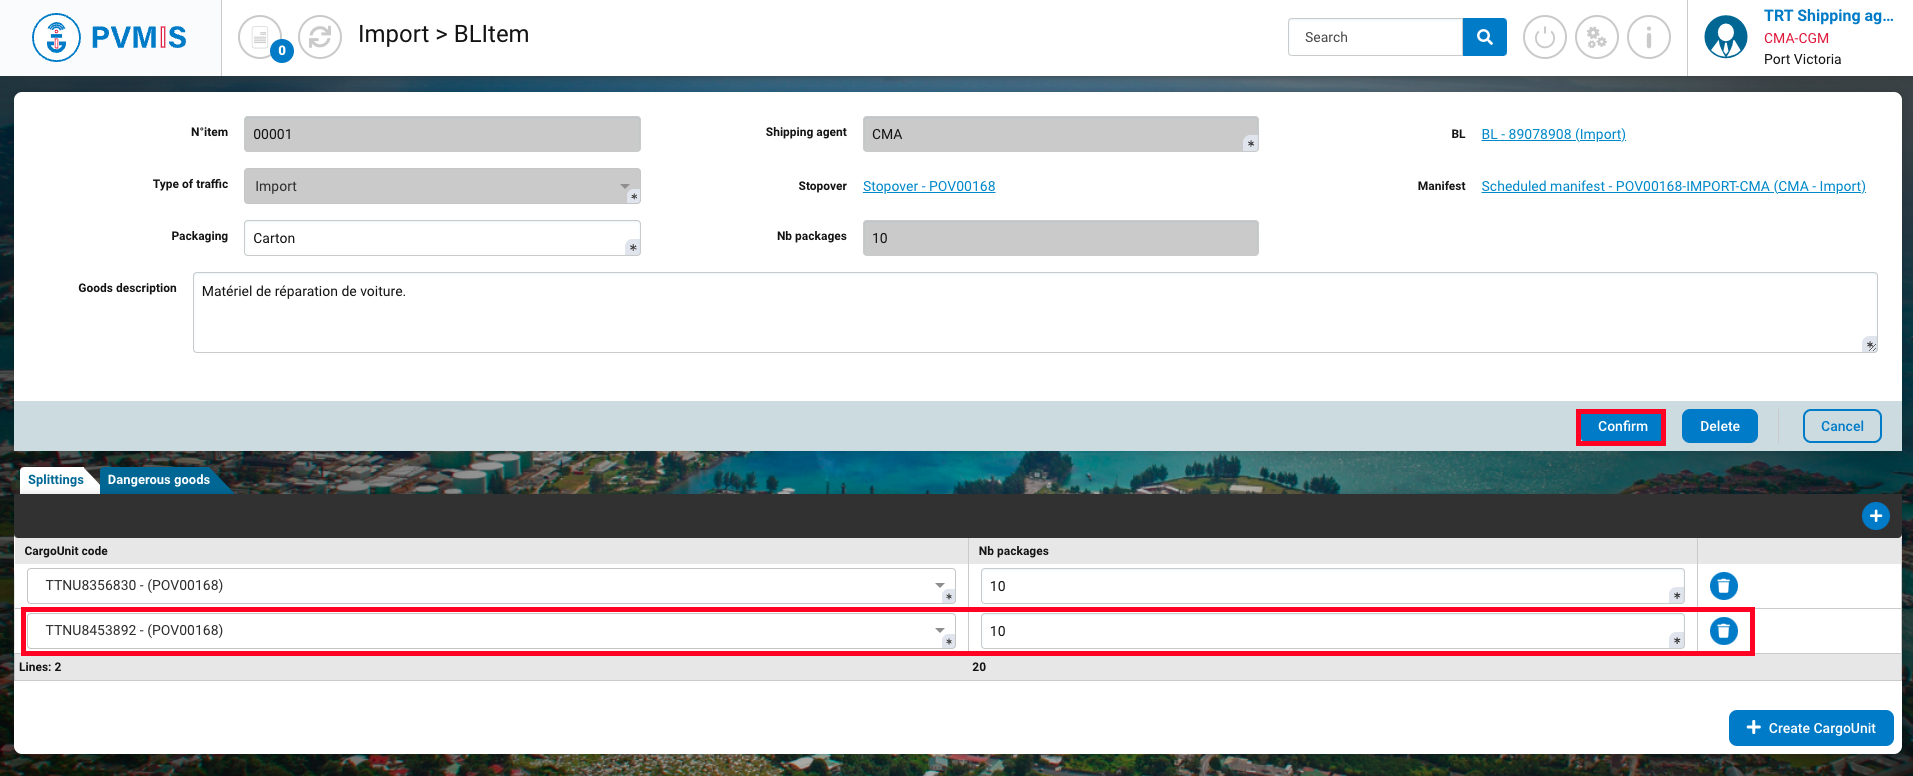
Upon being redirected to the BL Item detail page, you can associate it with a Cargo Unit in one of two ways: either by adding an existing Cargo Unit or by creating a new Cargo Unit.
If you wish to associate the BL Item with an existing Cargo Unit, click on the "+" icon.
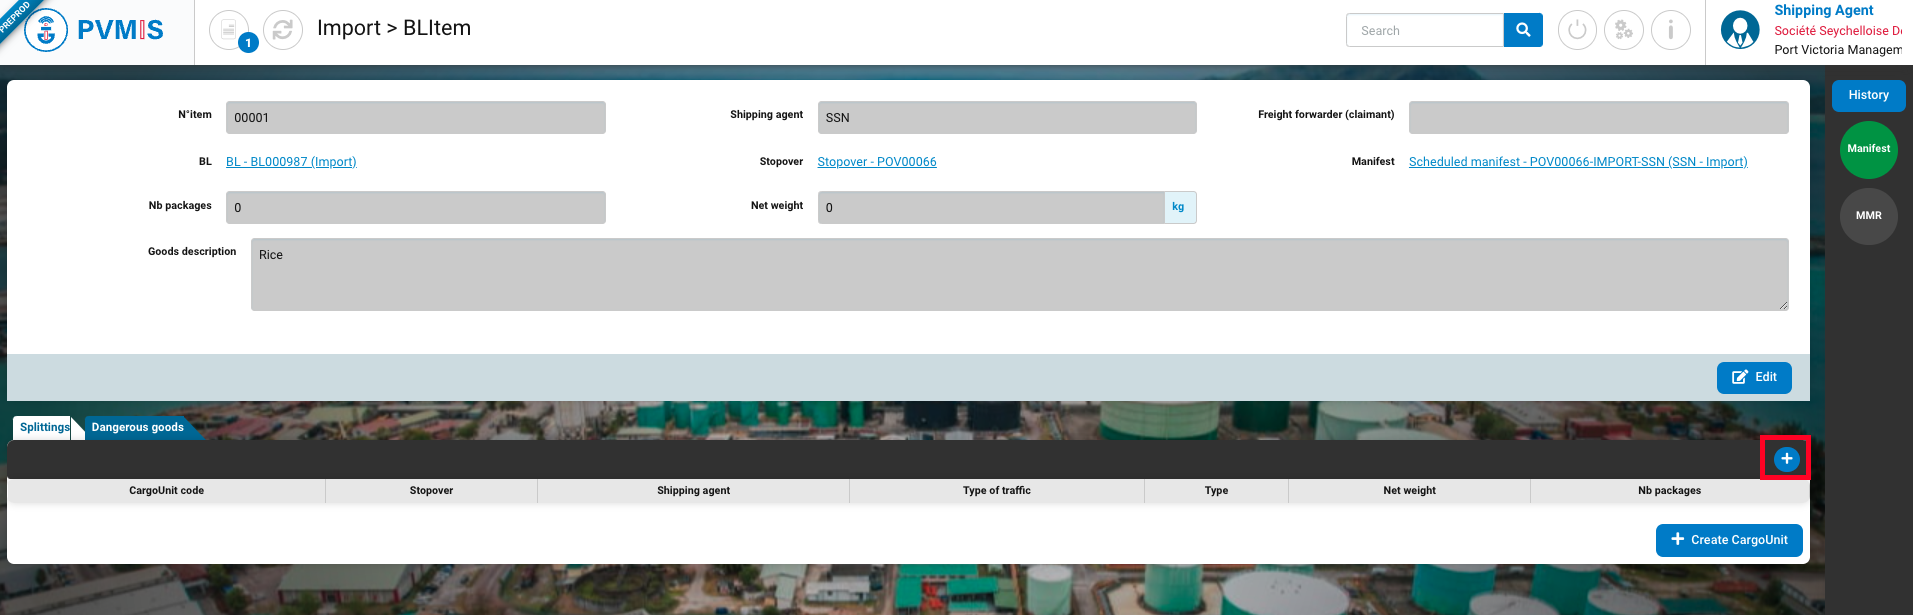
If you wish to associate the BL Item with a new CargoUnit , click on Create CargoUnit button:
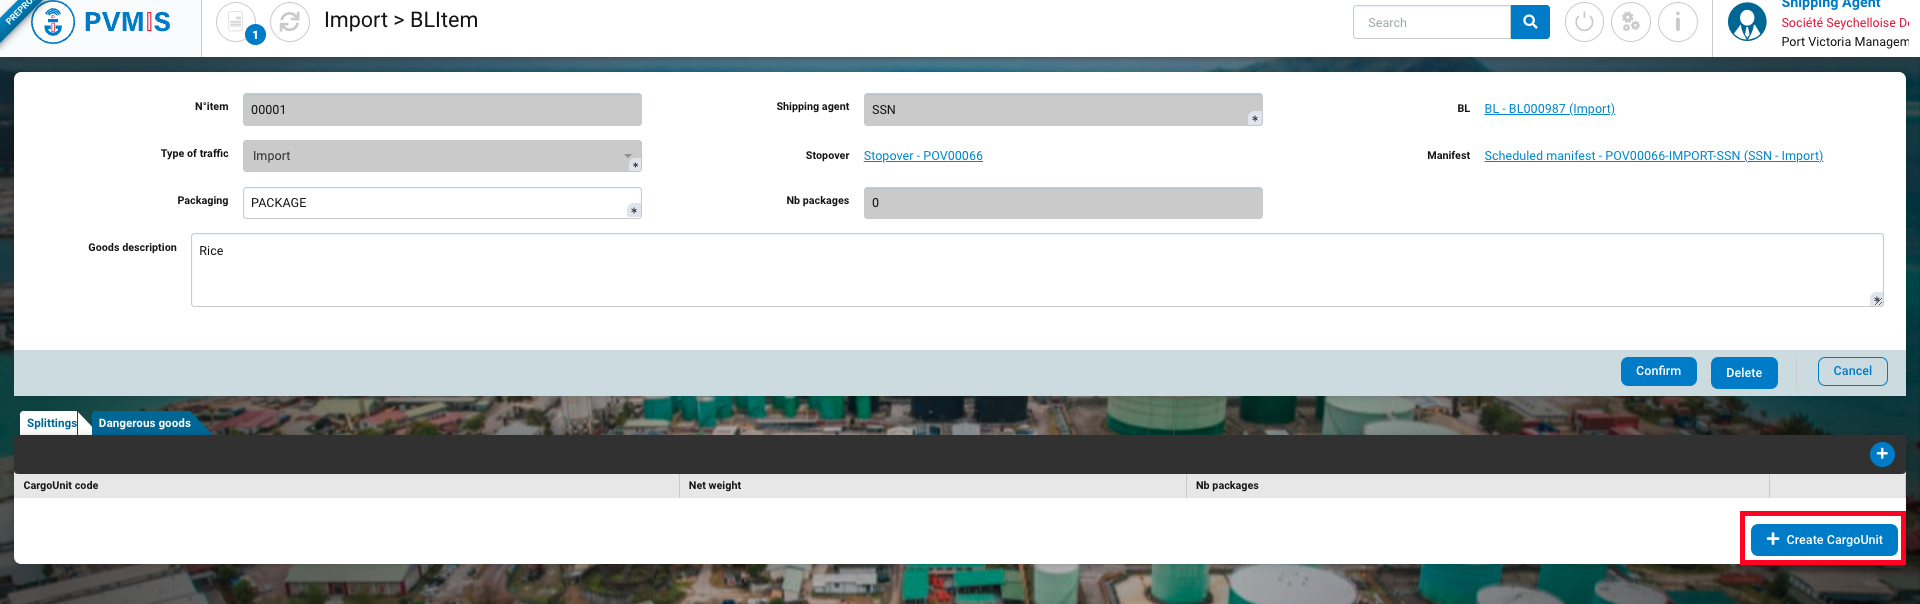
Compte the form and click on Confirm:
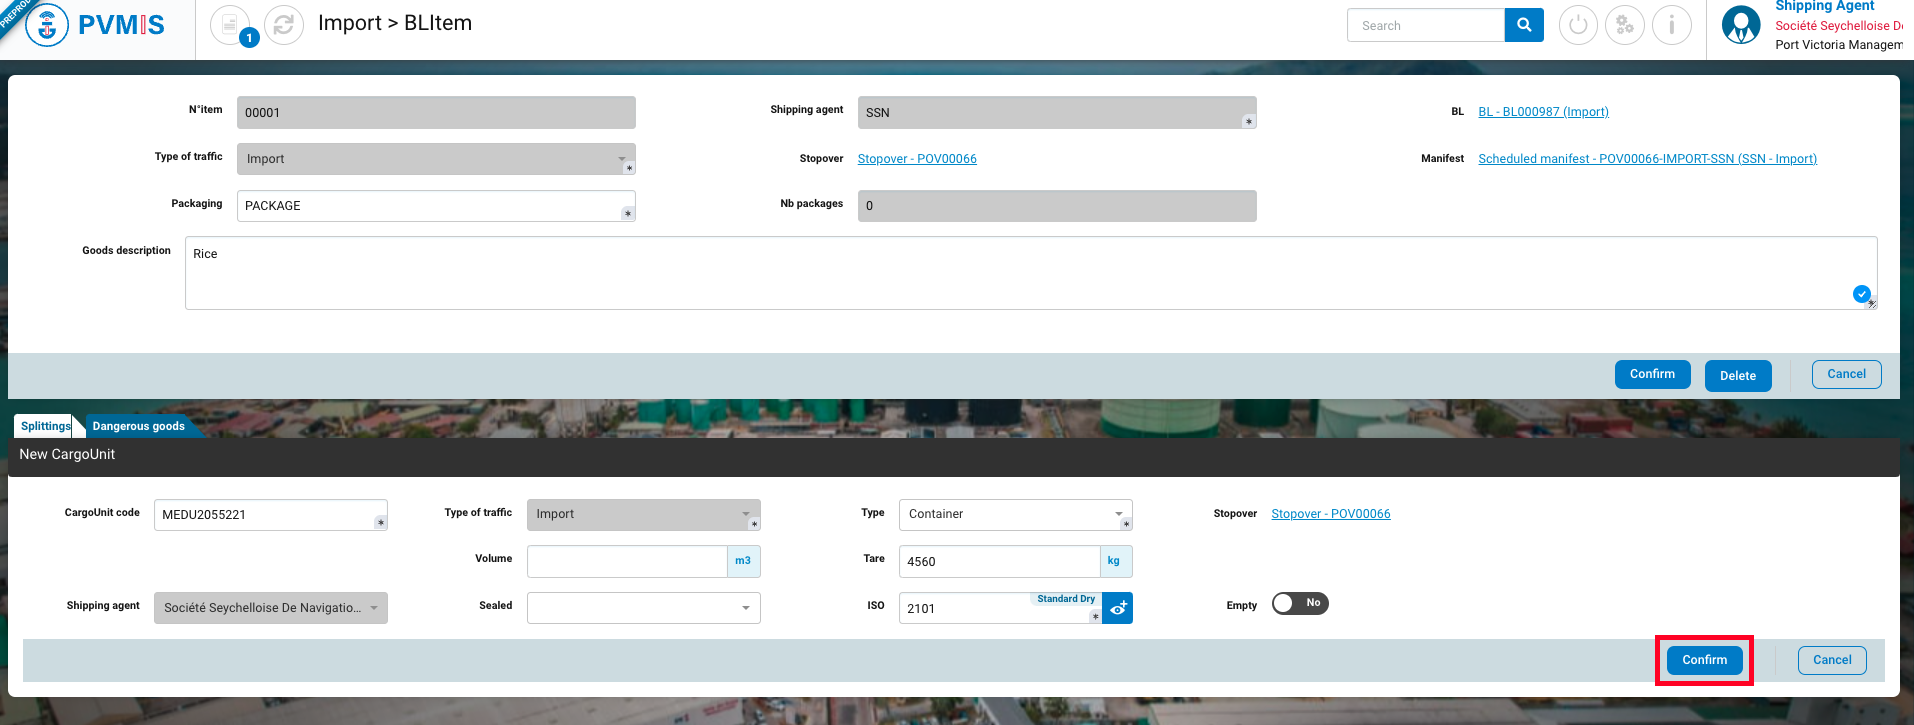
Complete the Net weight of this CargoUnit and the number packages.
The product operation of the Net weigh and the number packages is included in the sum of the total Net weigh of the BL.
After adding all the CargoUnits, click on Confirm button:
After confirmation, you can consult information about the BL Item and the Cargo Unit is created et add on it.
Second case : Cargo Unit association by Manifest detail page
Cargo Unit association by Manifest page
Click on the “Unloading operations” menu in the Import section:
A list of all stopovers within the specified date range is presented. To access the scheduled manifest page, click on the appropriate code in the sixth column of the table.
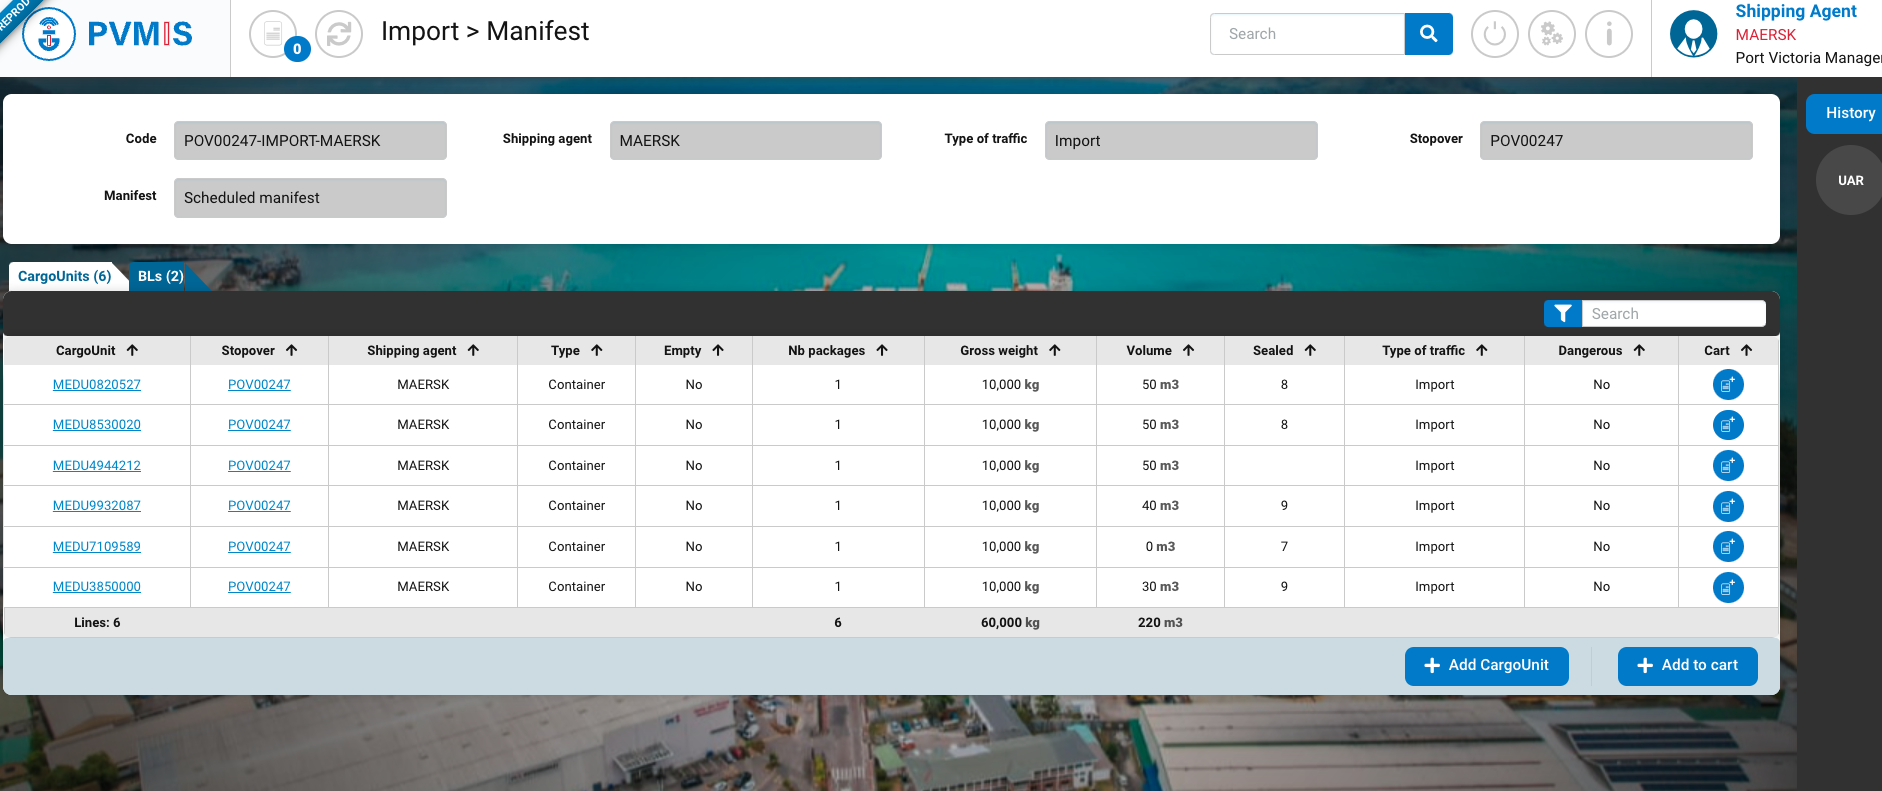
You can view information about the manifest, select the CargoUnits section and click on +Add CargoUnit.
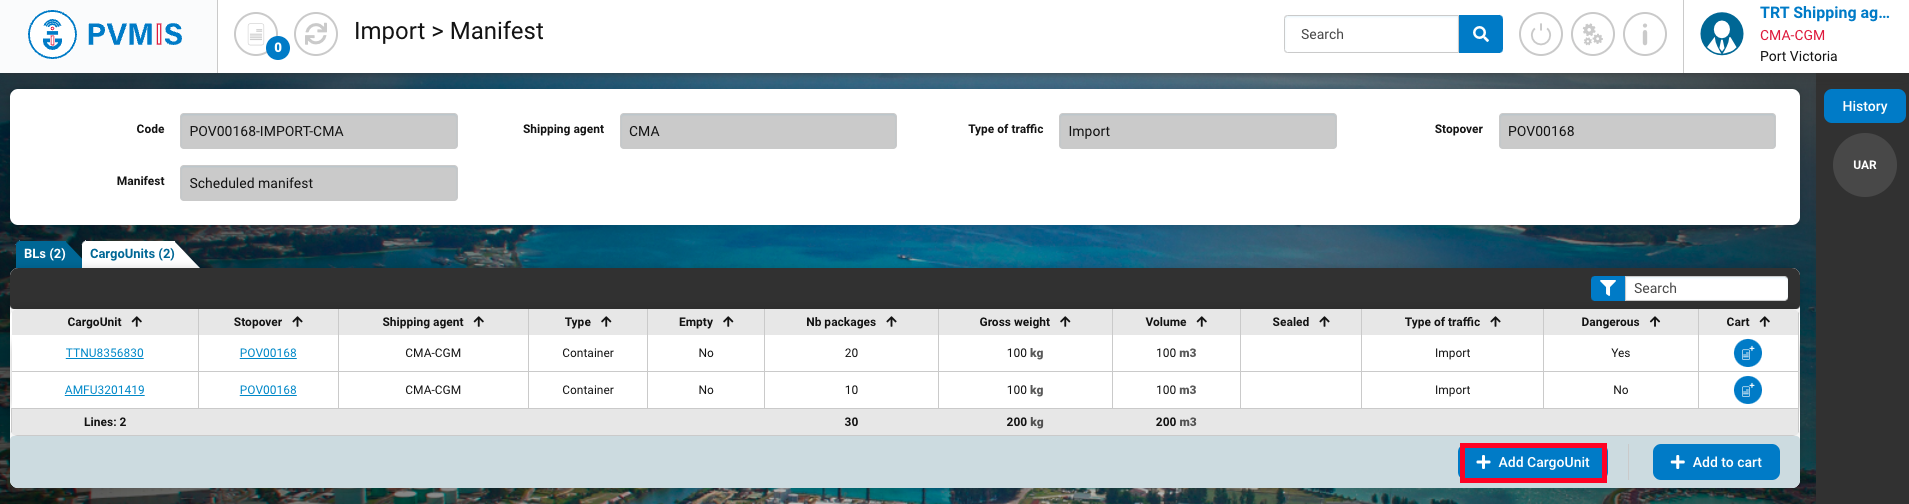
You arrive on CargoUnit creation form, enter the required fields et click Confirm.
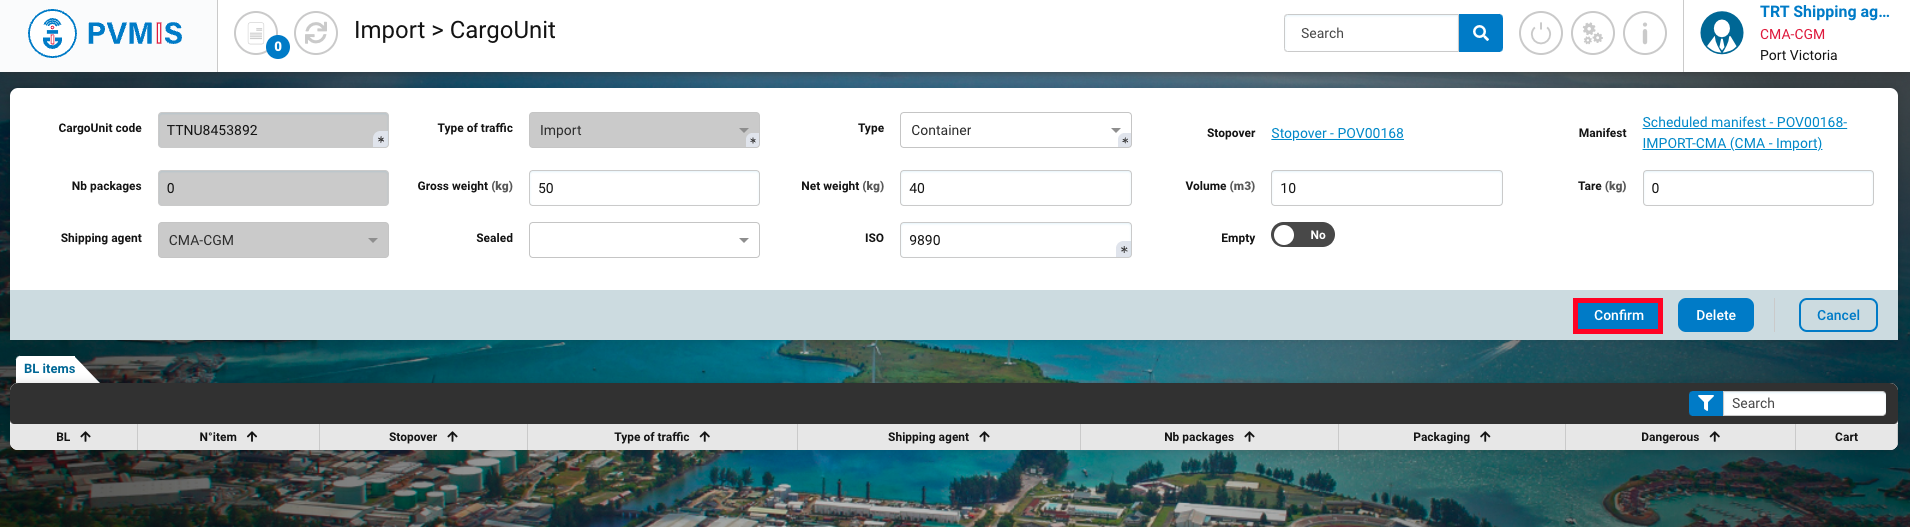
After confirming, you will be redirected to the Manifest page, and the new CargoUnit entry will have been added.
Additionally, there will be an alert message reminding you that this CargoUnit needs to be attached to a Bill of Lading (BL).
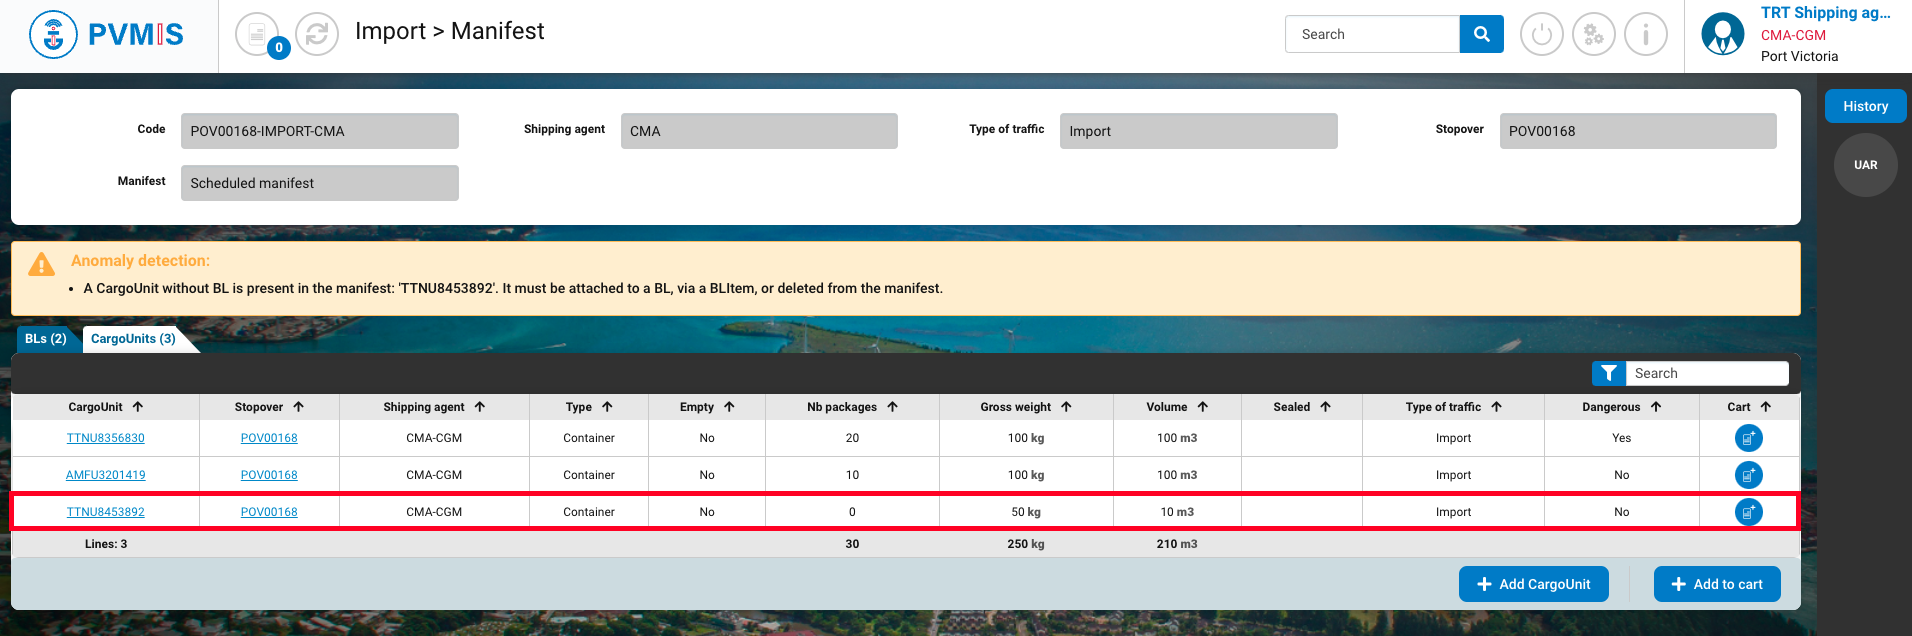
To associate this Cargo Unit to a BL Item, select the BLs section and click on the BL number which you will attache the Cargo Unit.
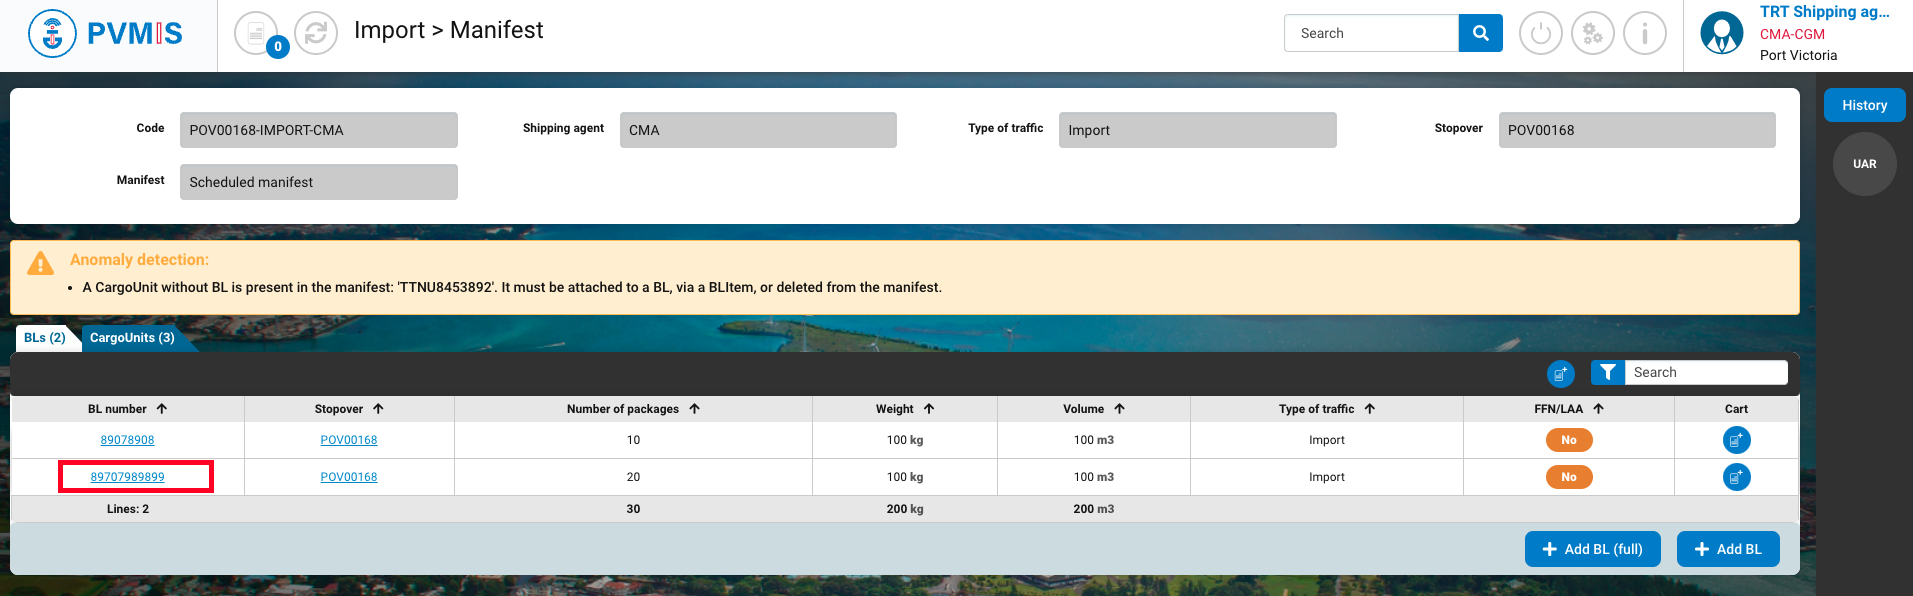
You can view information about the BL, select the Items section and click on N°item.
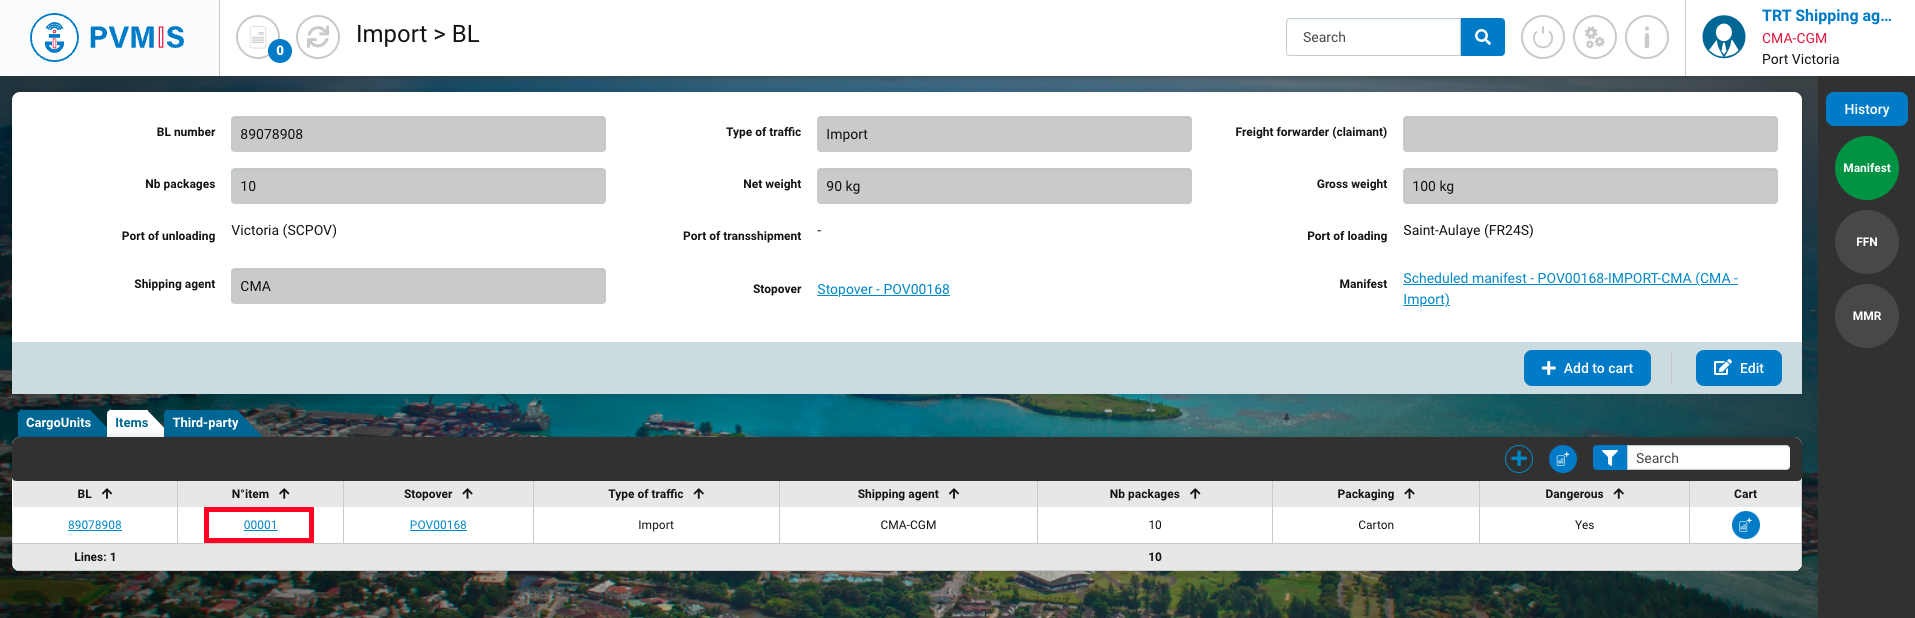
You can view information about the BL Item, in the Splittings section, click on +.
Select the CargoUnit code that you created, complete “Nb packages” field and click Confirm.
The line of the Cargo United is added and it is associate to the BL Item.
Modify a scheduled manifest
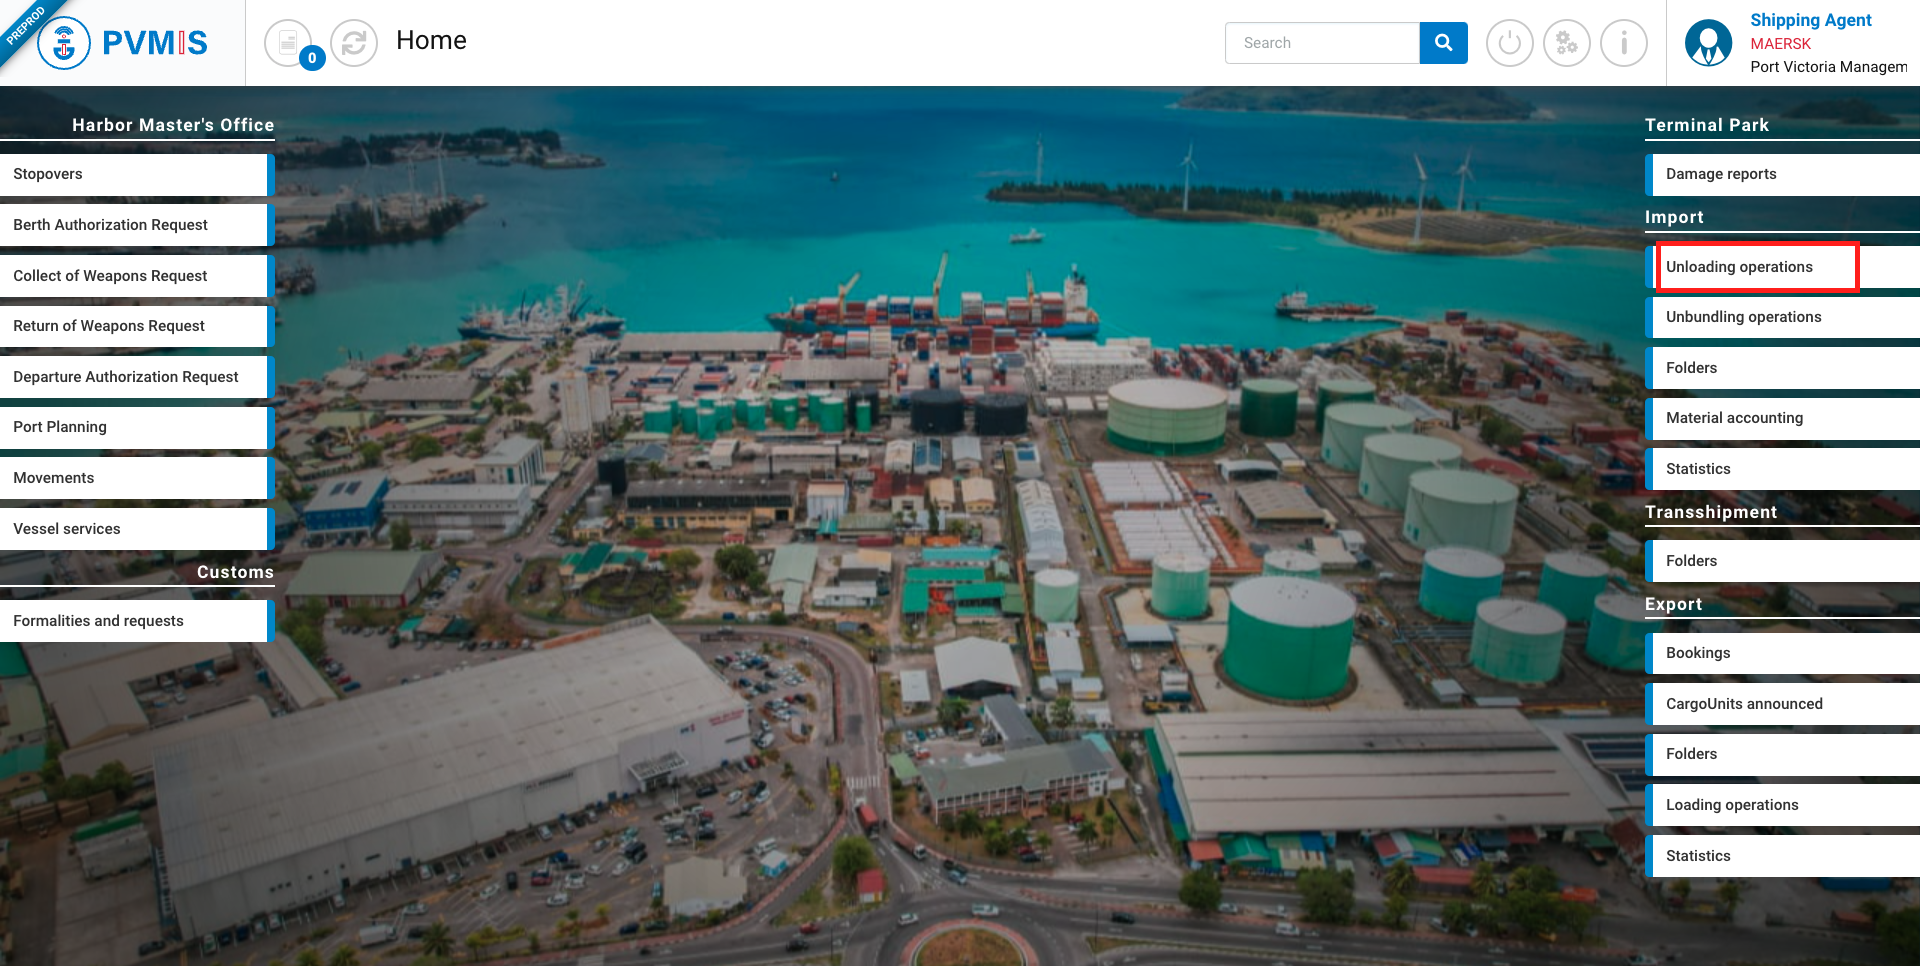
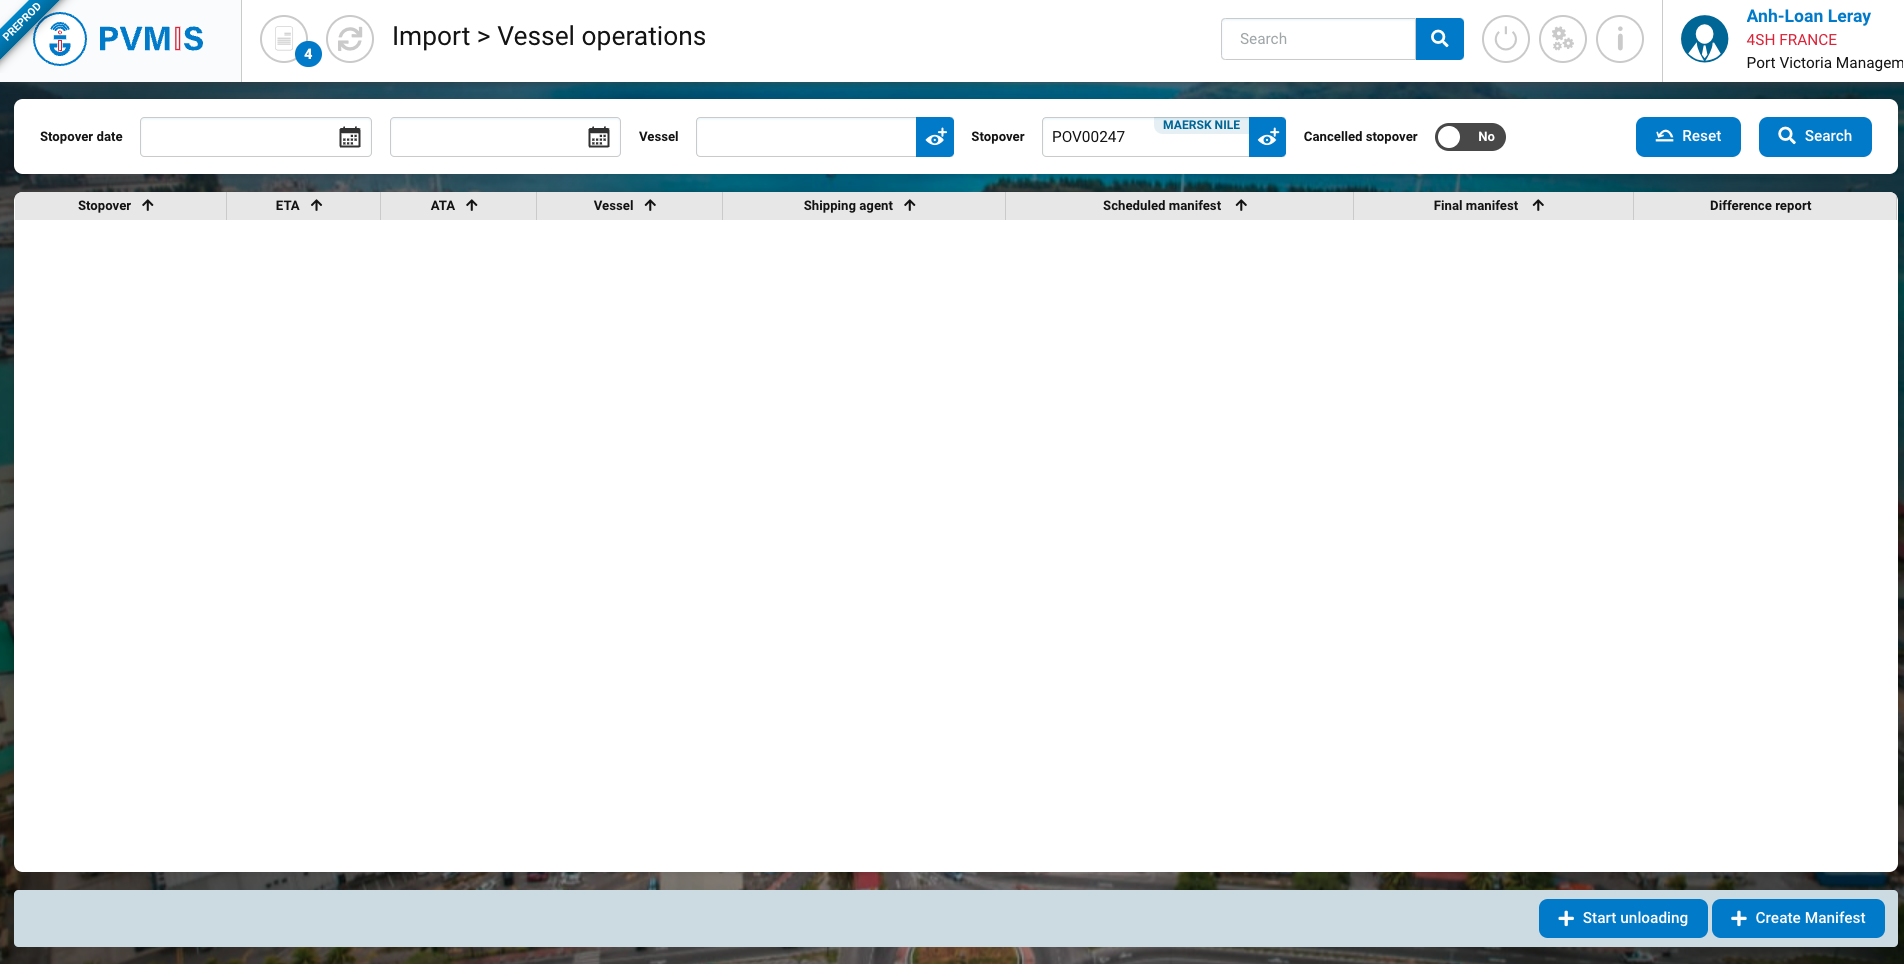
Click on the “Unloading operations” menu in the Import section:
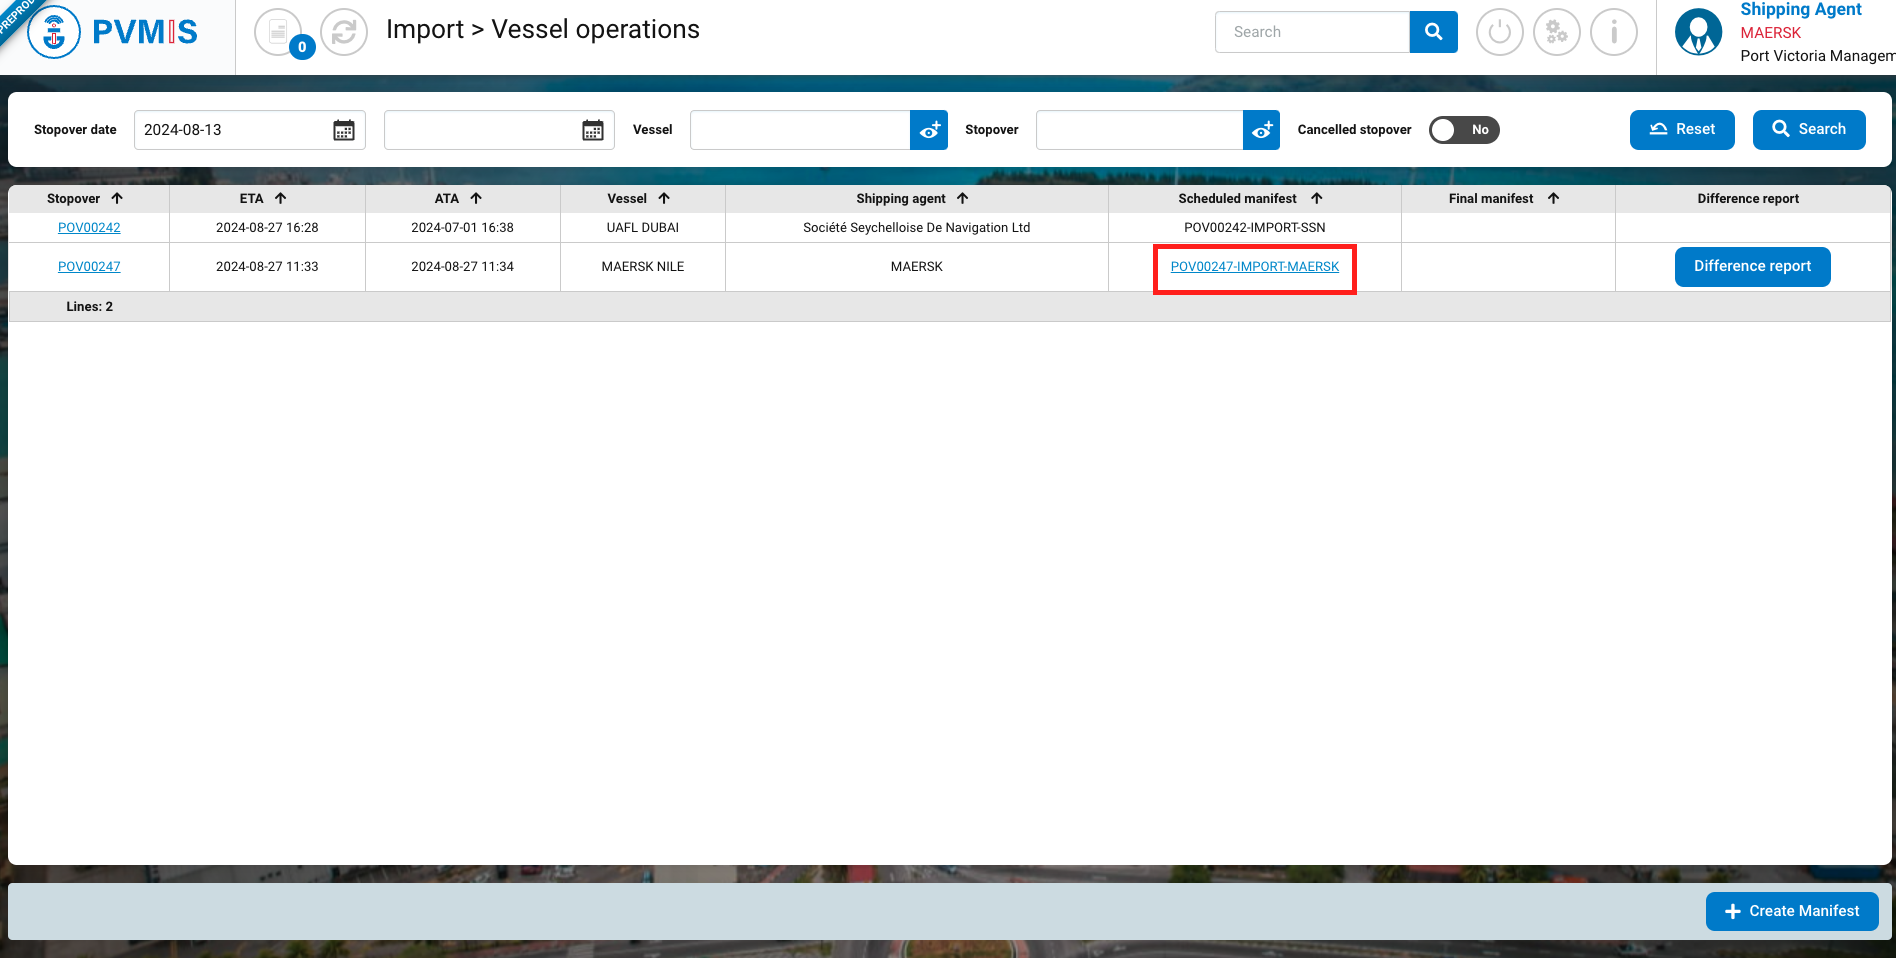
A list of all stopovers within the specified date range is presented. To access the scheduled manifest page, click on the appropriate code in the sixth column of the table.
You can view information about the manifest, and click on BL number.
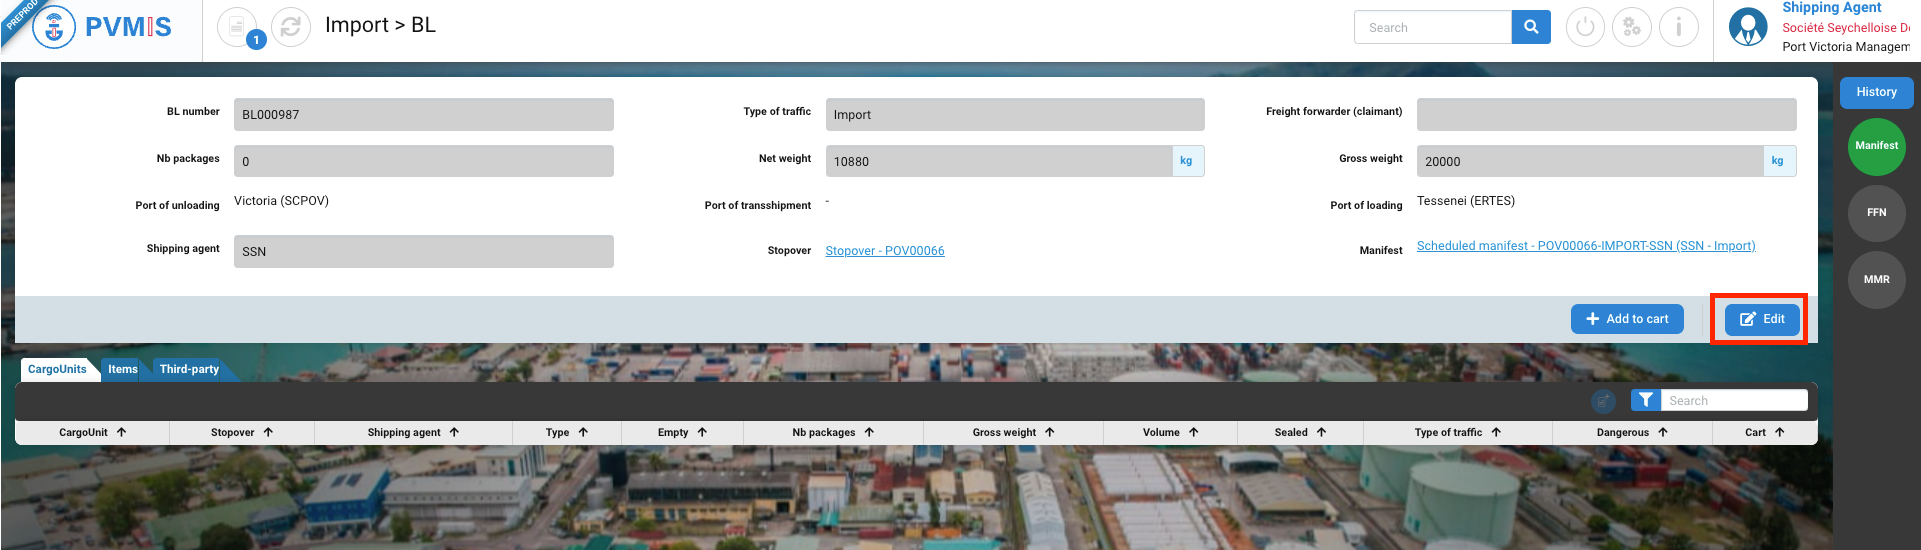
You are redirected on the Bill of Landing page, click on Edit.
You are on the Bill of Lading modification page.
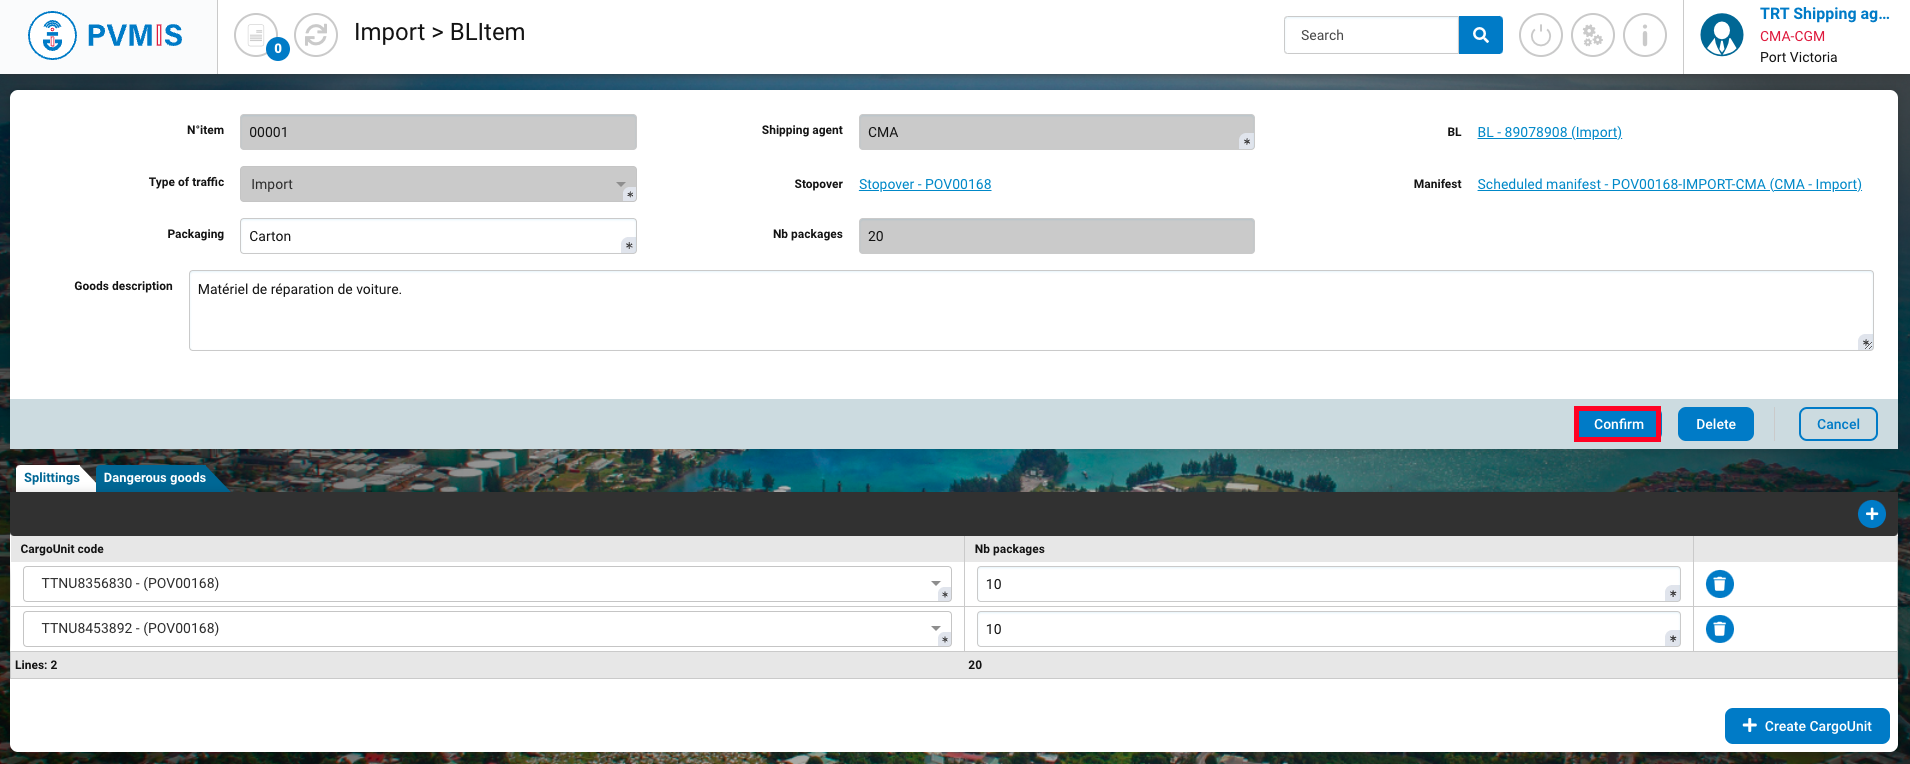
If you need to modify a CargoUnit or a Bill of Lading item, select Items section, and click on edit icon:
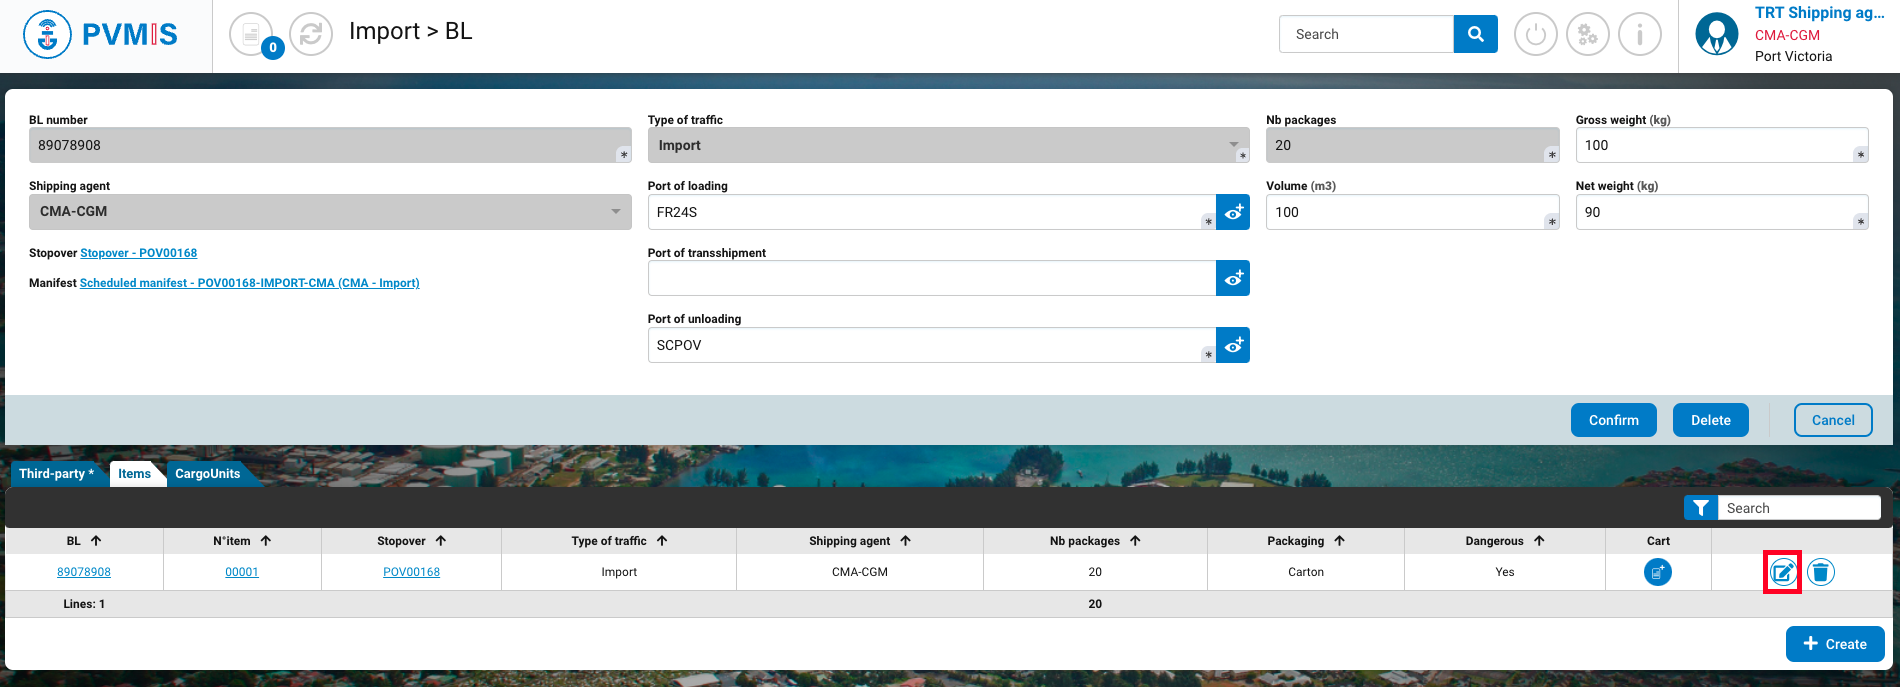
On the edit page of BL Item, you can modify informations Goods description field, Splittings and Dangerous section.
Don't forget to save the page, using the Confirm button to save your changes.
It is no longer possible to modify the scheduled manifest once a definitive one has been generated. Once the definitive manifest has been generated, modifications to the scheduled manifest will not be accepted. Contact your local customs office to cancel the final manifest.
Delete a scheduled manifest
To delete a manifest, please contact an adminstrator. .
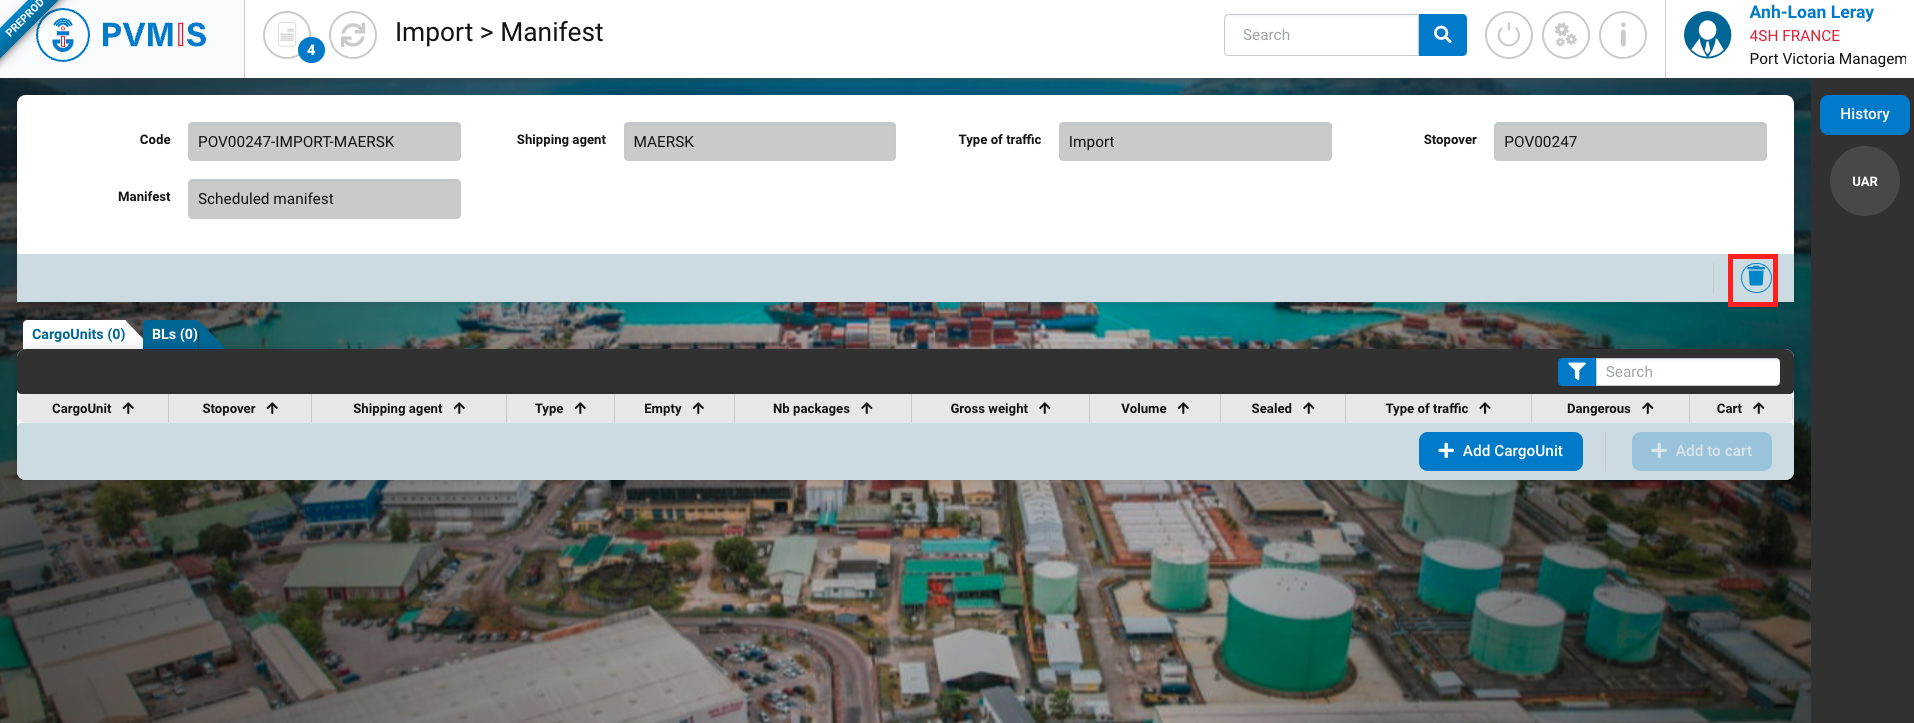
As Admin, click on the “Unloading operations” menu in the Import section:
A list of all stopovers within the specified date range is presented. To access the scheduled manifest page, click on the appropriate code in the sixth column of the table.
You can view information about the manifest, click on trash icon :
A modal will open, click on Confirm button :
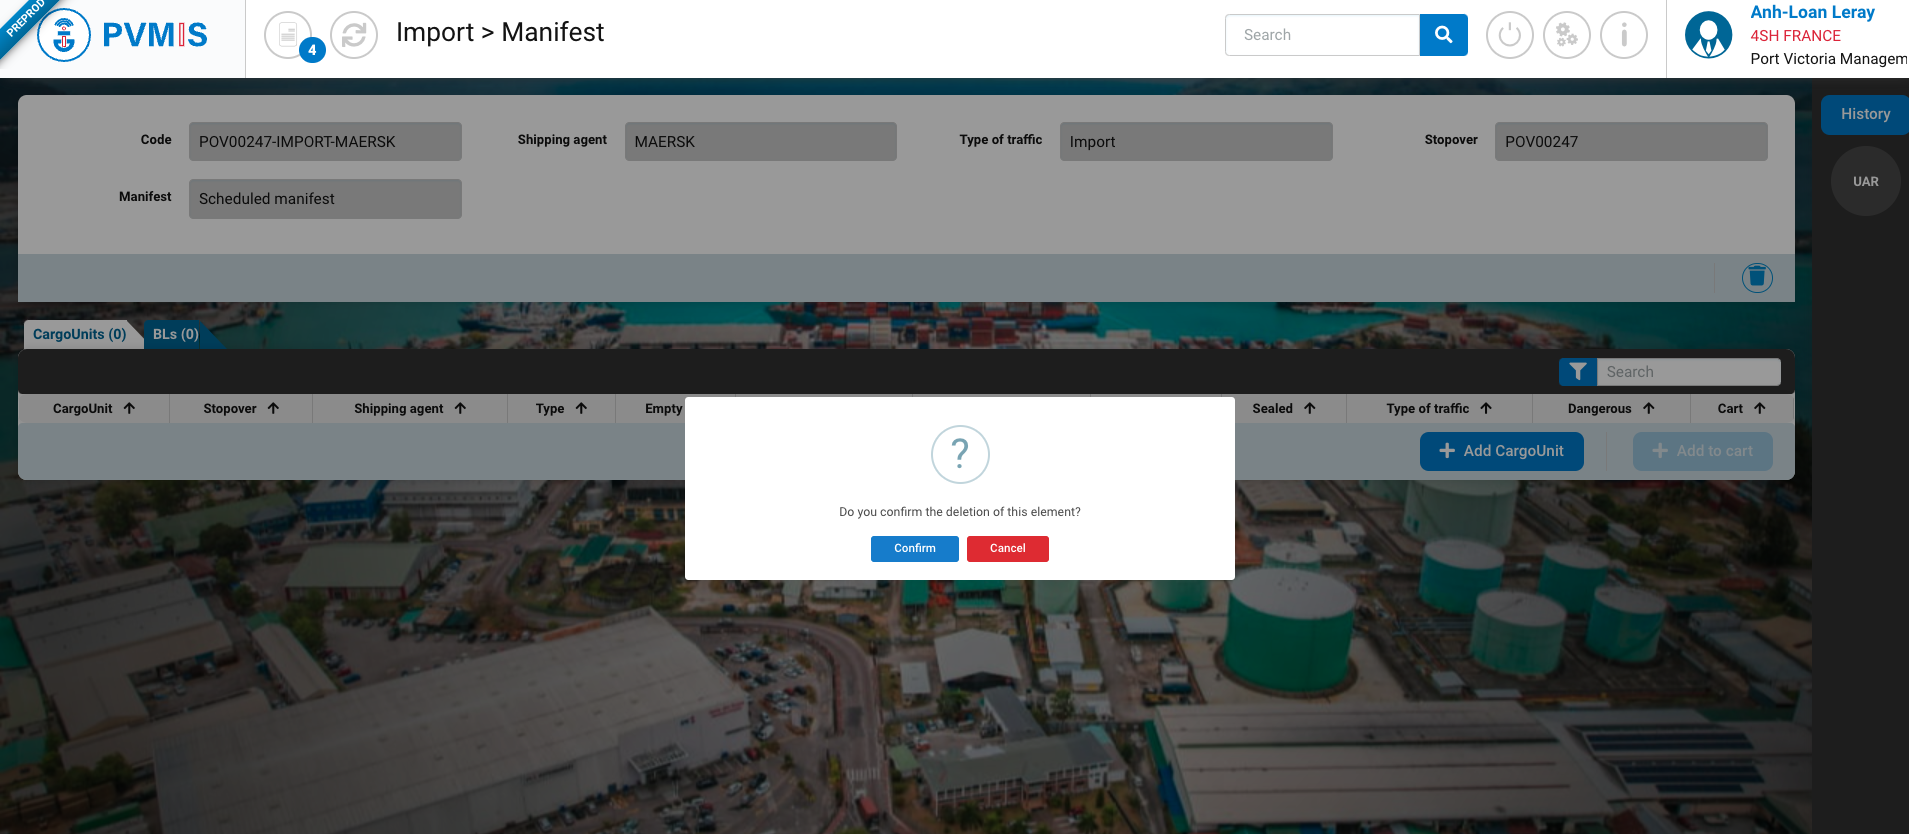
The scheduled manifest has been deleted, but no longer appears in the Unloading operations menu.
Delete a BL
A BL can only be deleted prior to unloading agent authorization (UAR status). A BL can only be deleted prior to unloading agent authorization (UAR status). After the UAR has been applied, the agent must request authorization to modify the manifest from customs (MMR status).
As shipping agent you will be able to delete BLs on the user interface.
Click on the “Unloading operations” menu in the Import section:
A list of all stopovers within the specified date range is presented. To access the scheduled manifest page, click on the appropriate code in the sixth column of the table.
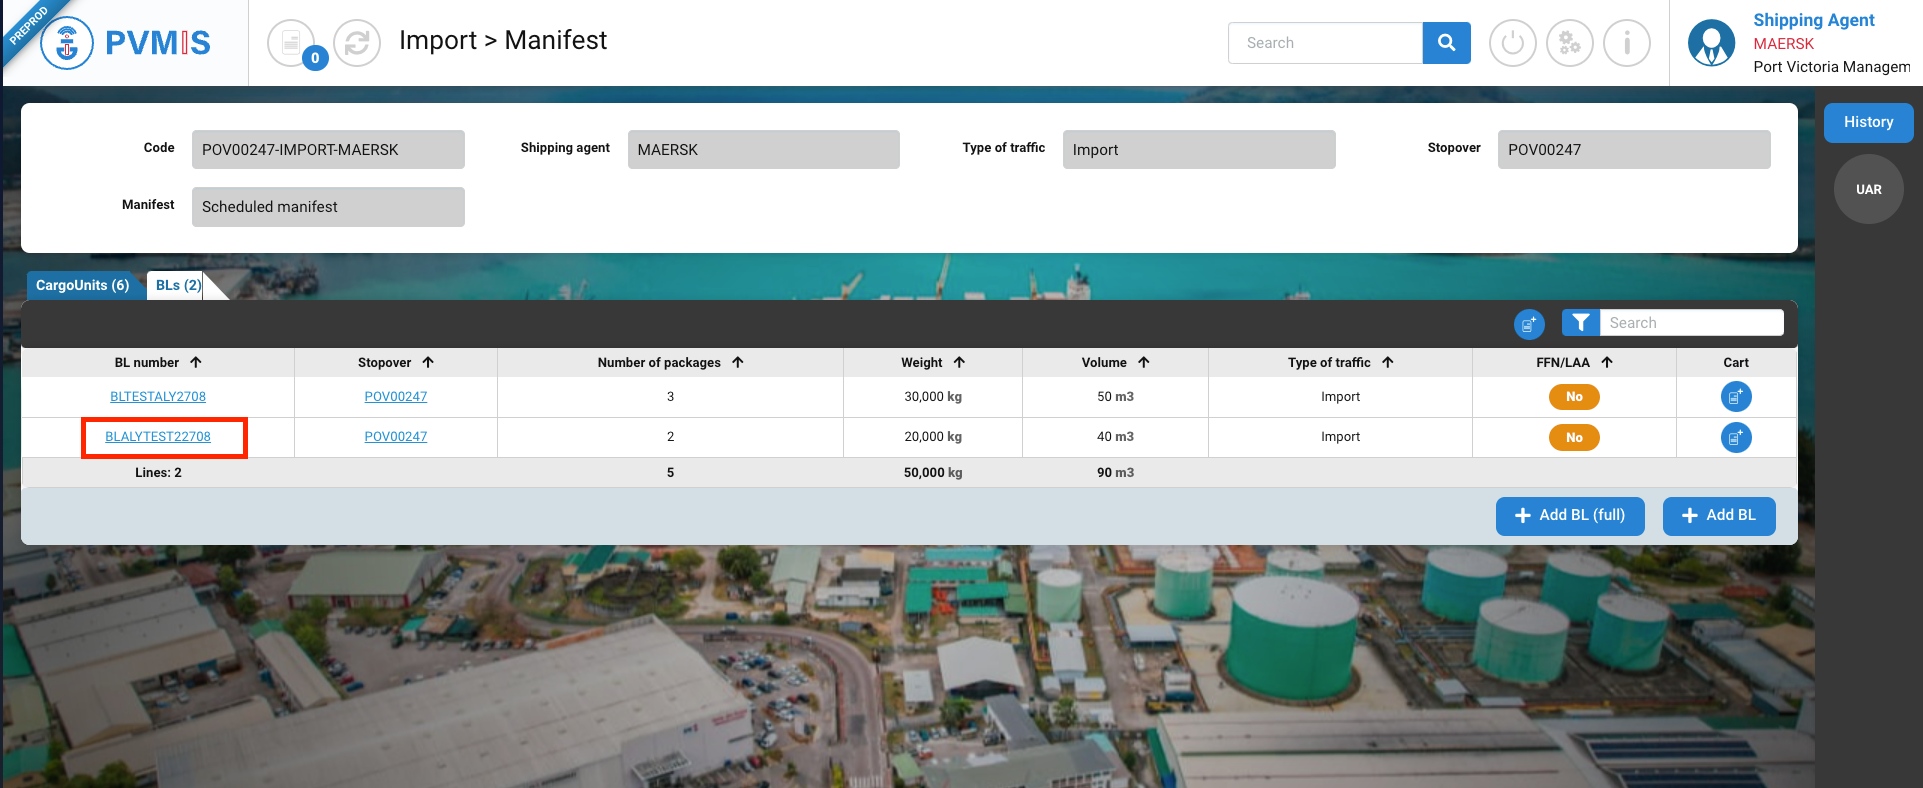
You can view information about the manifest, in the BLs section click on the link of the corresponding BL in the BL number column:
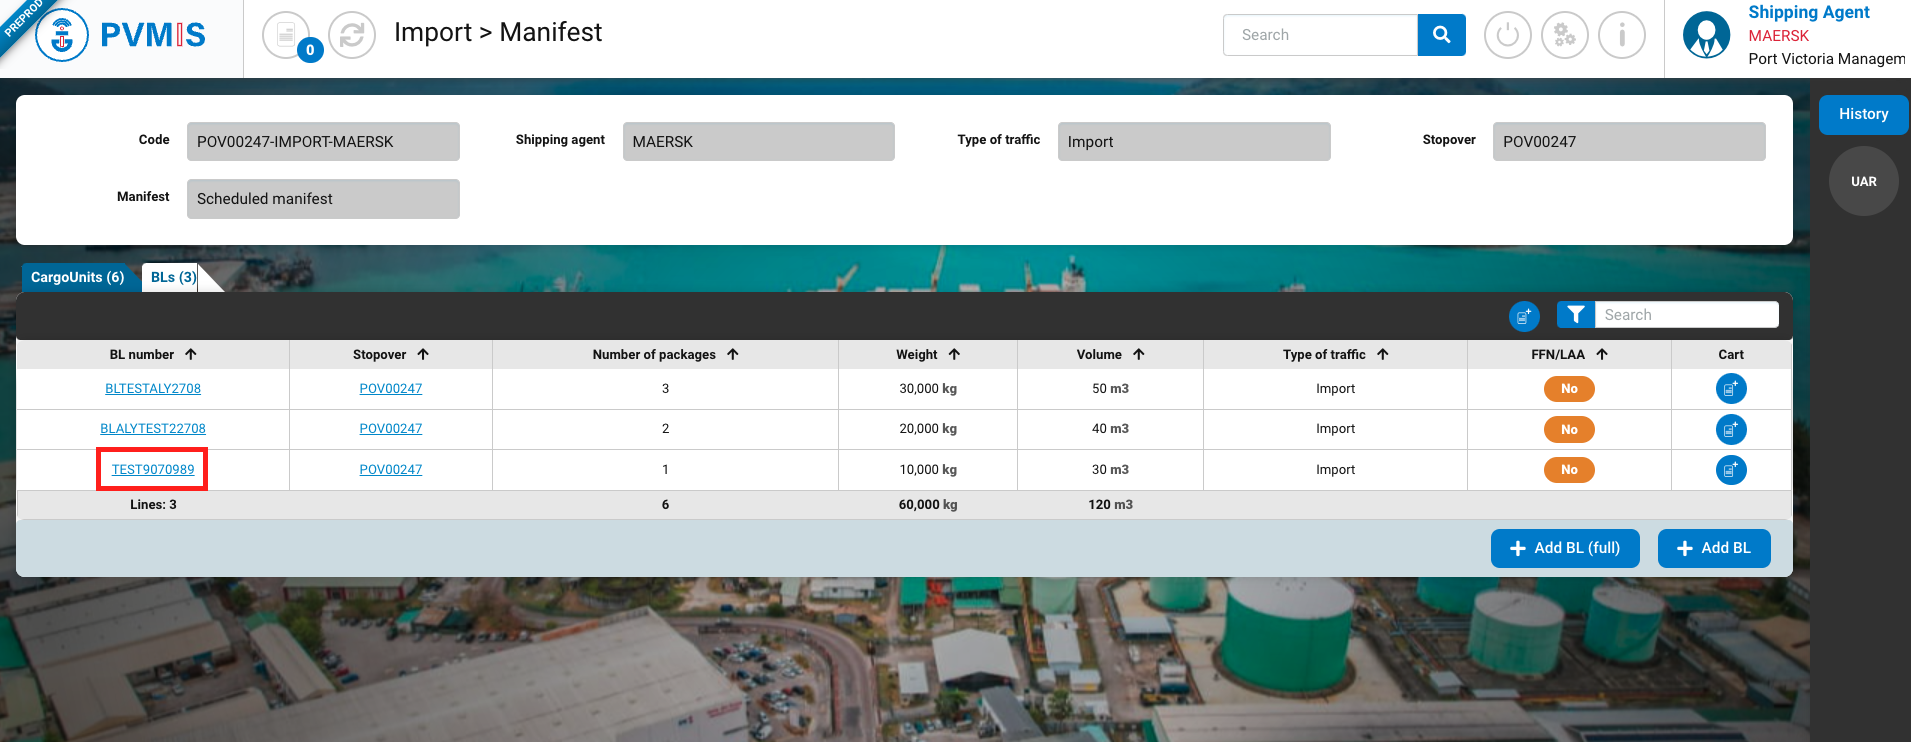
You can consult the informations of the BL, then click on Edit button :
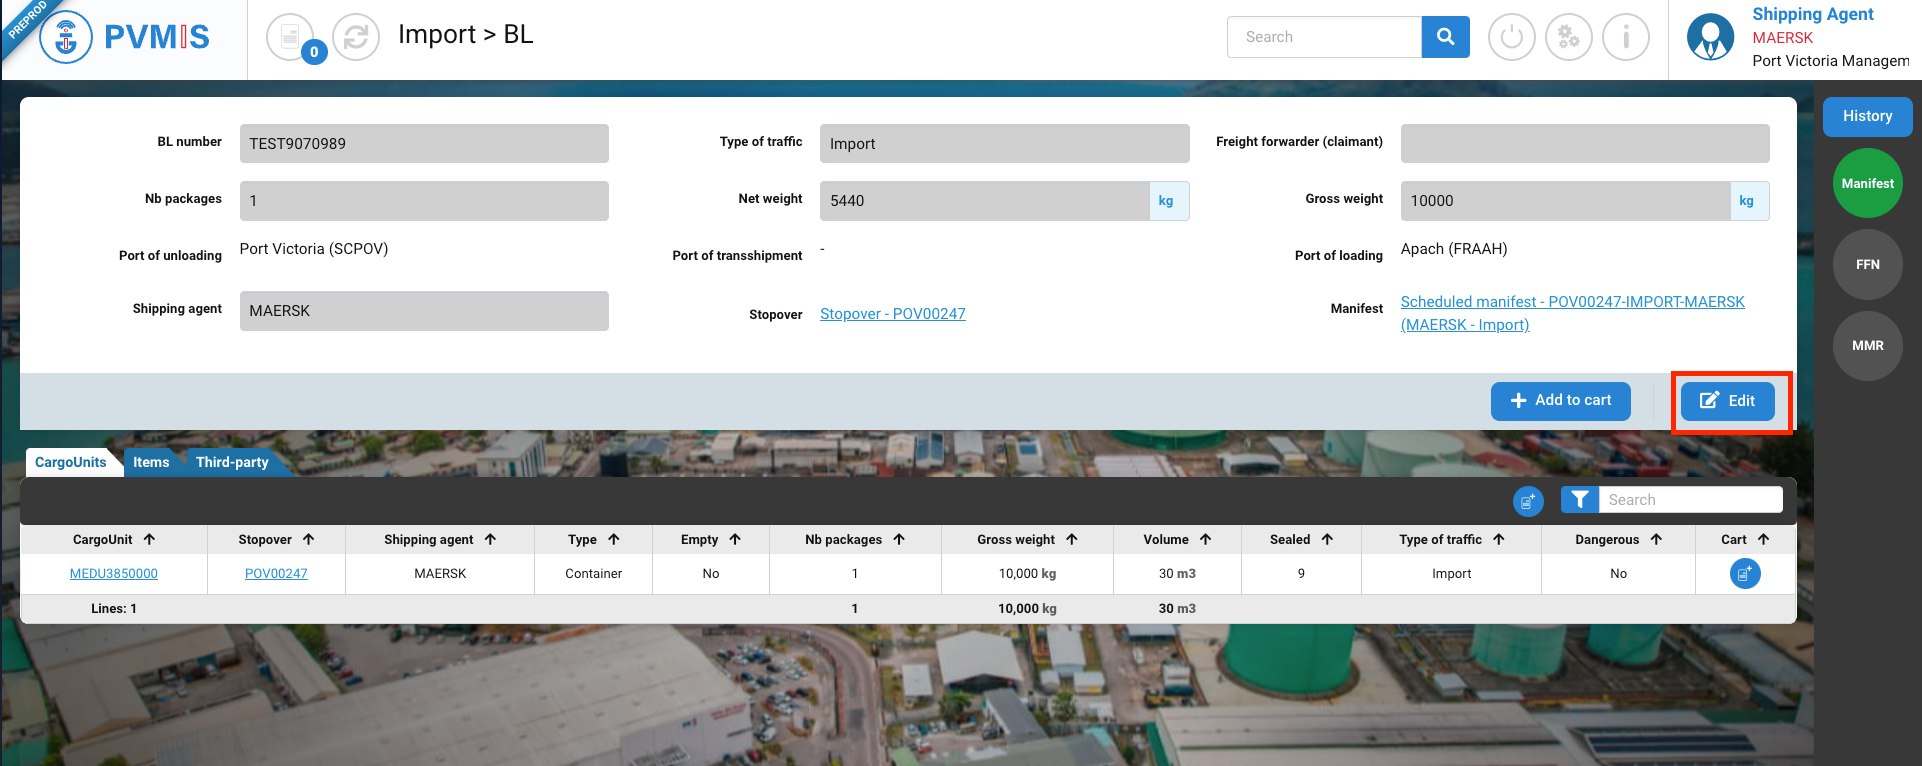
On the edit page of the BL, click on the trash icon :
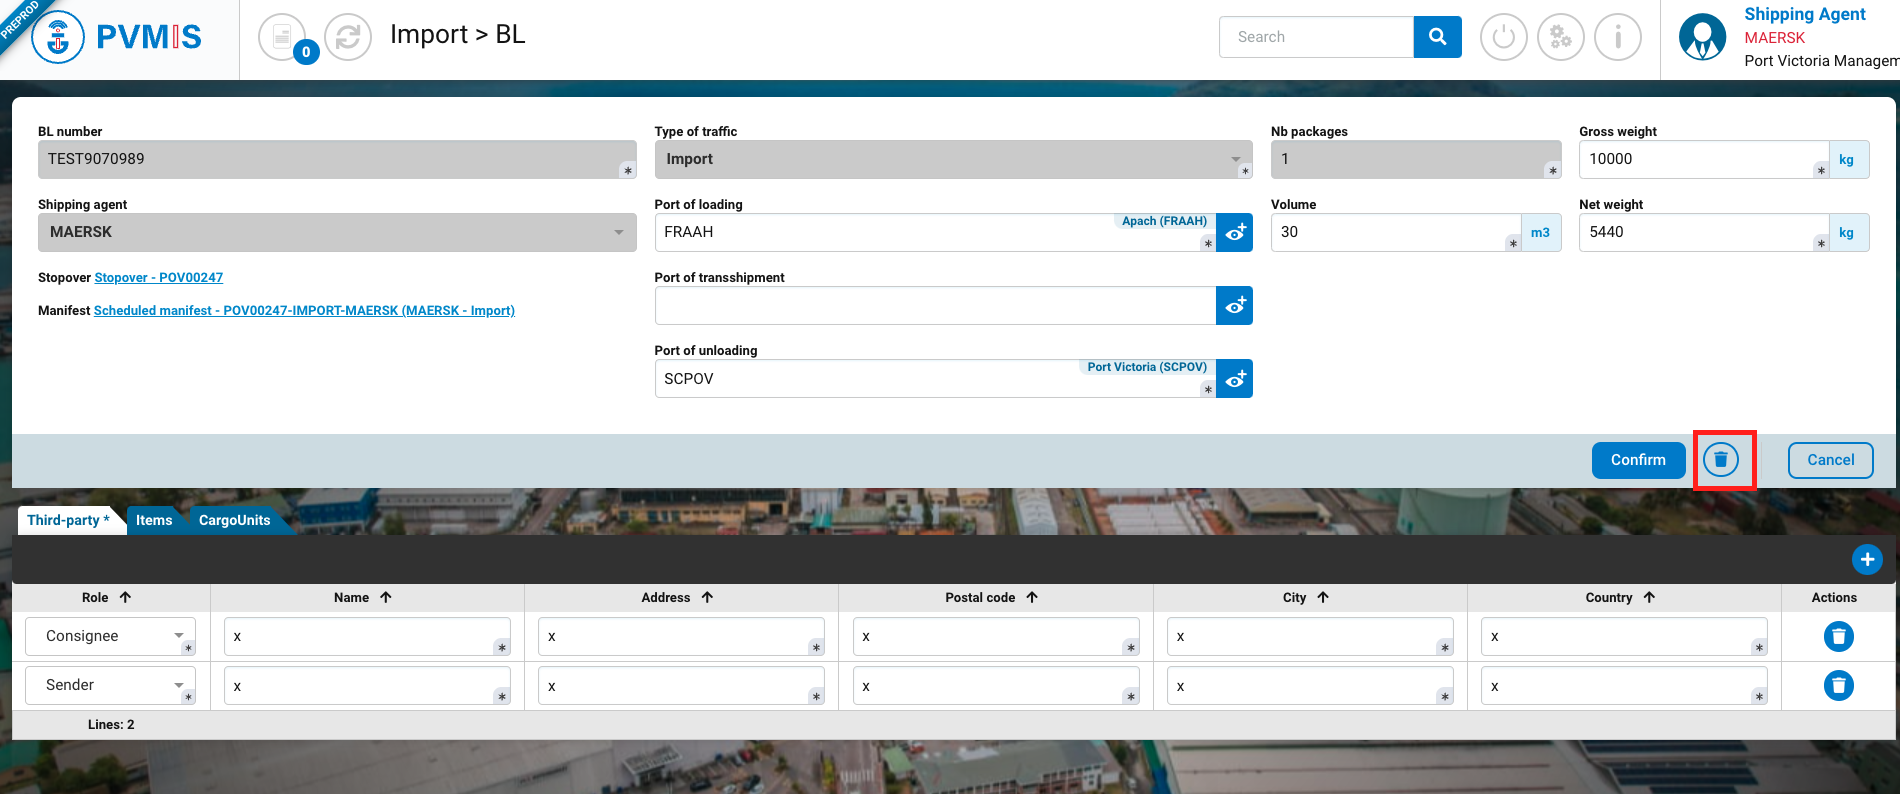
Your BL has been correctly deleted.
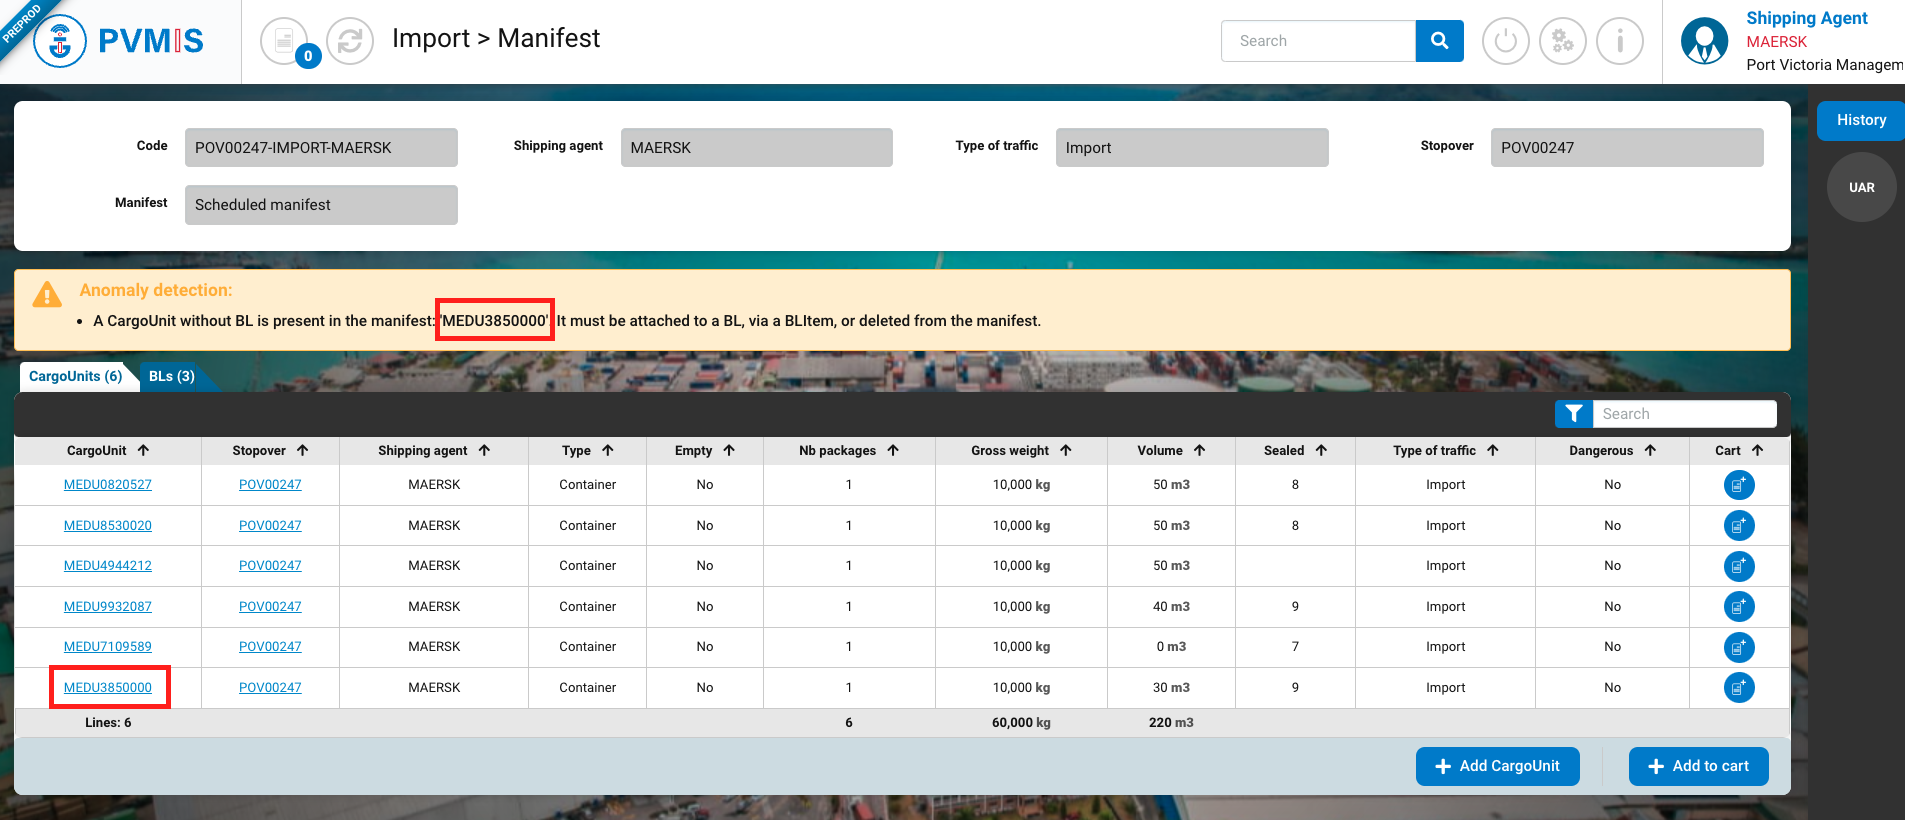
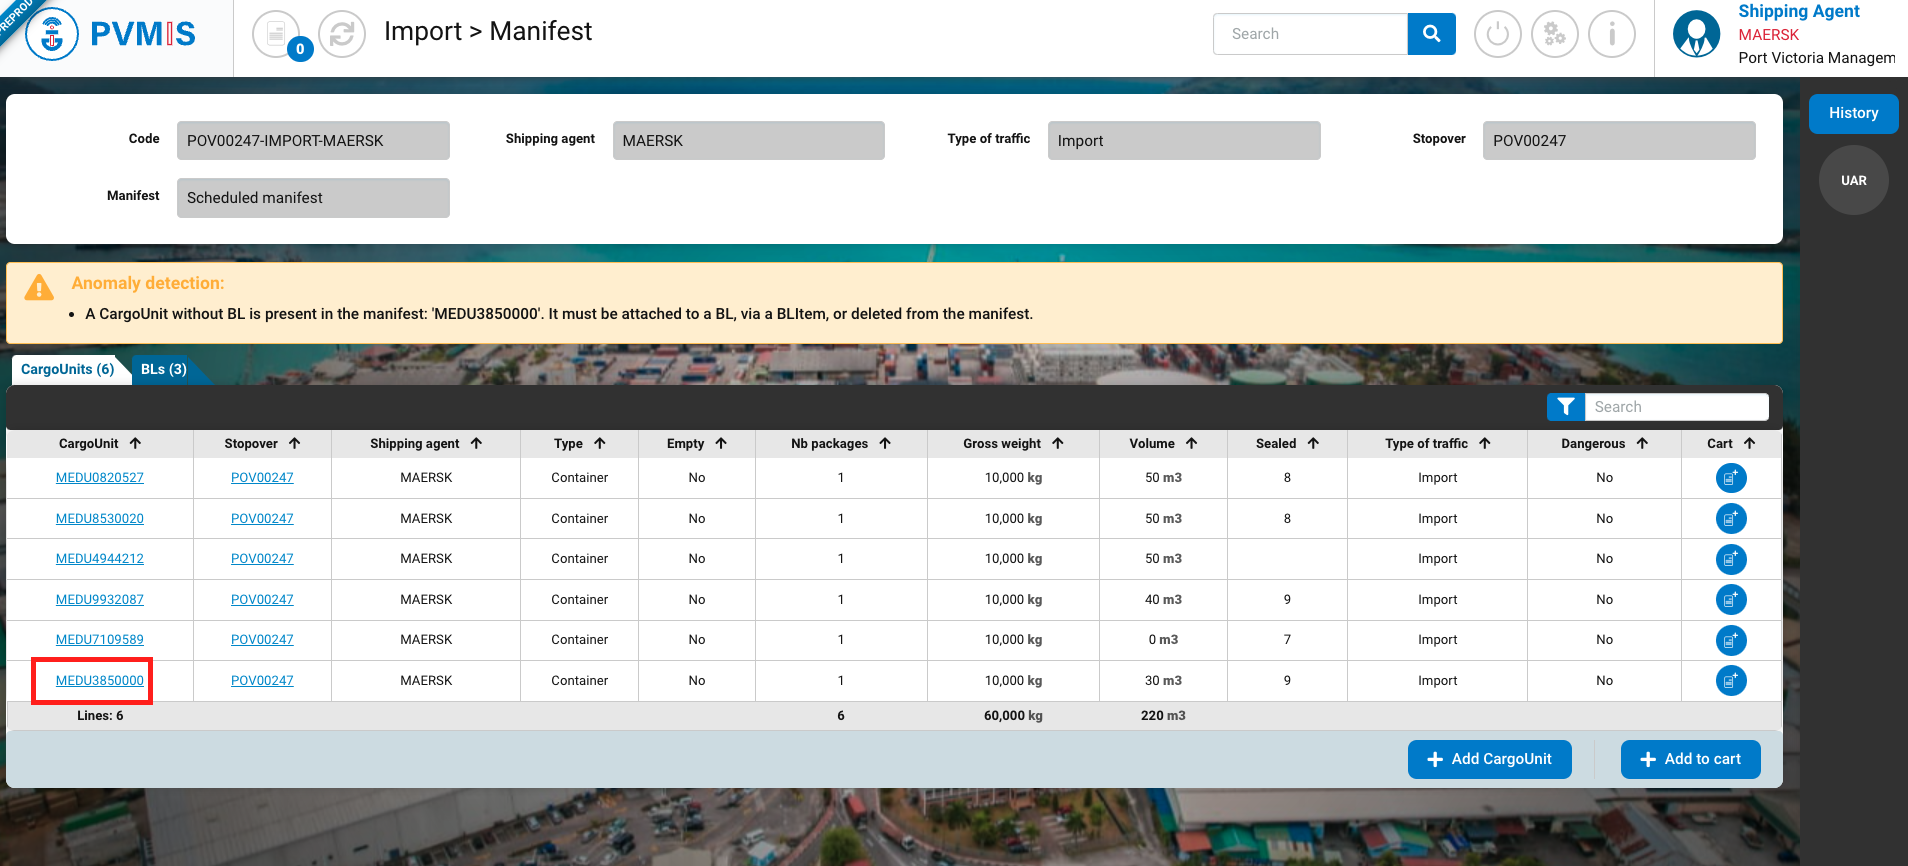
When you delete a BL, the CargoUnits that were included are still present in your scheduled manifest, but are no longer attached to the BL. You need to delete them to allow your manifest to be unloaded (UAR status). An “Anomaly detection” message is displayed to target components that are not attached to BLs.
Delete a CargoUnit
A CargoUnit can only be deleted prior to unloading agent authorization (UAR status). A CargoUnit can only be deleted prior to unloading agent authorization (UAR status). After the UAR has been applied, the agent must request authorization to modify the manifest from customs (MMR status).
As shipping agent you will be able to delete CargoUnits on the user interface.
Click on the “Unloading operations” menu in the Import section:
A list of all stopovers within the specified date range is presented. To access the scheduled manifest page, click on the appropriate code in the sixth column of the table.
You can view information about the manifest, in the CargoUnits section click on the link of the corresponding CargoUnit in the CargoUnit column:
On the detail of the CargoUnit, click on the Edit button :
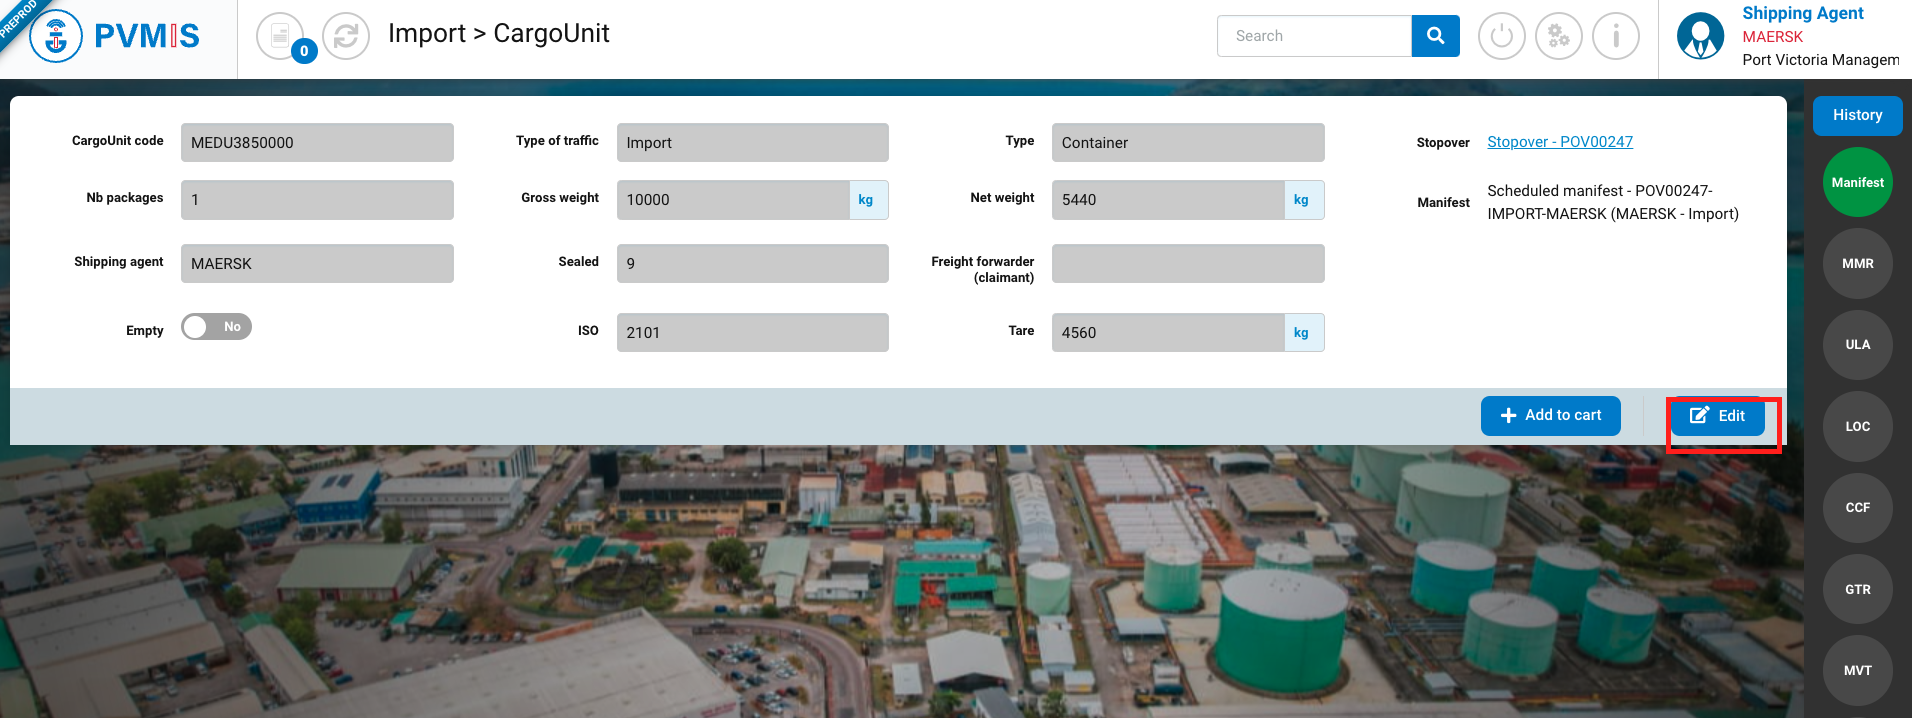
On the edit page, click on the trash icon :

CargoUnit has been correctly deleted
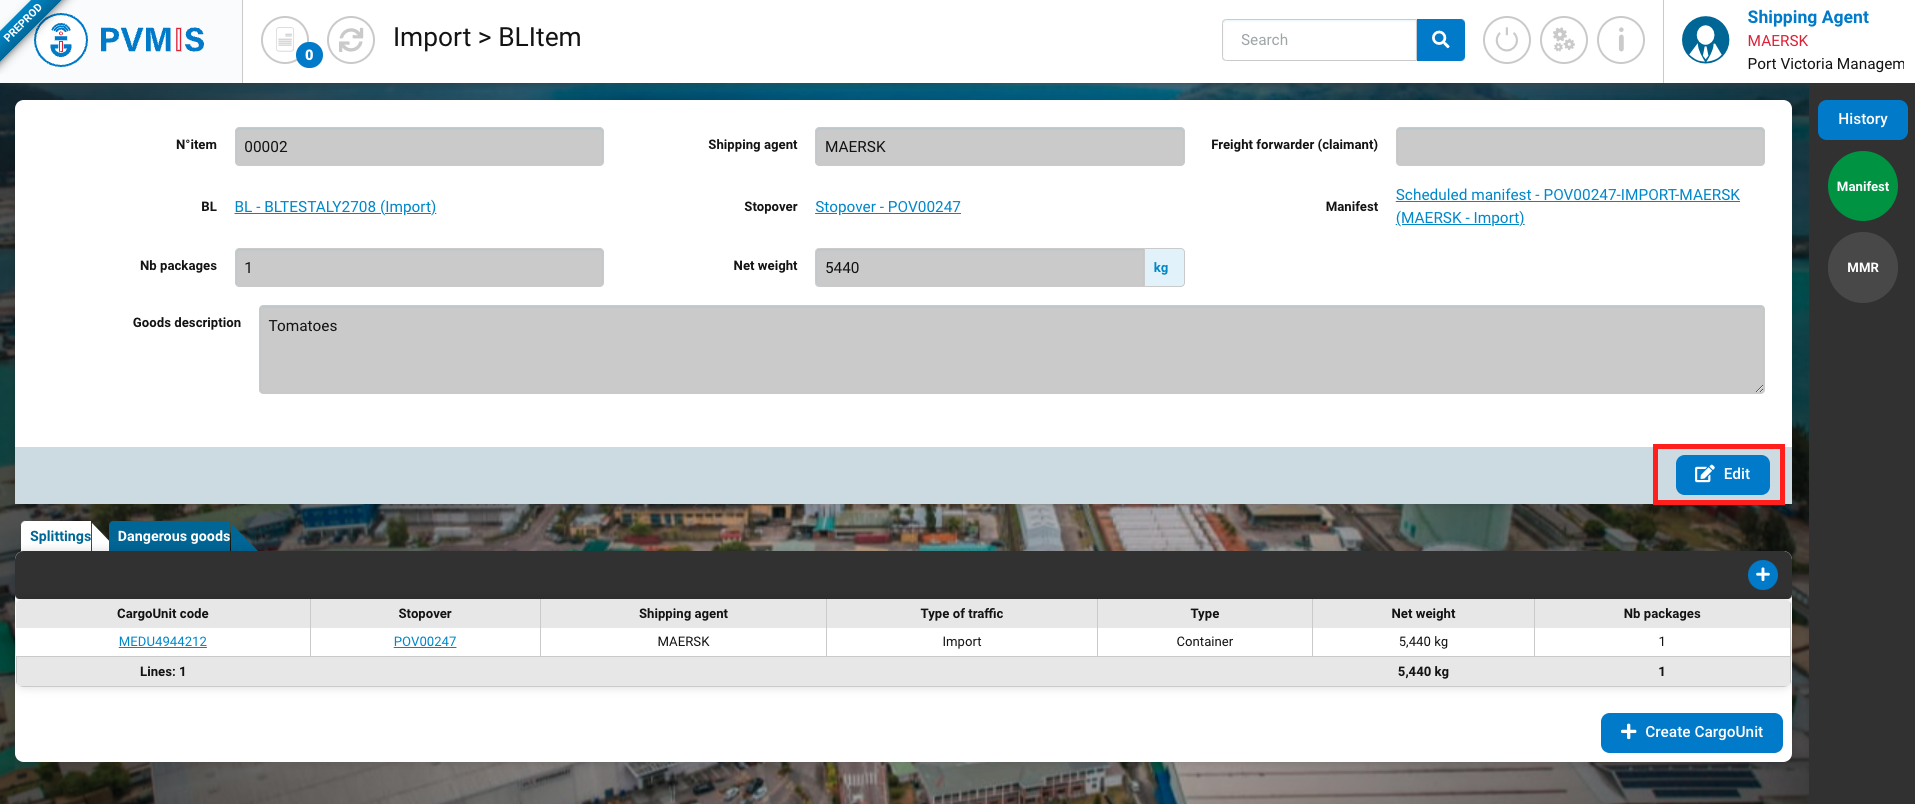
Delete a BL item
A BL item can only be deleted prior to unloading agent authorization (UAR status). A BL item can only be deleted prior to unloading agent authorization (UAR status). After the UAR has been applied, the agent must request authorization to modify the manifest from customs (MMR status).
As shipping agent you will be able to delete BLitems on the user interface.
Click on the “Unloading operations” menu in the Import section:
A list of all stopovers within the specified date range is presented. To access the scheduled manifest page, click on the appropriate code in the sixth column of the table.
You can view information about the manifest, in the BLs section click on the link of the corresponding BL including the BL item in the BLs column:
You can consult the informations of the BL, in the Items section, click on the BL item link corresponding in the N°item column :
Click on Edit button:
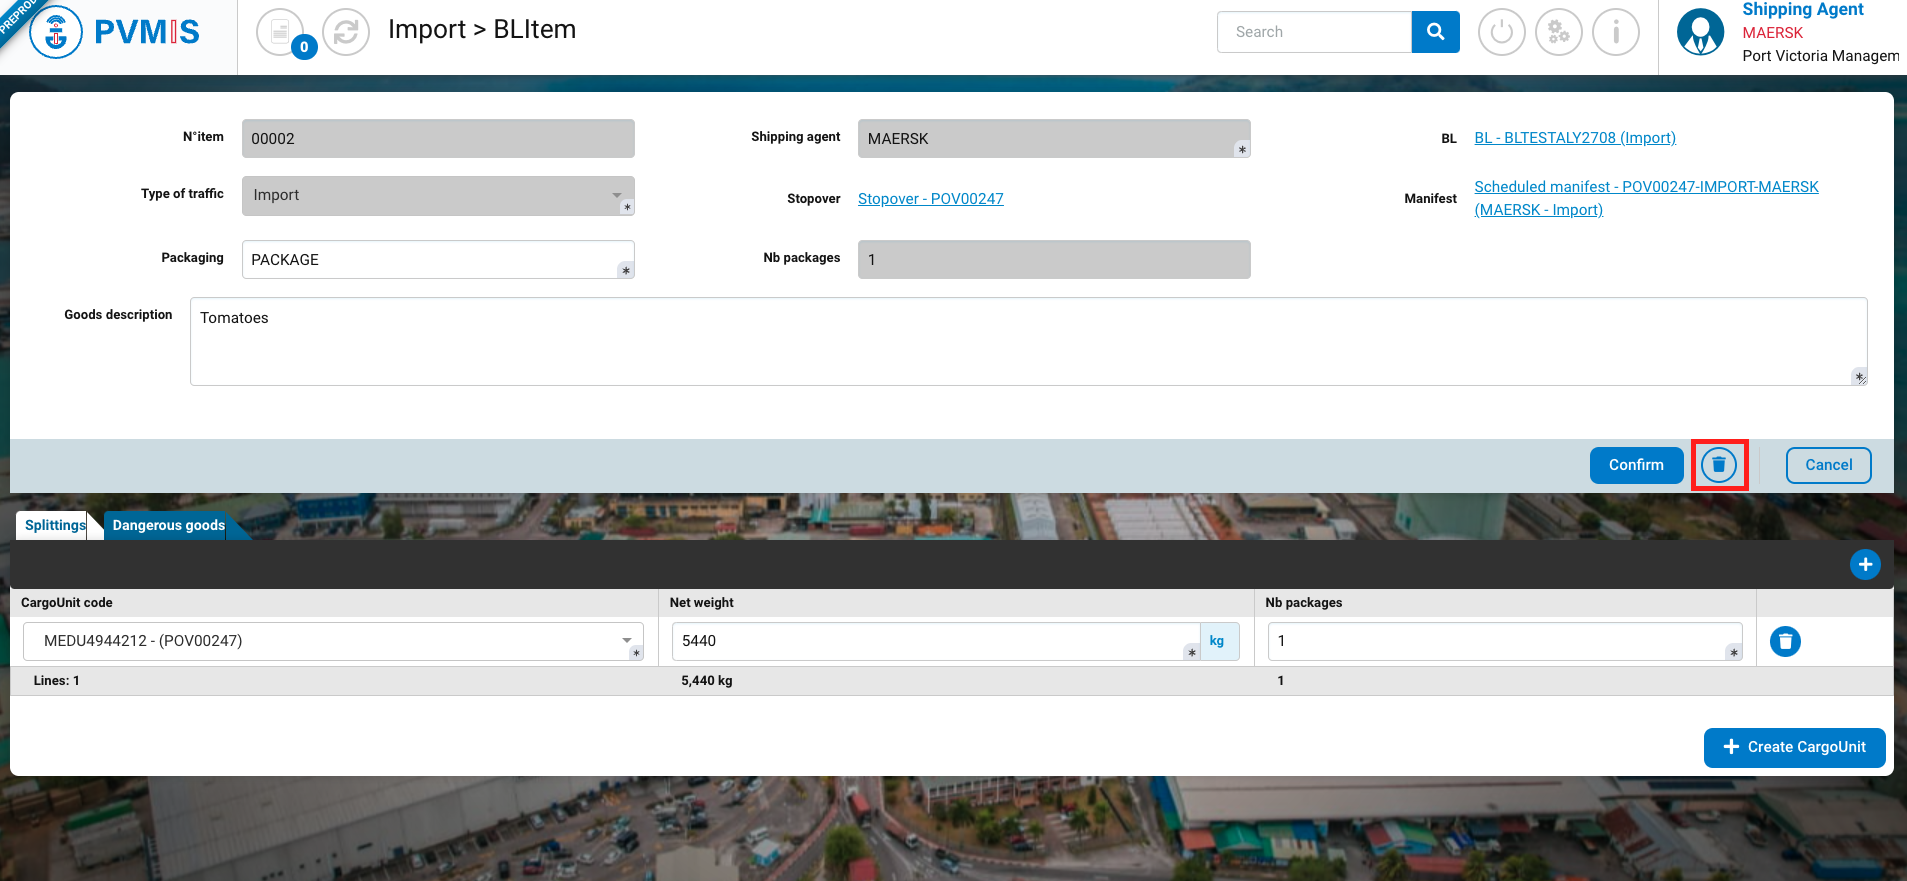
Click on Trash icon:
A modal will open, click on Confirm button:
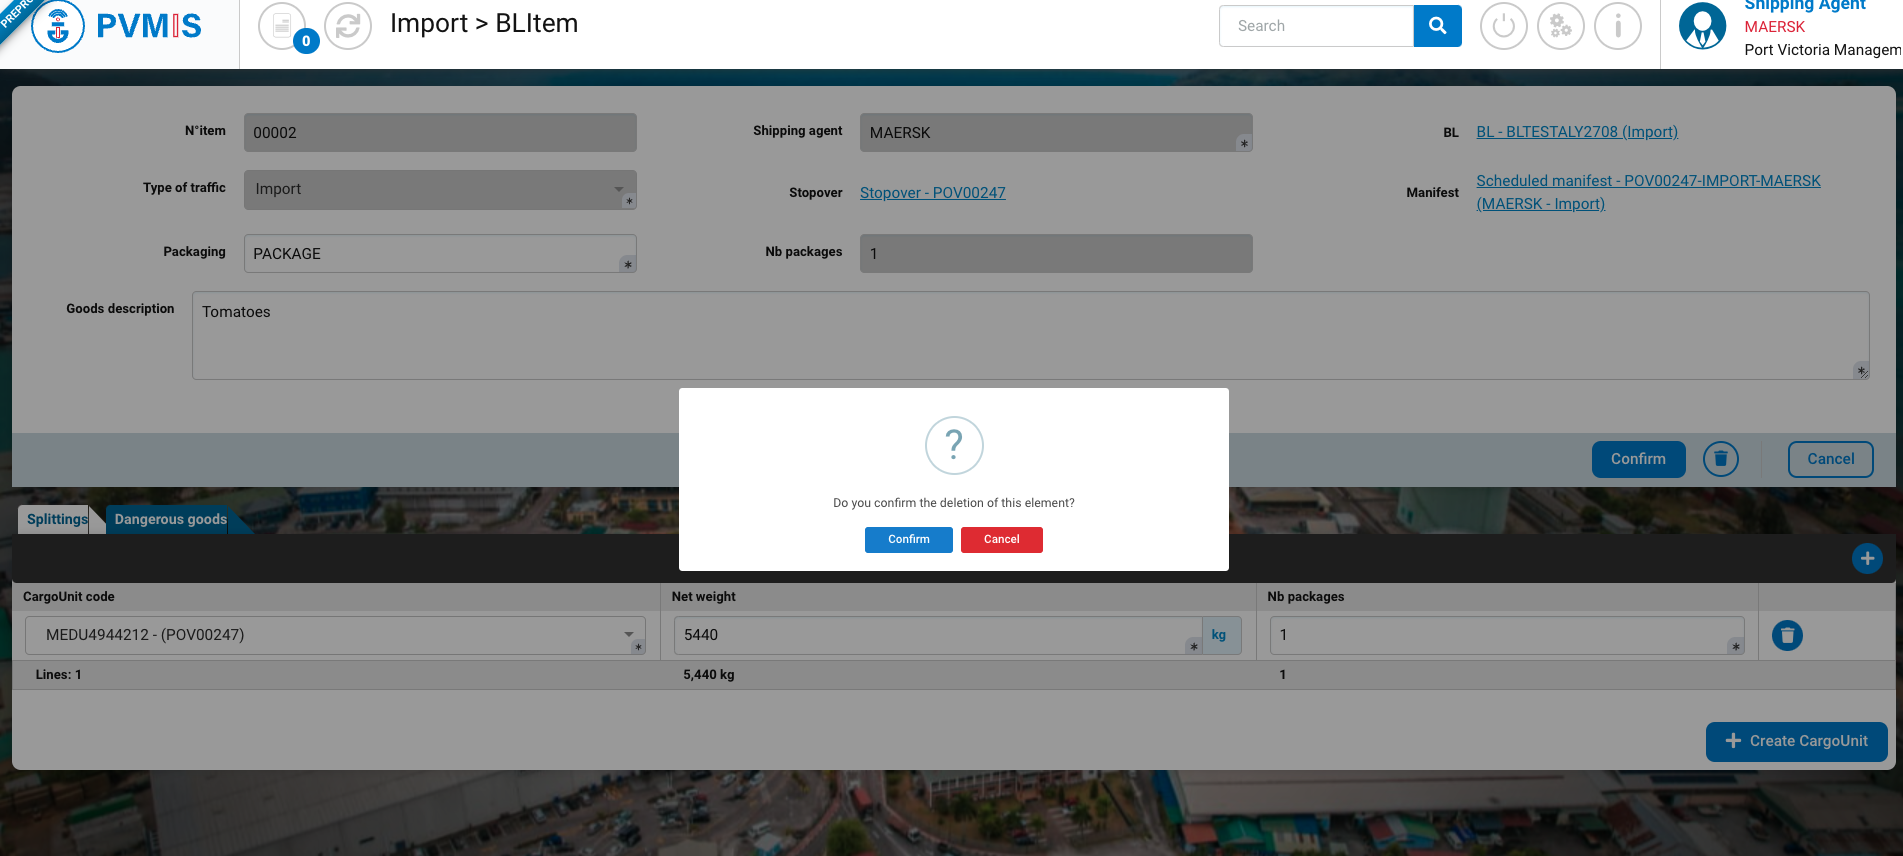
The BL item was correctly deleted.
When you delete a BL item, the CargoUnits that were included are still present in your scheduled manifest, but are no longer attached to the BL. You need to delete them to allow your manifest to be unloaded (UAR status), if you don't do this, when applying the UAR status you'll see an error message with the CargoUnit code that isn't linked to any BL
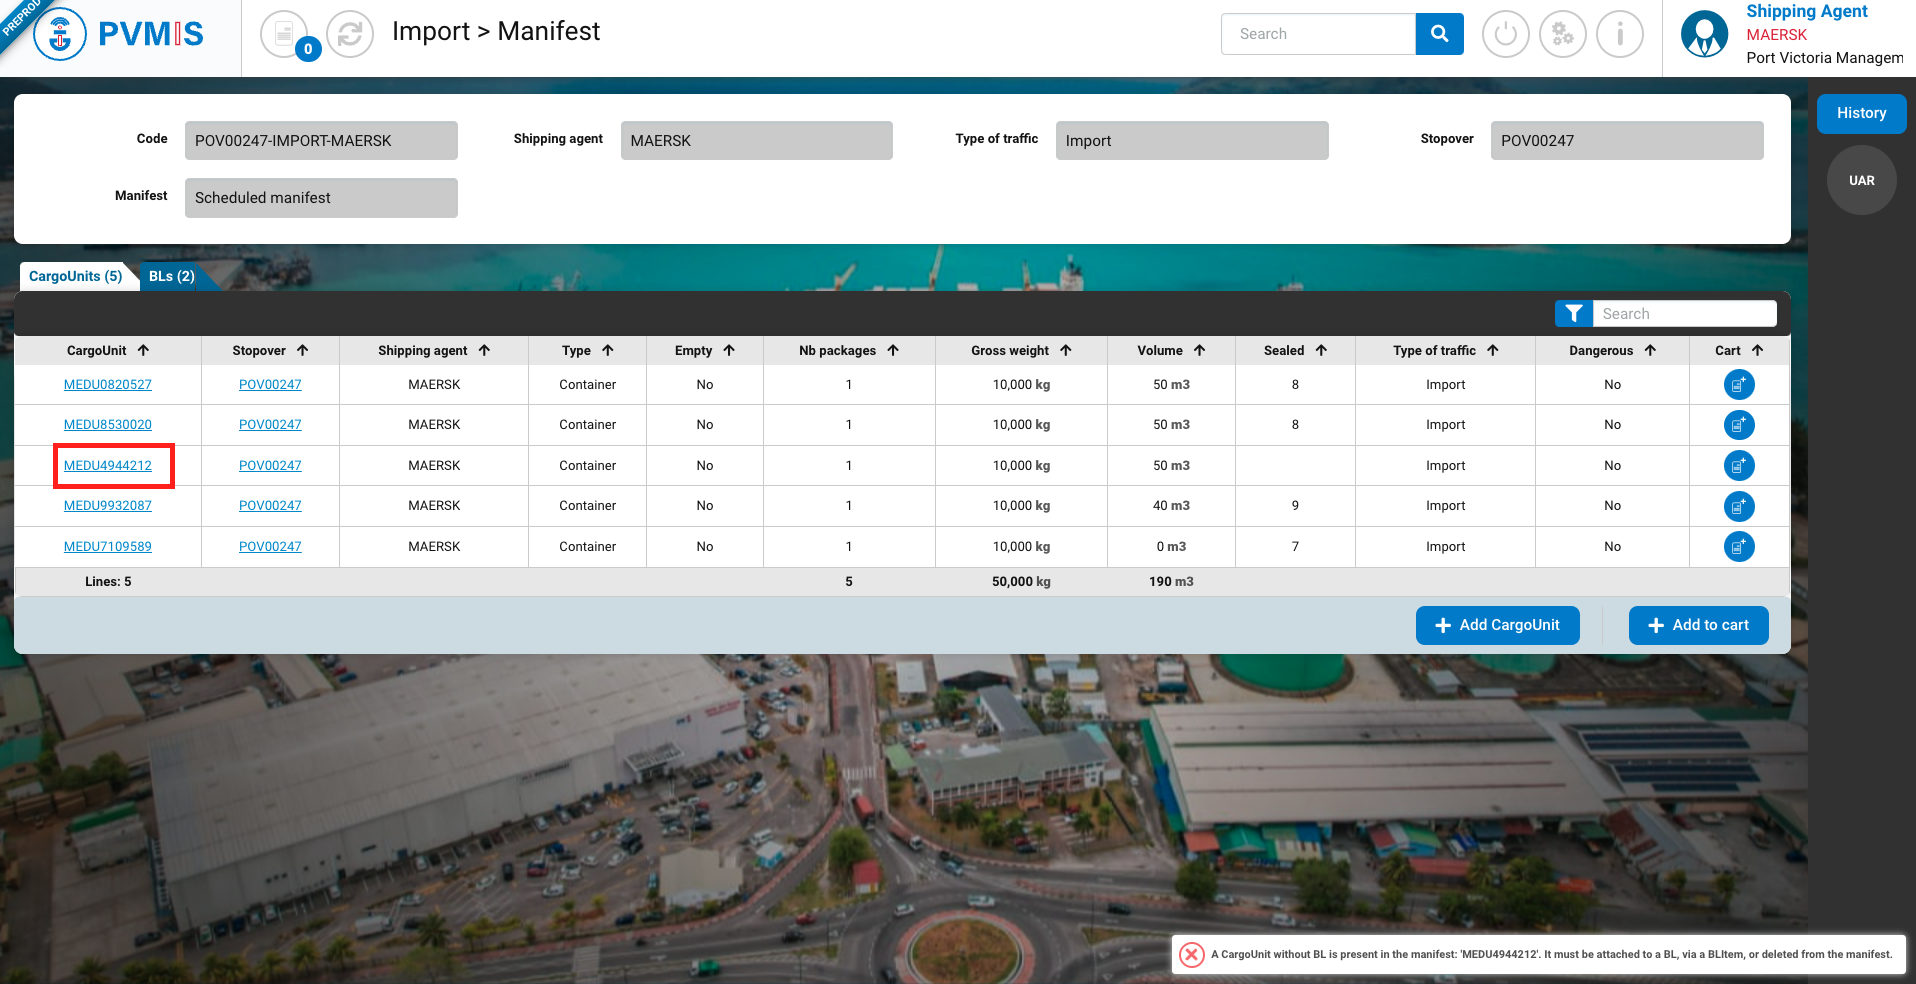
After deleting the CargoUnit concerned, you can then authorize the unloading of your sheduled manifest.
