|
Actors |
Shipping Agent |
|---|---|
|
Description |
The main step for declaring the goods manifest |
|
Creation rights |
Shipping Agent |
|
Visibility rights |
Shipping Agent, Customs, Stevedores, Handlers |
This part of the documentation is a specific for fishing operations. It will focus on the differences with the main PVMIS processes.
Creating a fishing scheduled manifest
Note that this is an optional step in PVMIS. You only have to do it if you want to transmit this manifest to ASYCUDA.
To see more information on the generic manifest creation process, please visit manifest creation documentation.
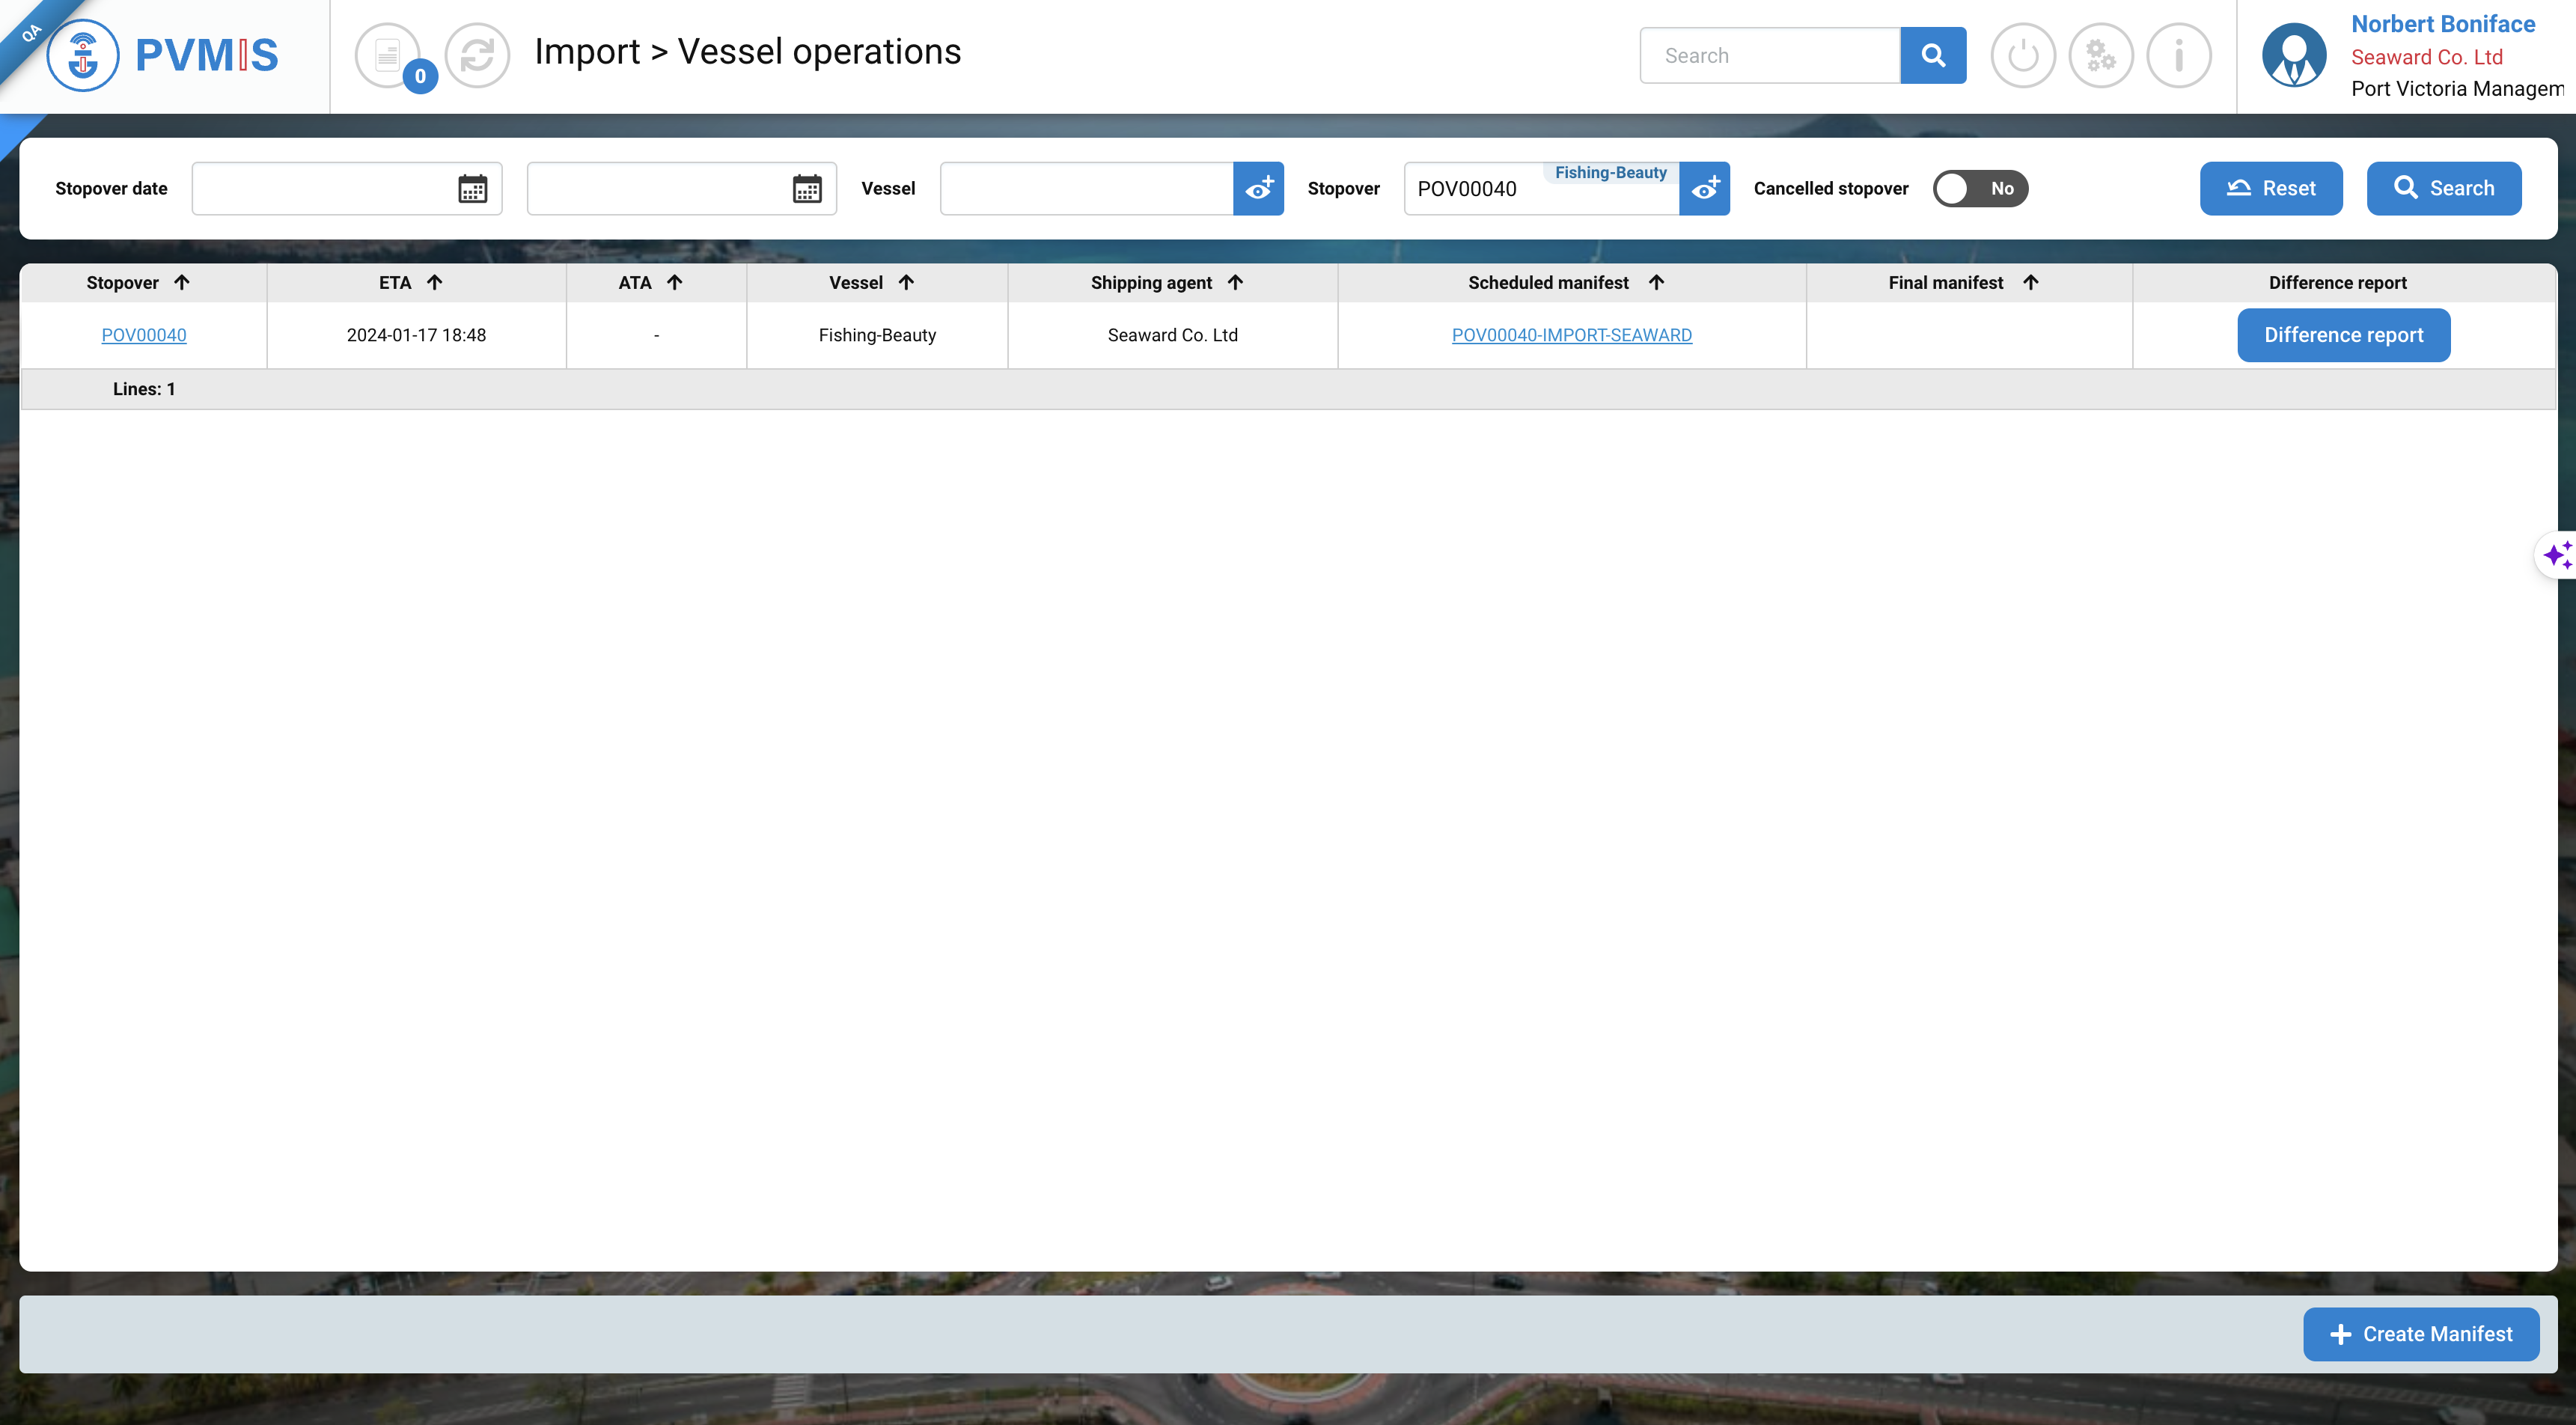
On the stopover screen, go to the create manifest button and click Validate to add a new empty scheduled manifest.
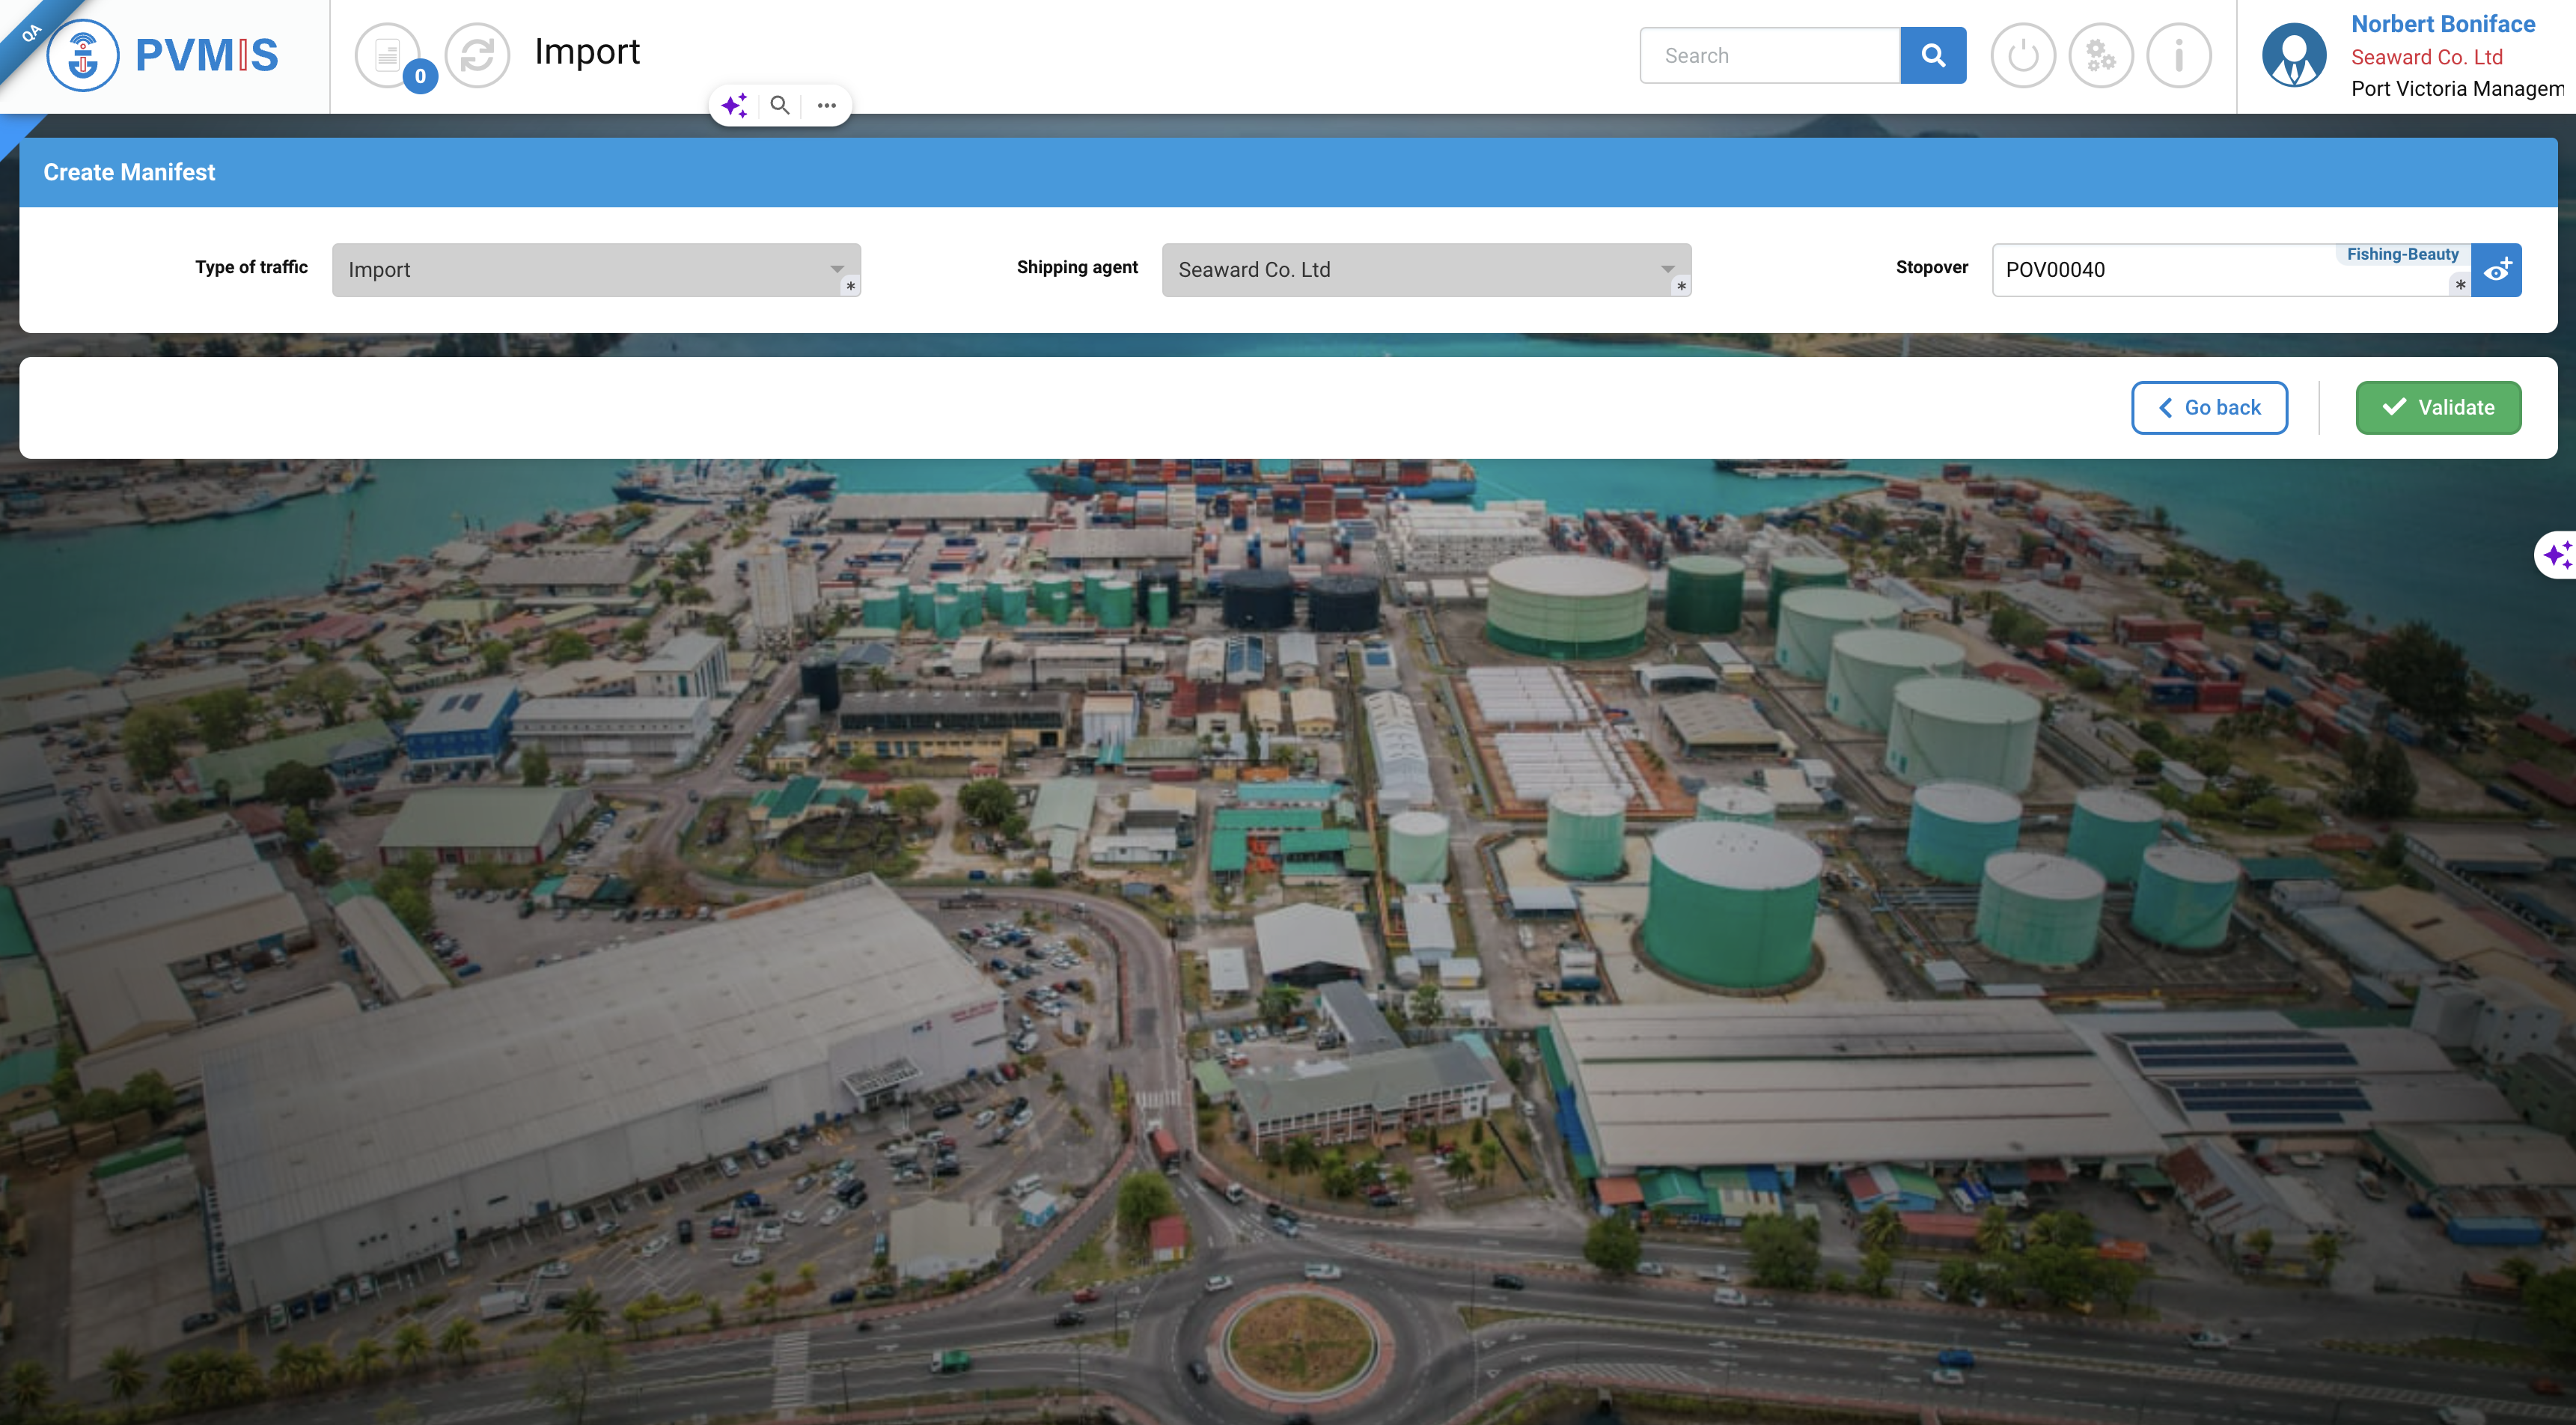
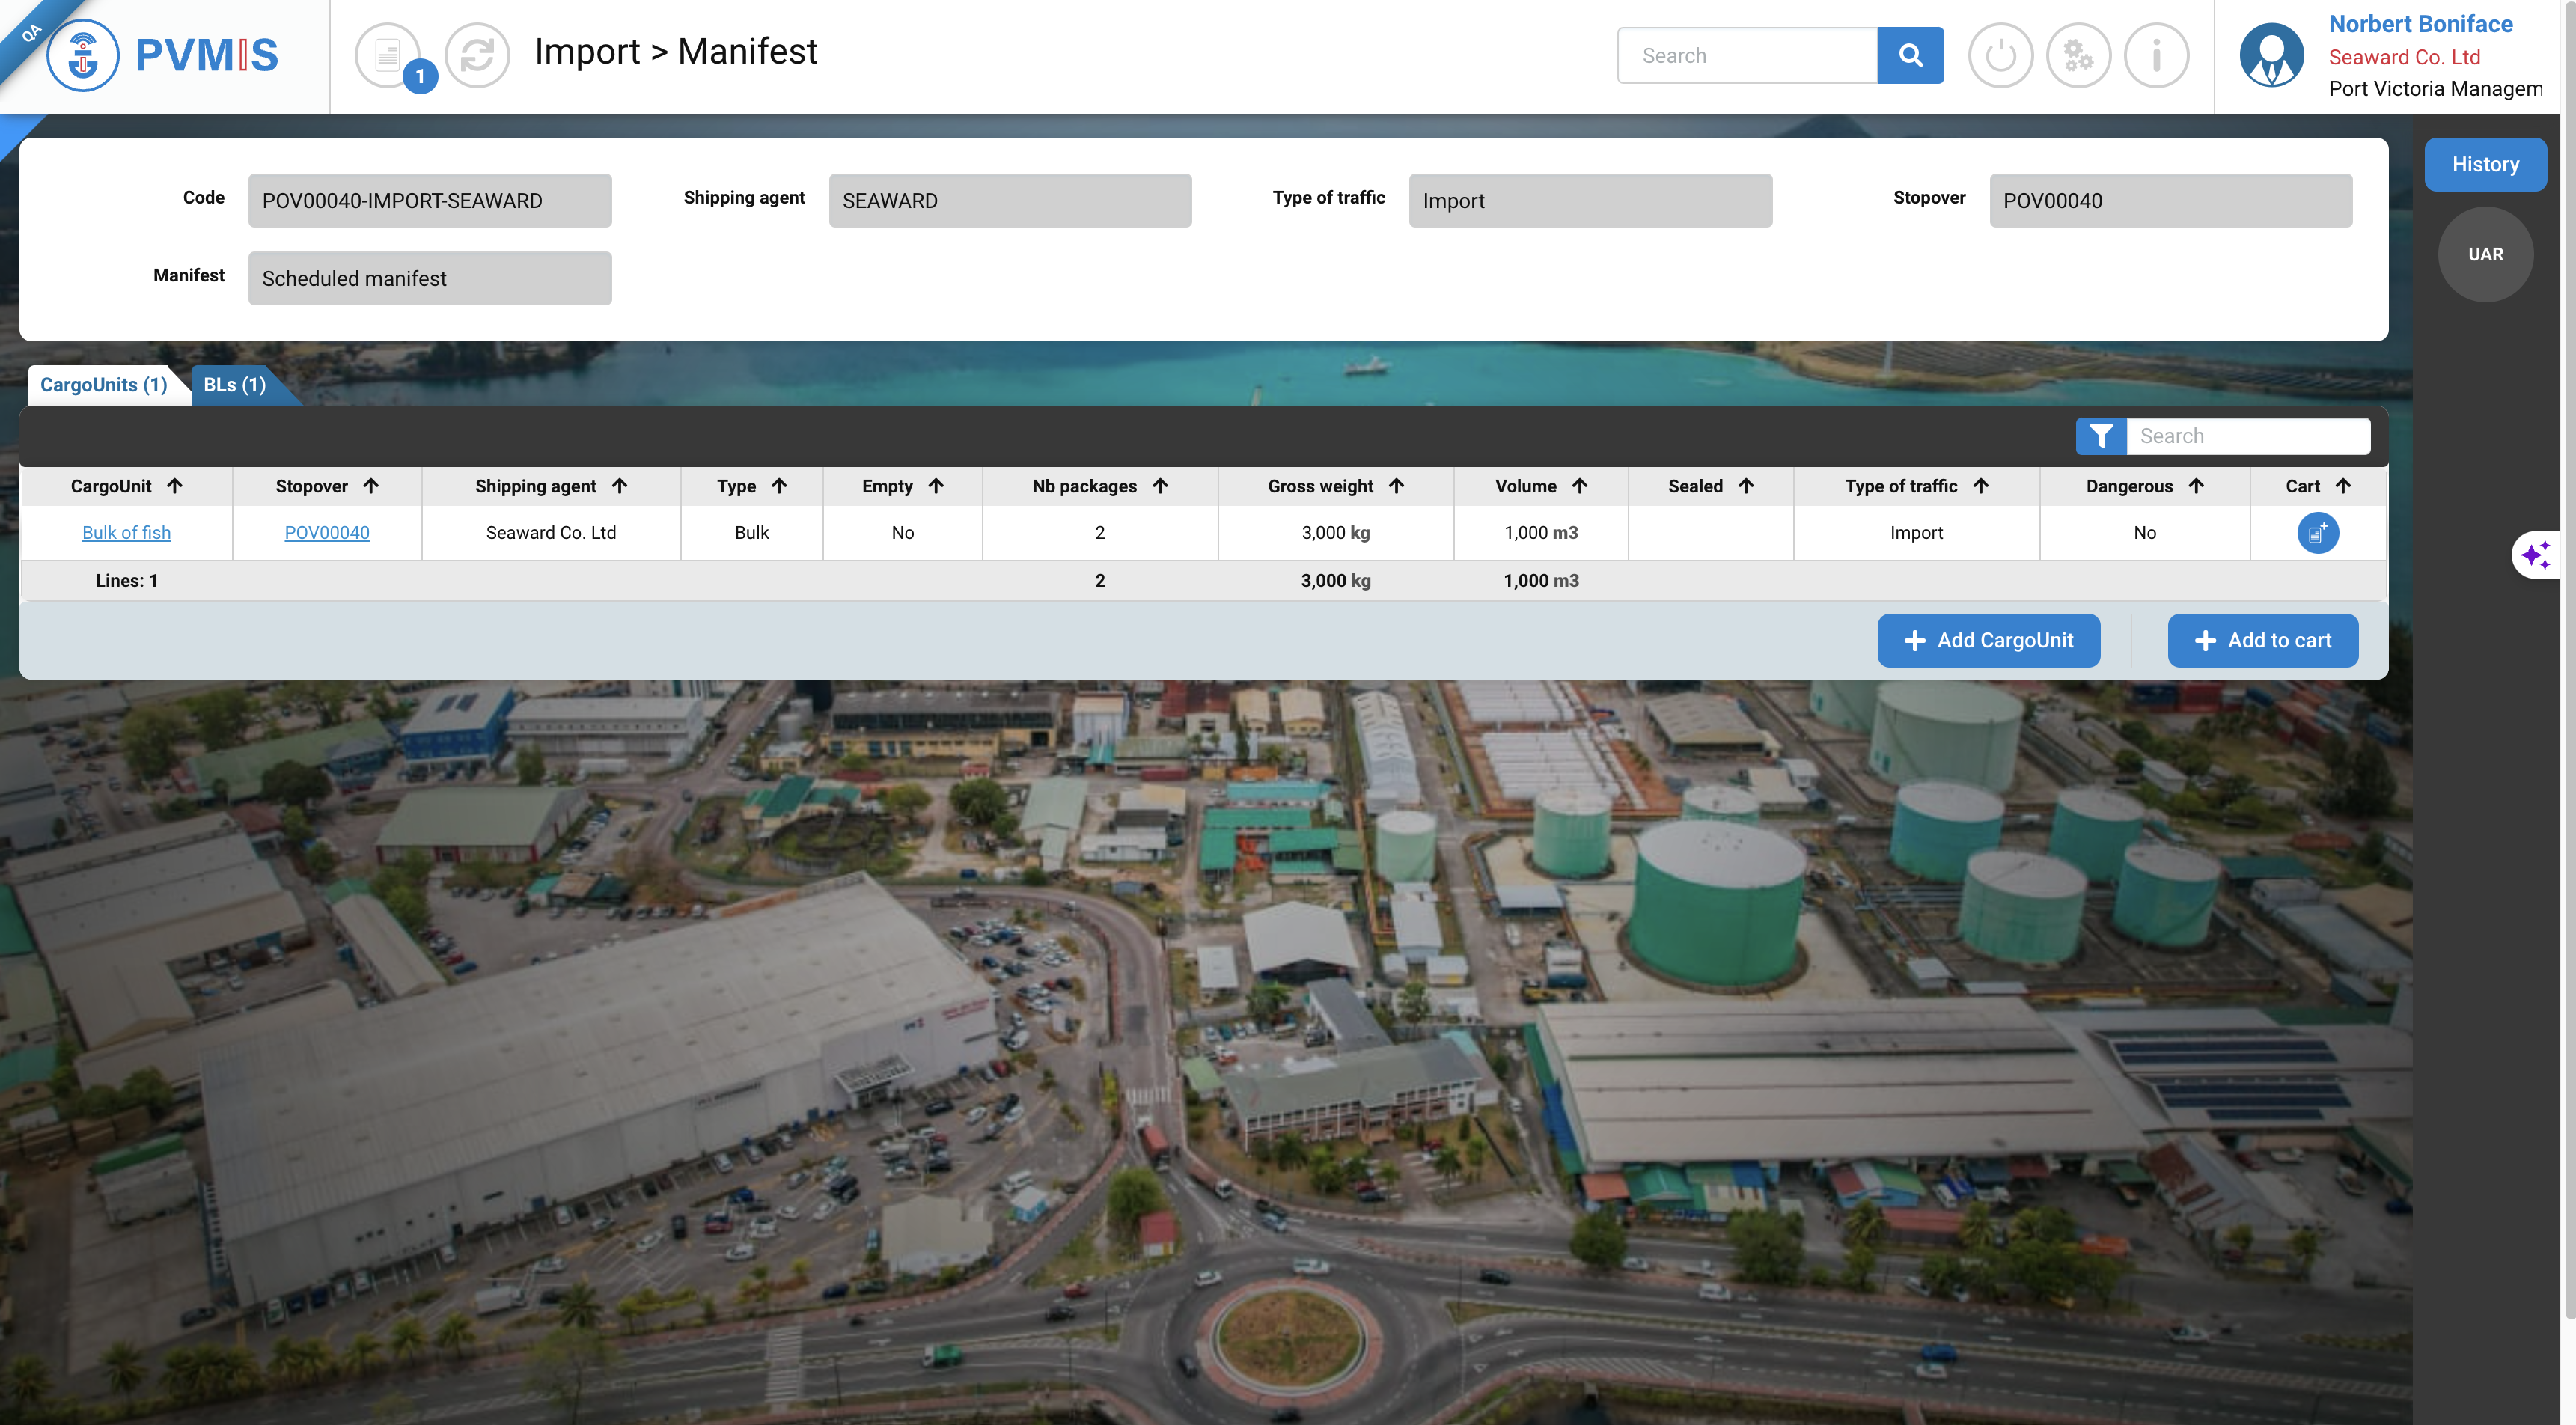
Once this manifest is created, you can find it back in the unloading operation screen.
On the manifest details, you can add BLs, BL Item and Cargo Unit as for any other manifest.
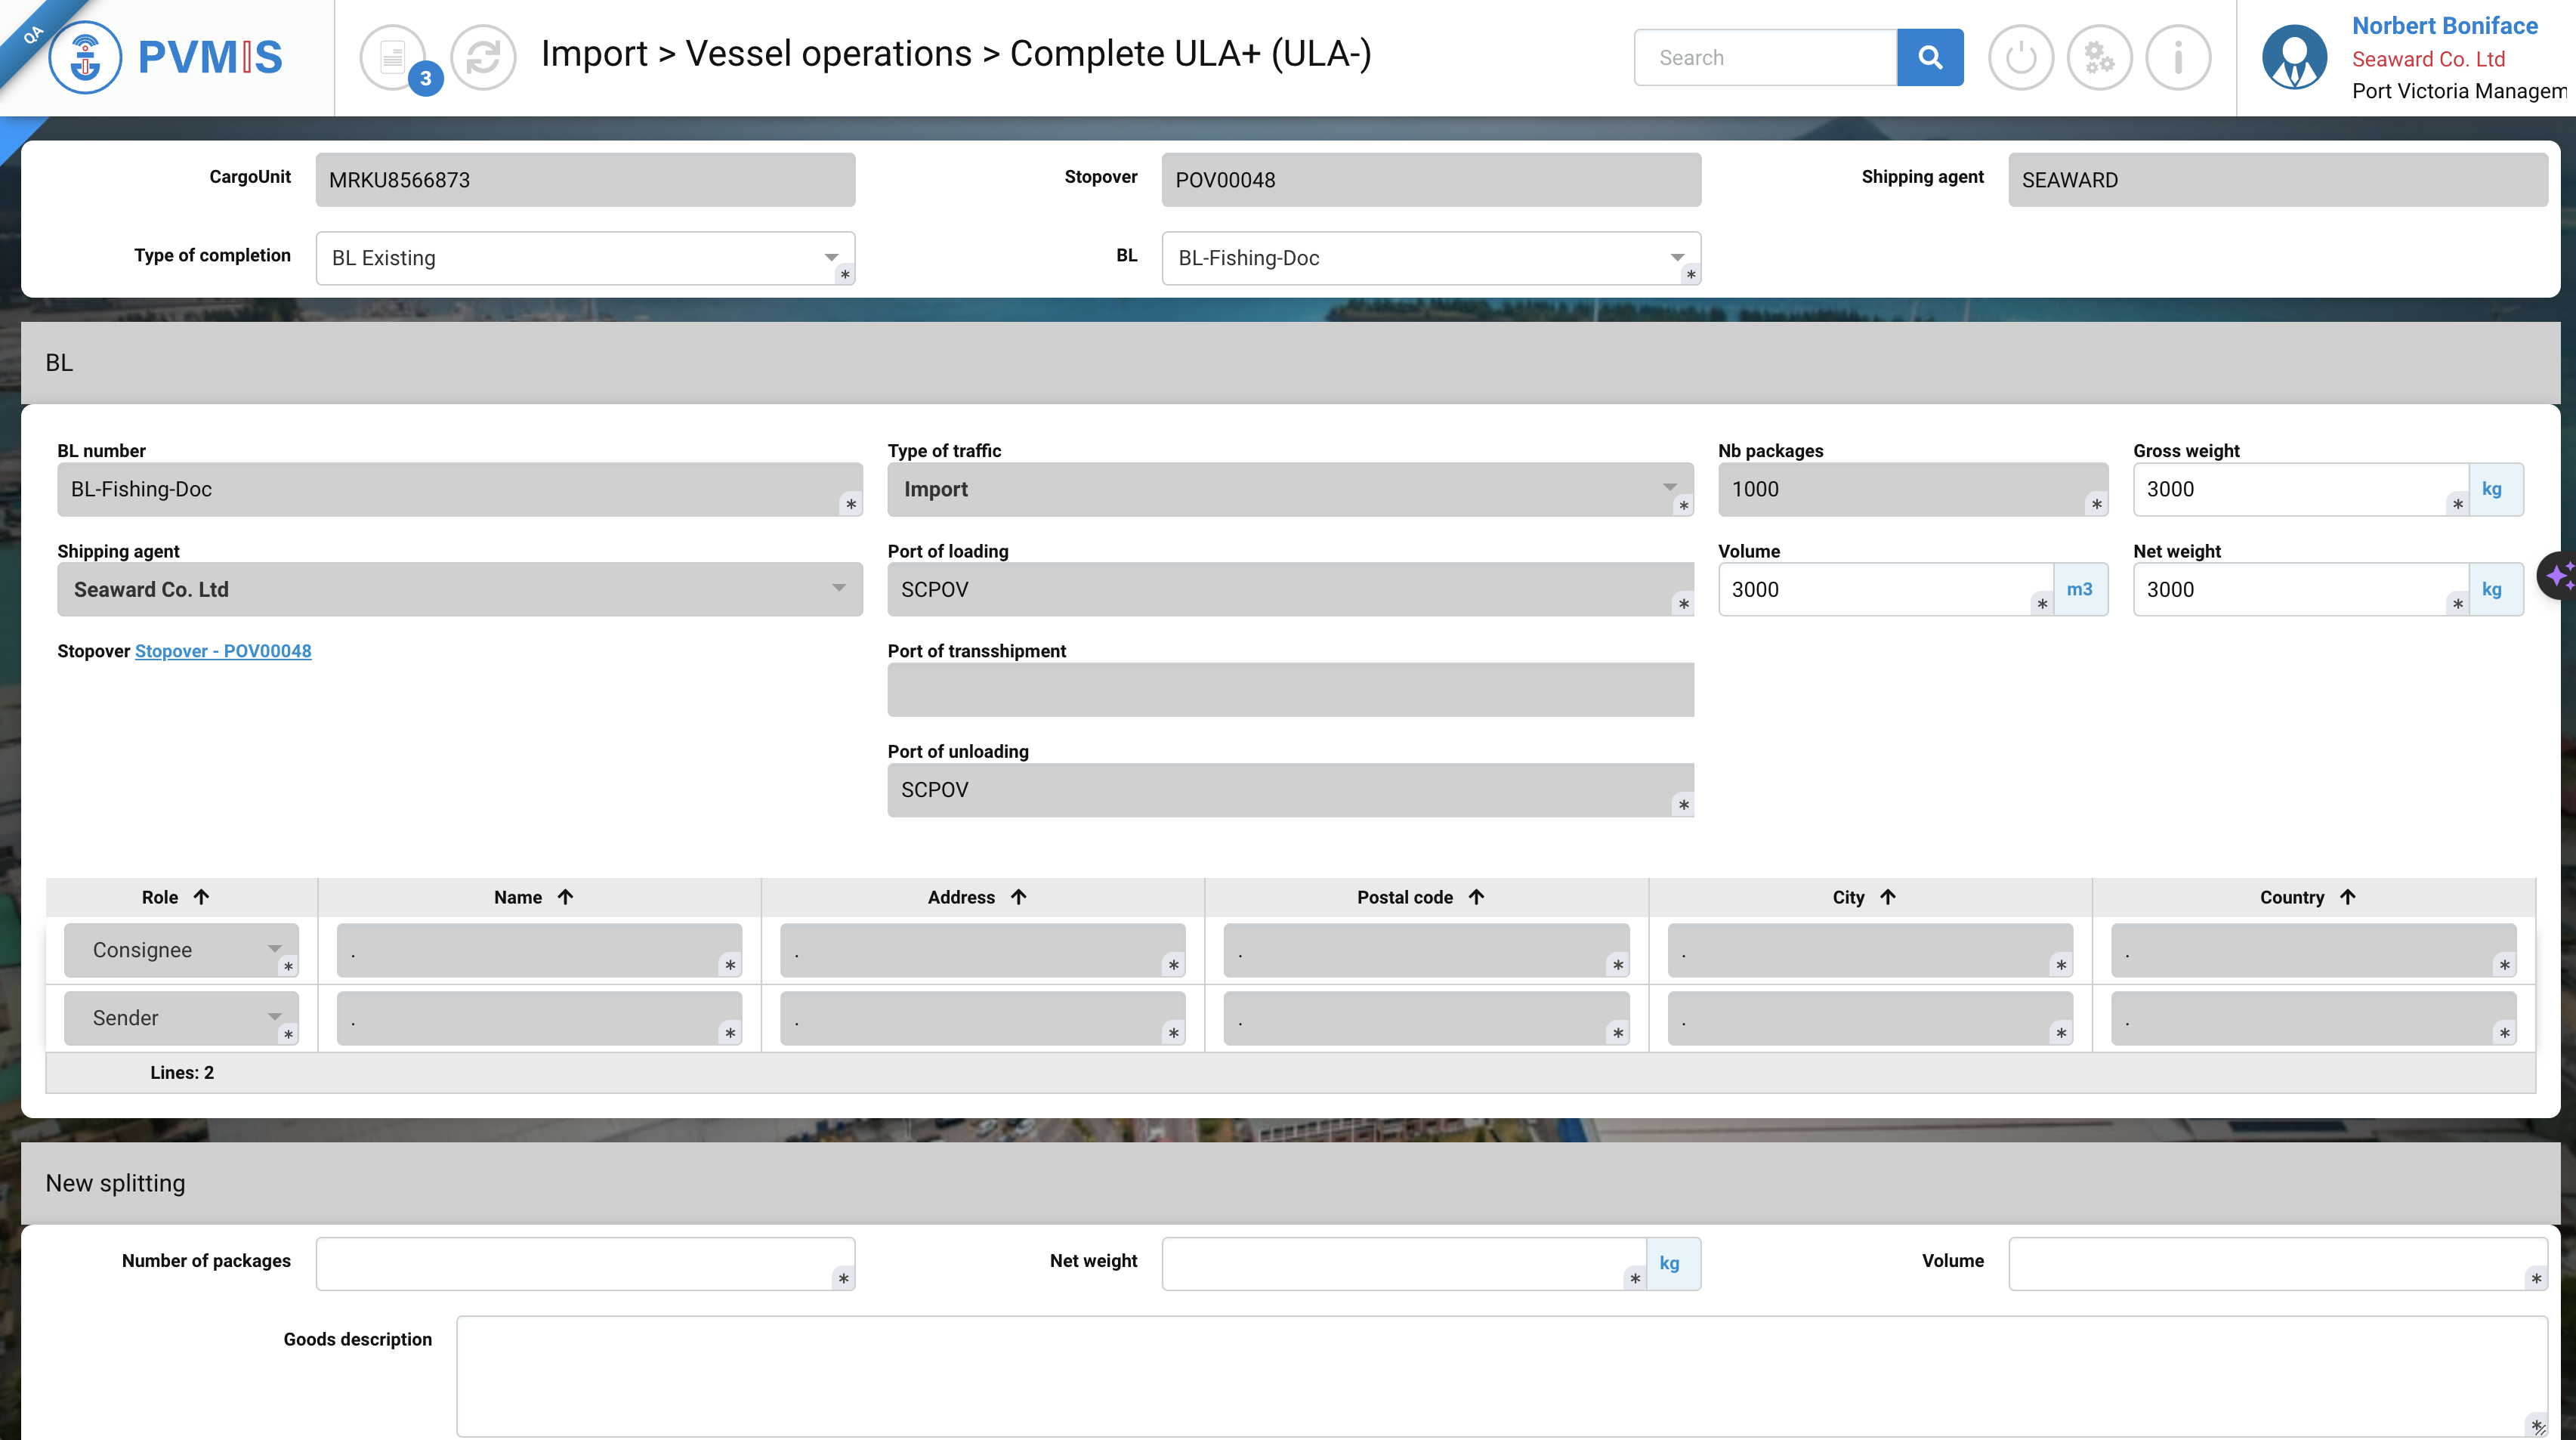
To create a fish cargo unit, we use bulk type declaration.
In the BLs tabs, click on the add BL full to create a new BL. You can add all the information regarding the fishing contract in the BL creation section.
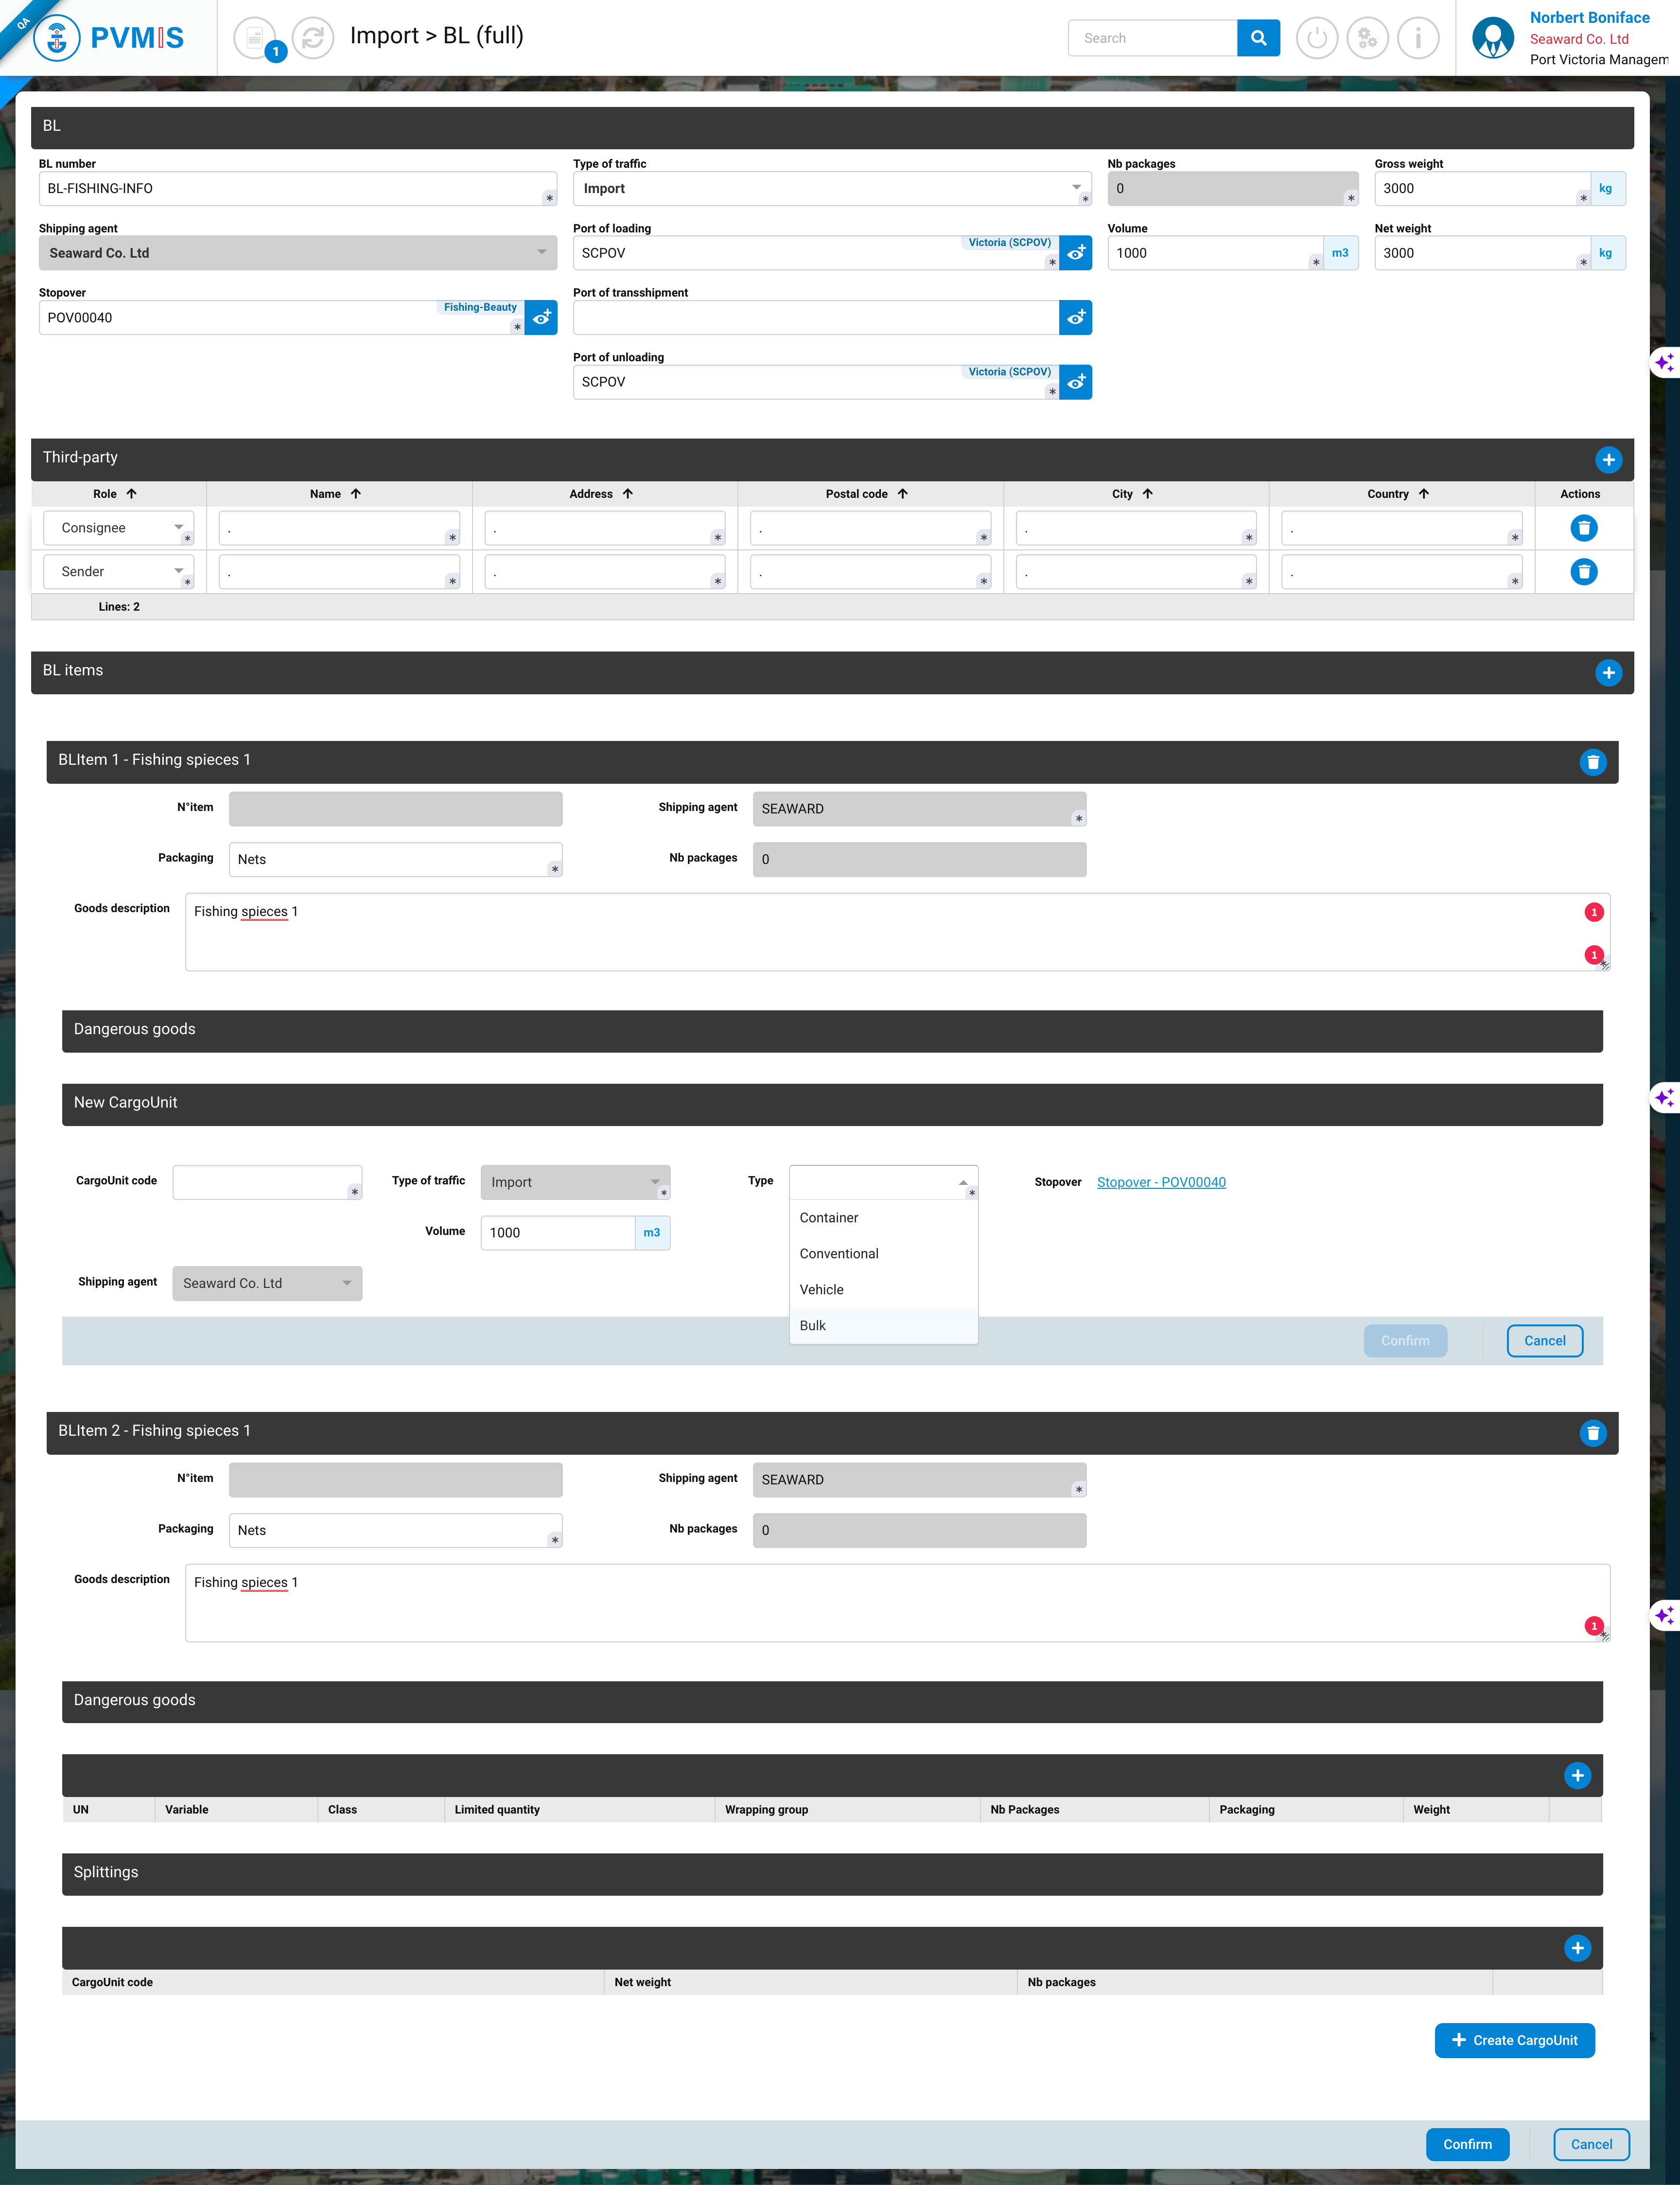
Then create a BL item for every type of fish species in the manifest. (The BL items represents goods line, so here we discriminated between different types of fish).
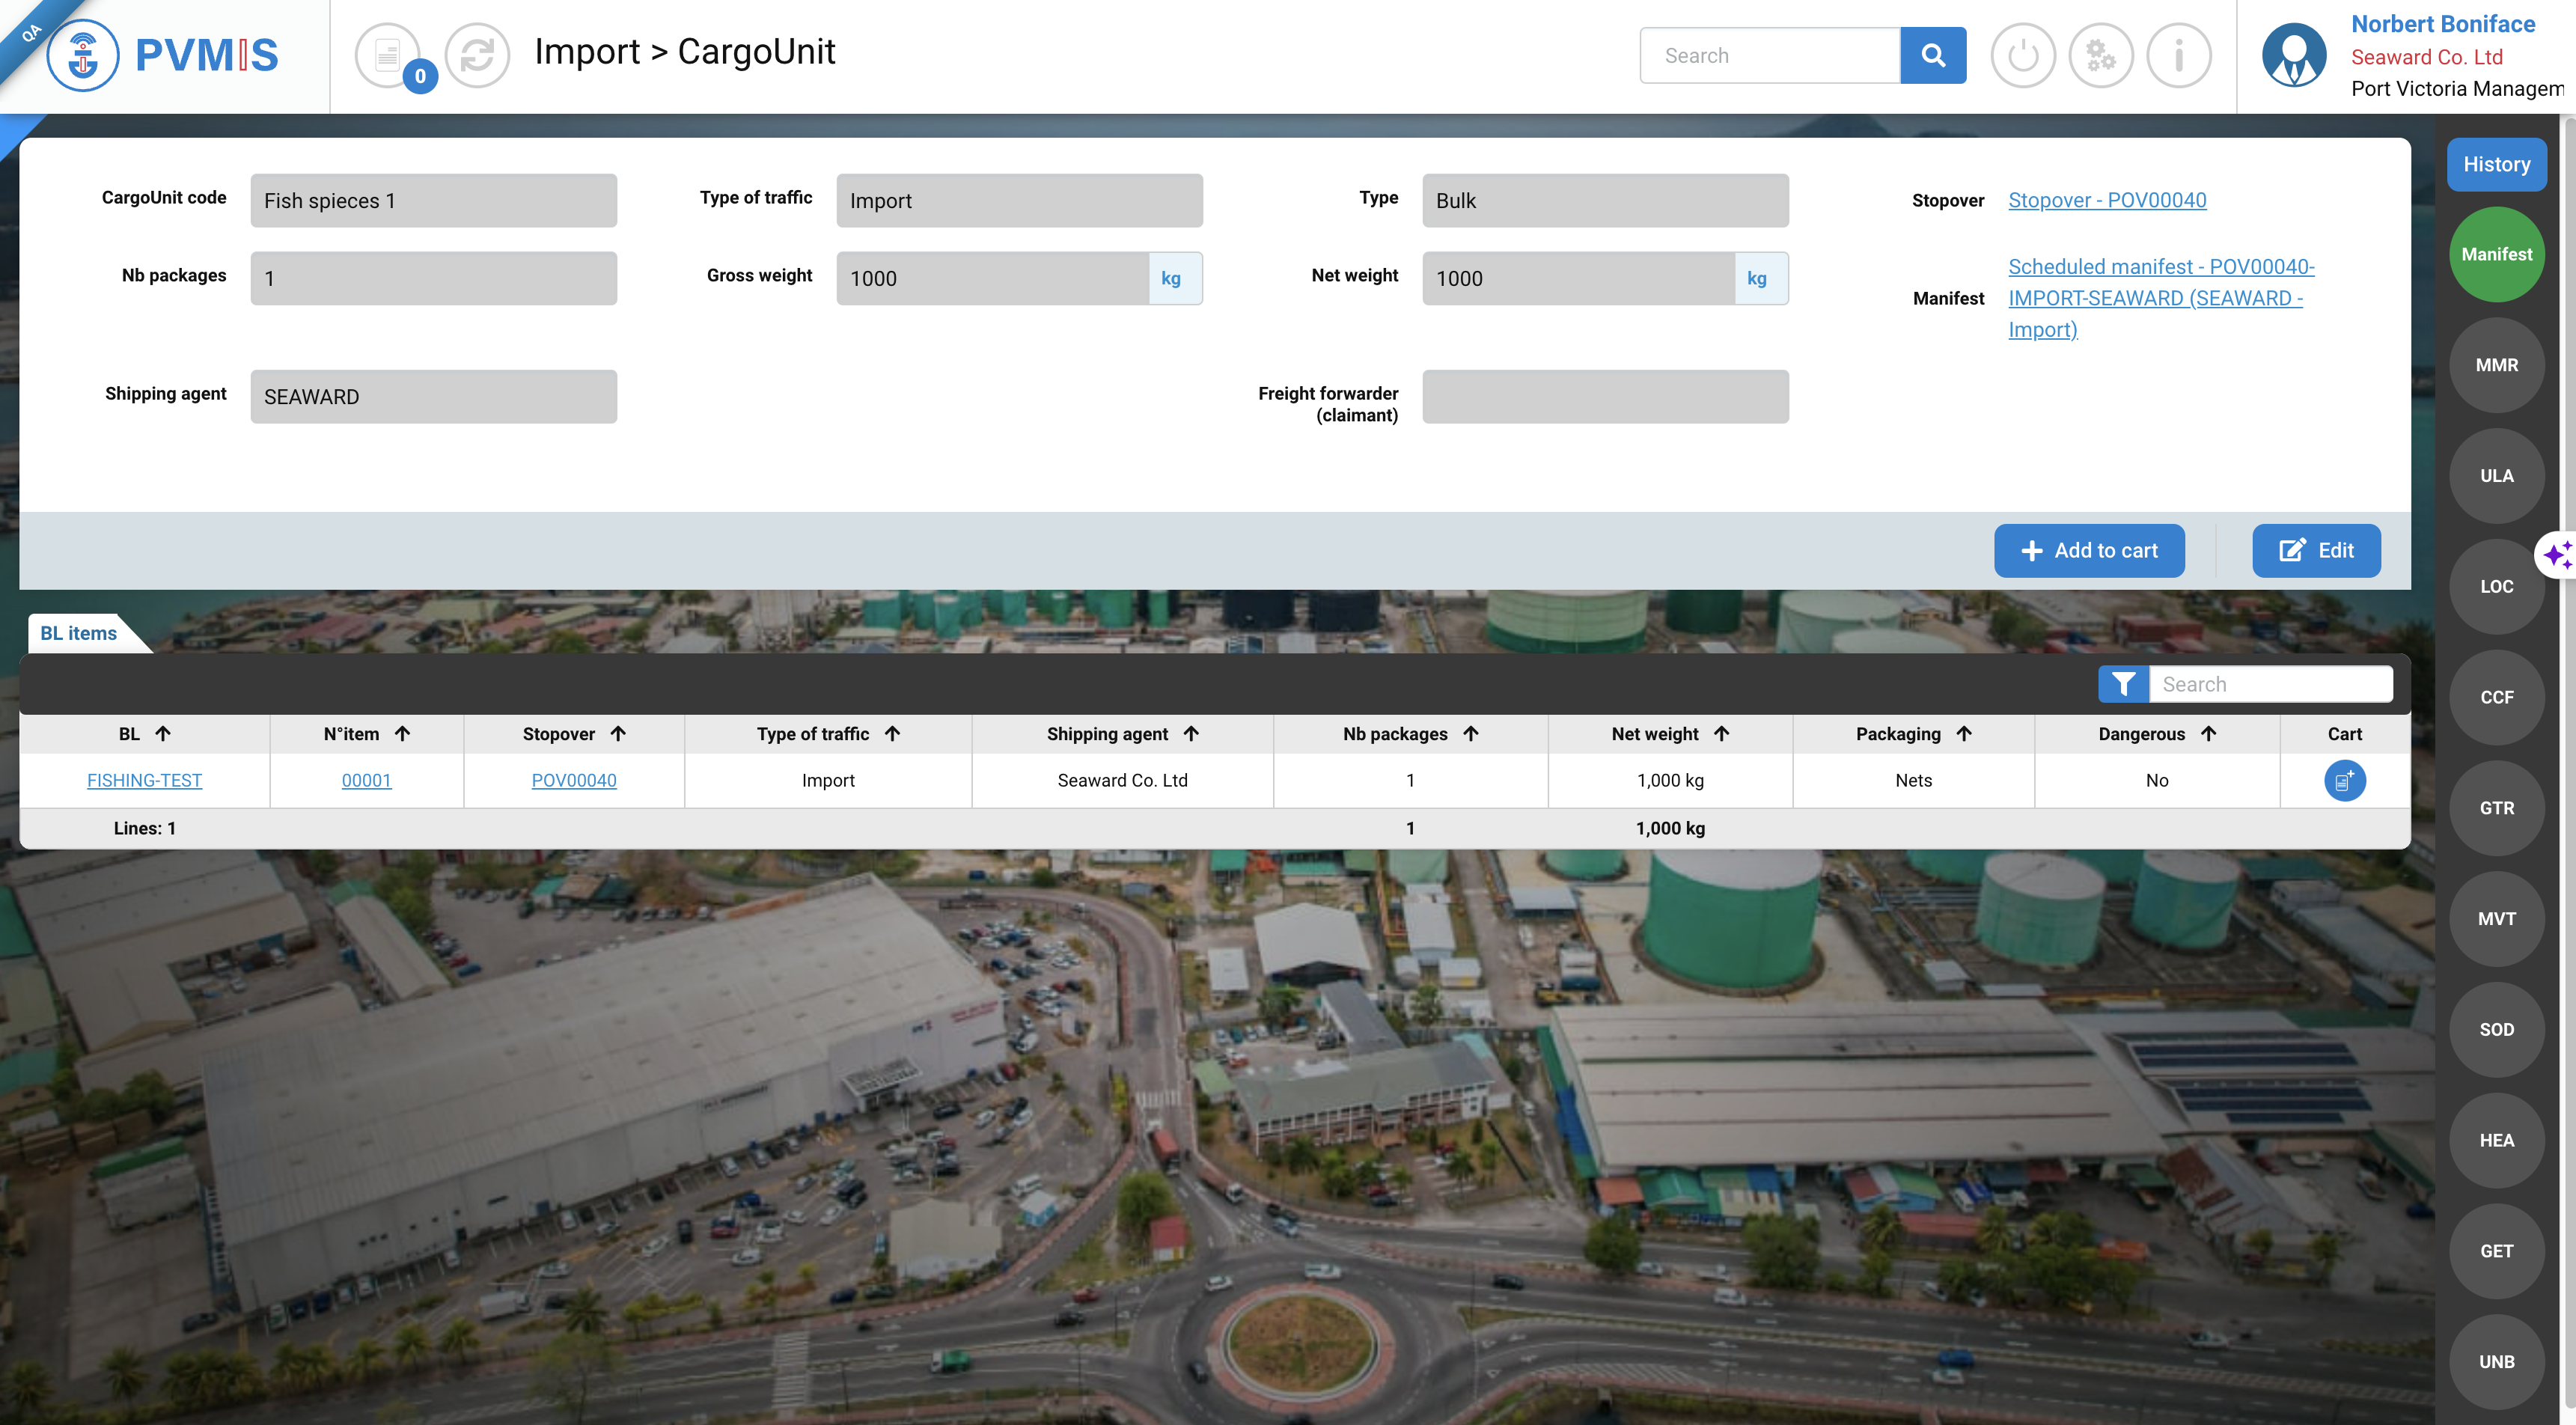
In the BL you can add a Bulk type cargo unit. So you declare one bulk for all the fish captured. In the splitting, you have to state the repartition for every BL items.
You have to enter the weight in splitting lines of the Bulk cargo unit. This is how you inform the repartition of species in the bulk CU for every mentioned species in the items.
The weight can be an estimated tonnage.
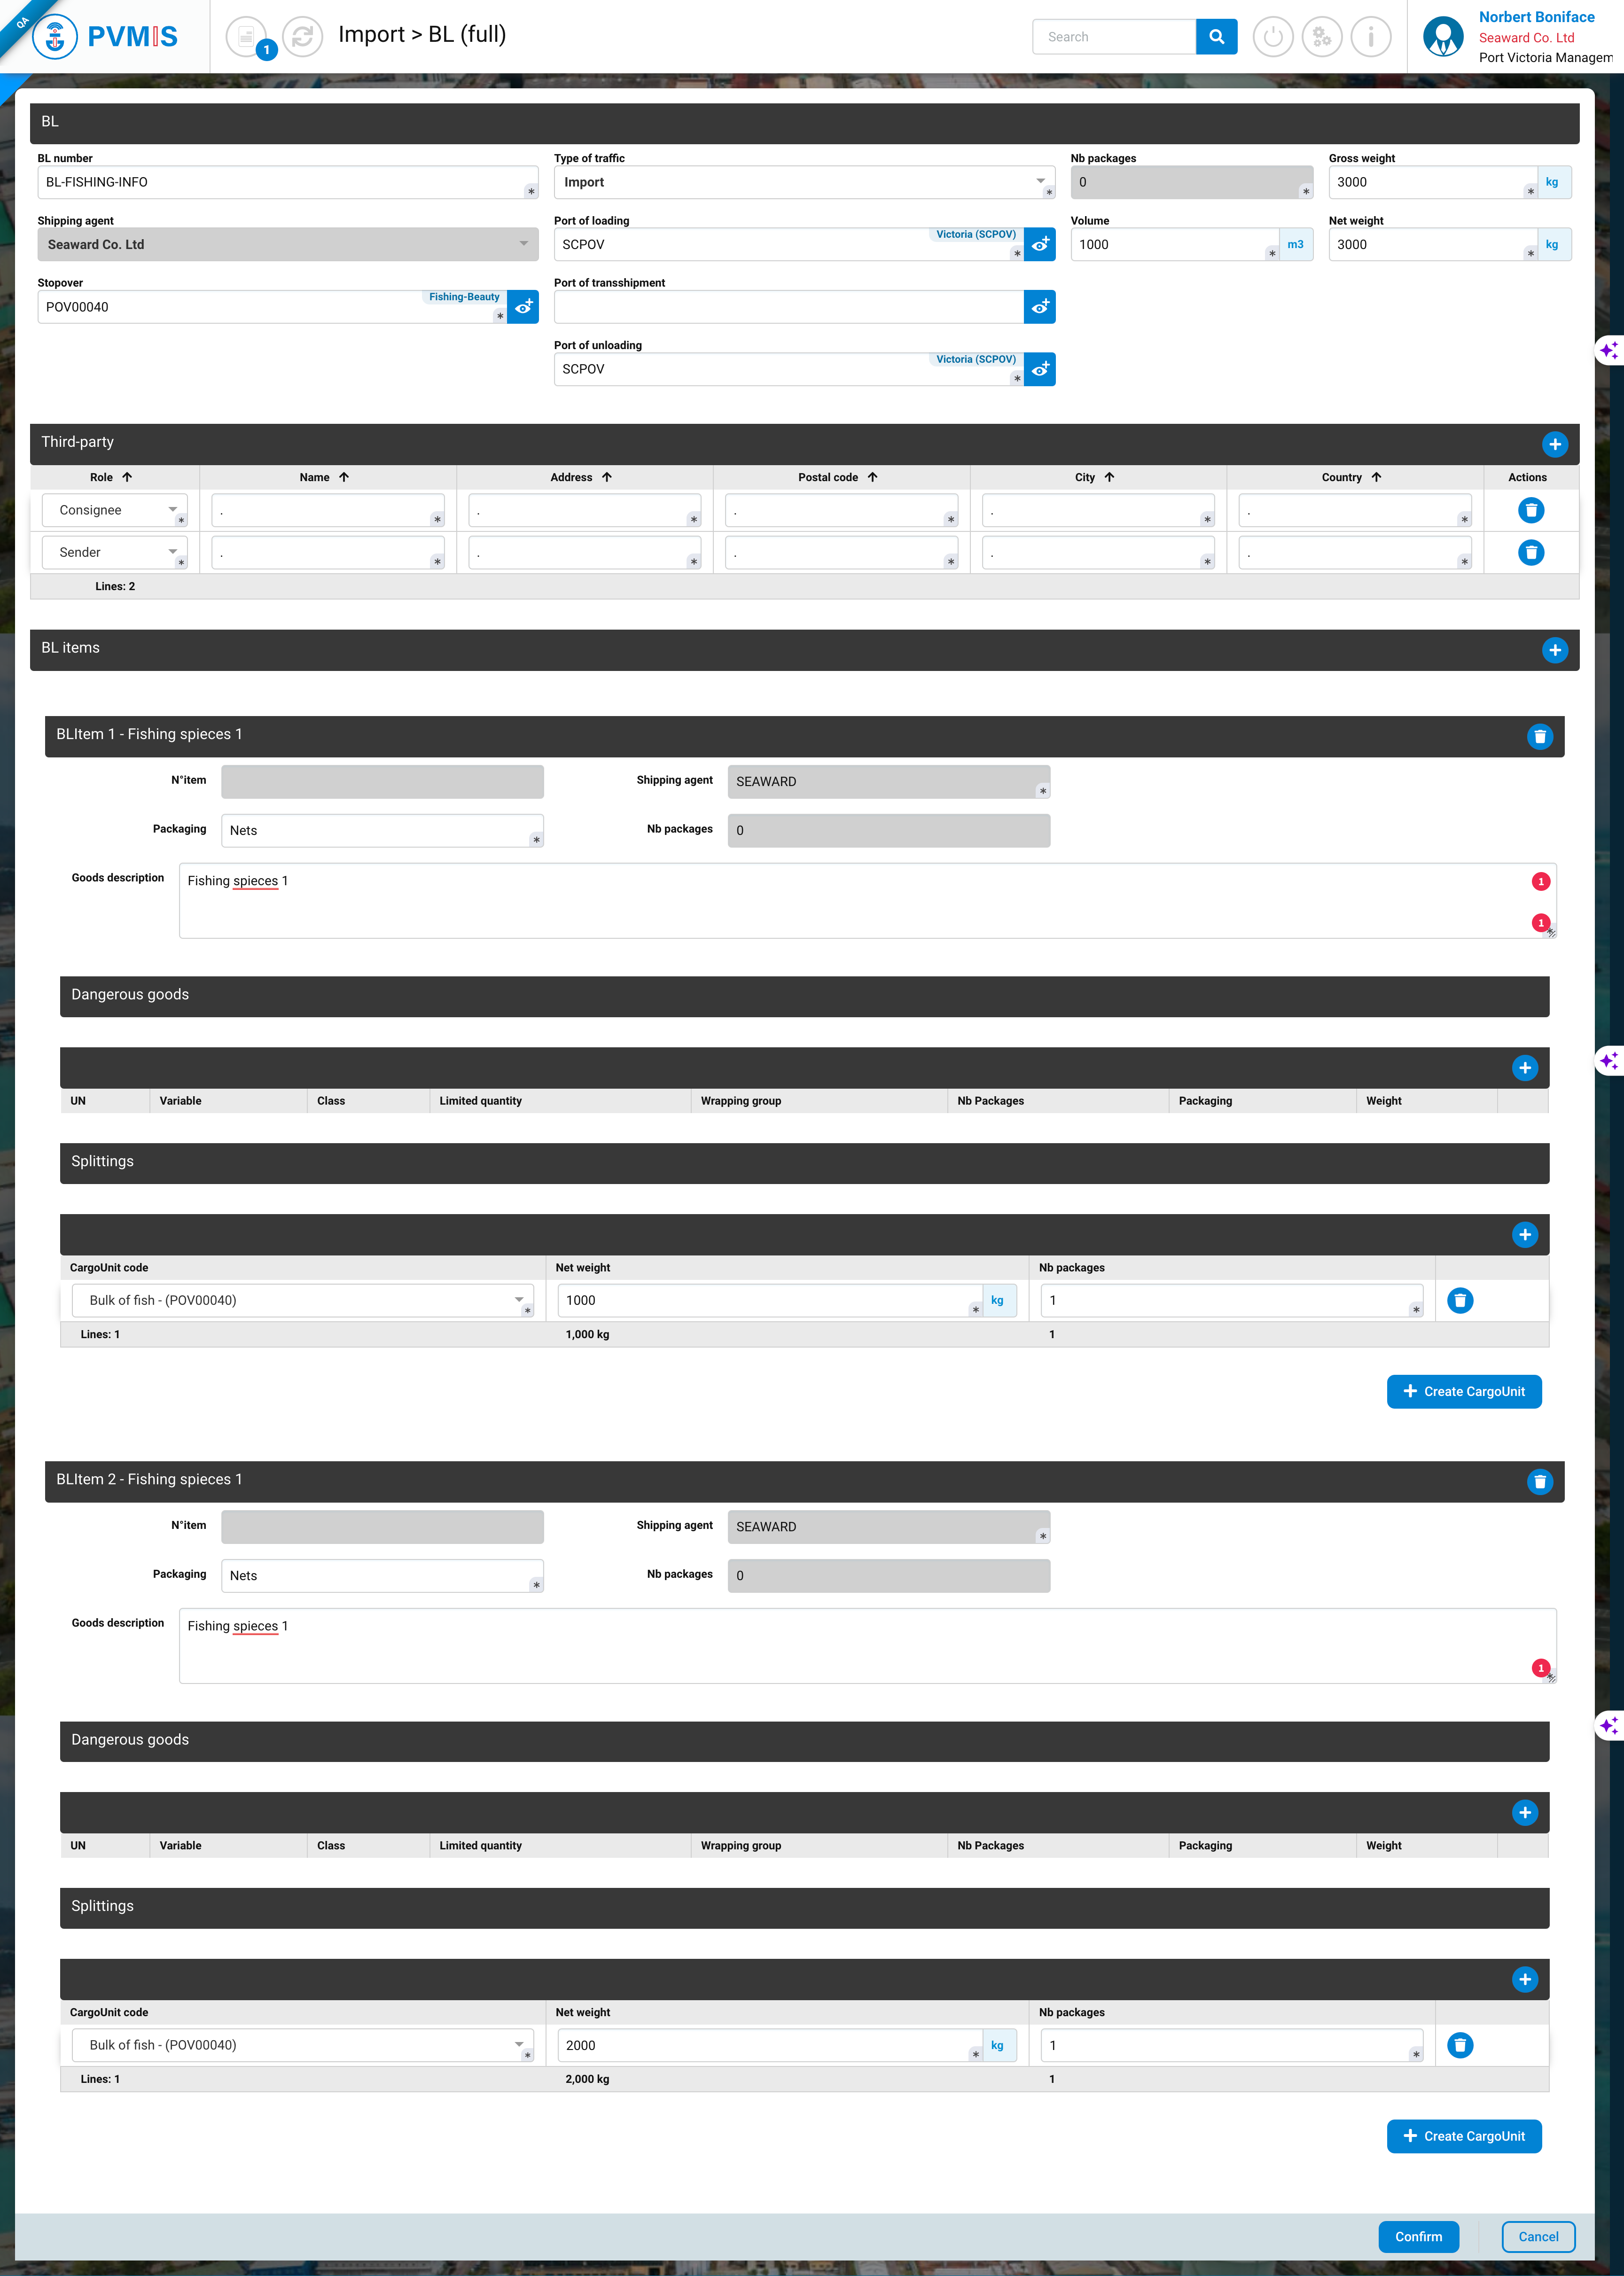
Then, when you have entered all the information, click on Confirm to create your manifest.
Underneath is presented a fishing manifest example, with a declaration for two different type of fish.
Generating a definitive manifest
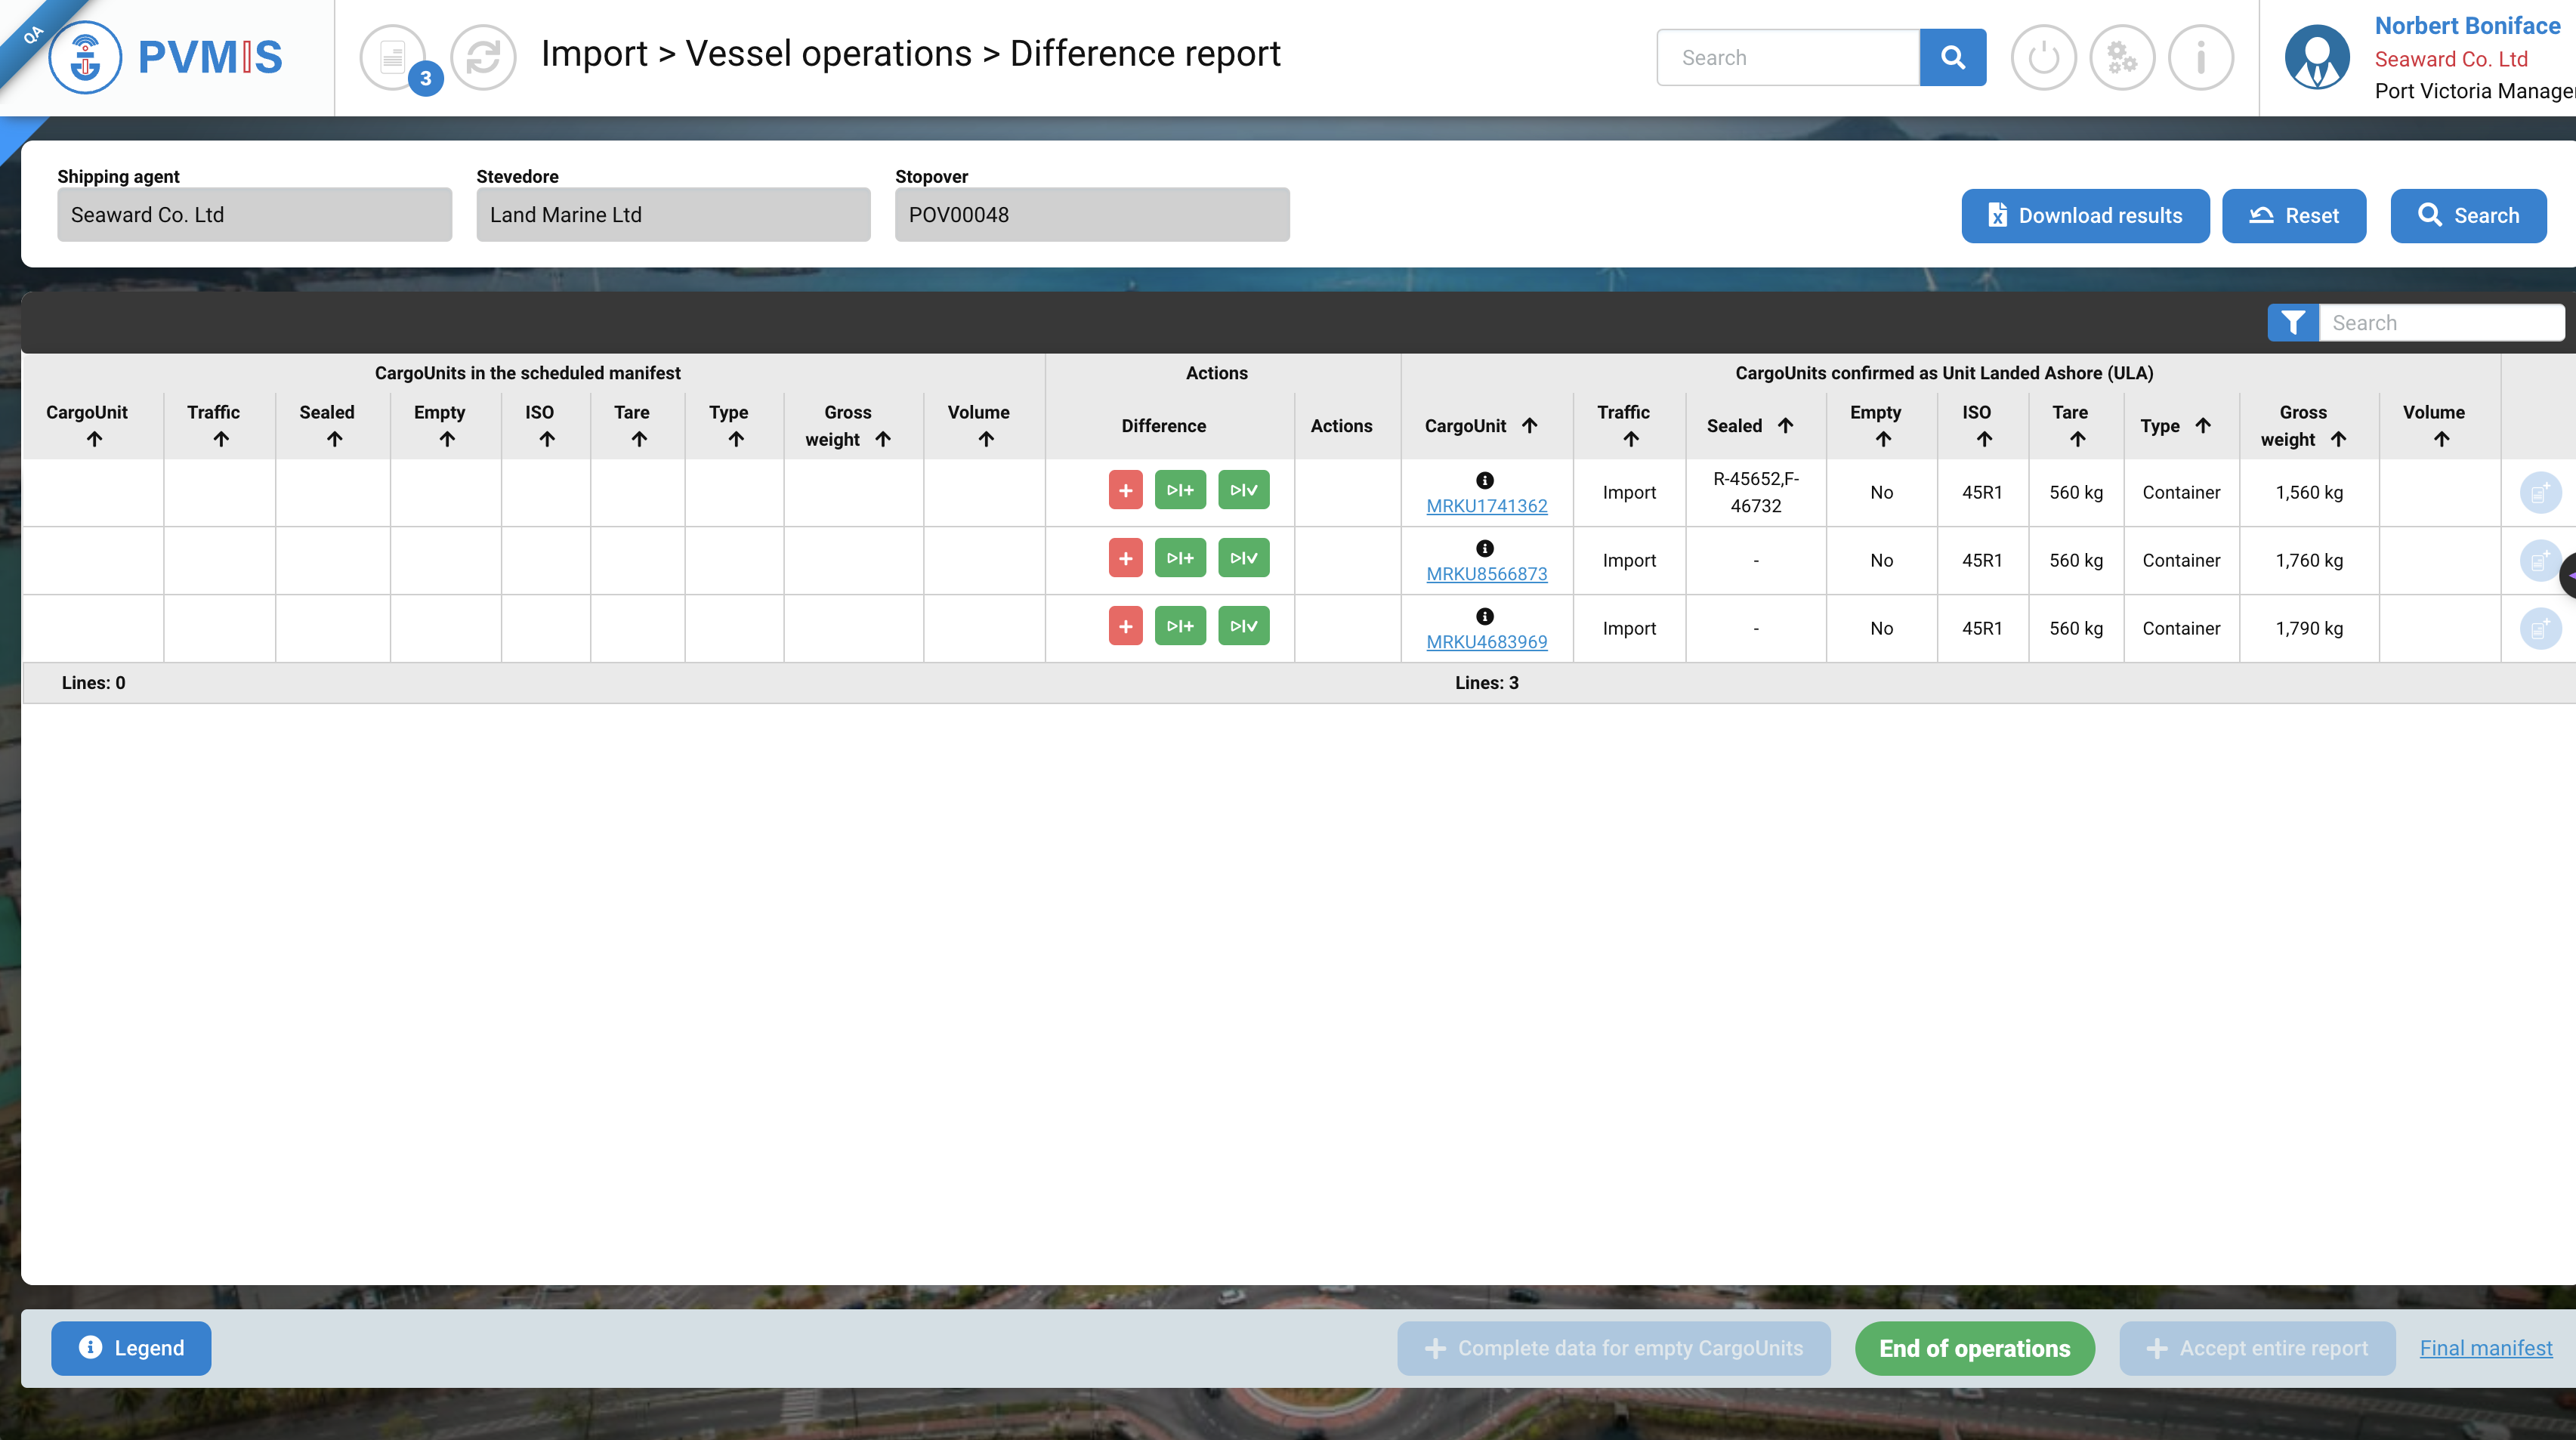
After the unloading operation you can generate your definitive manifest. Click on the Generate final manifest button.
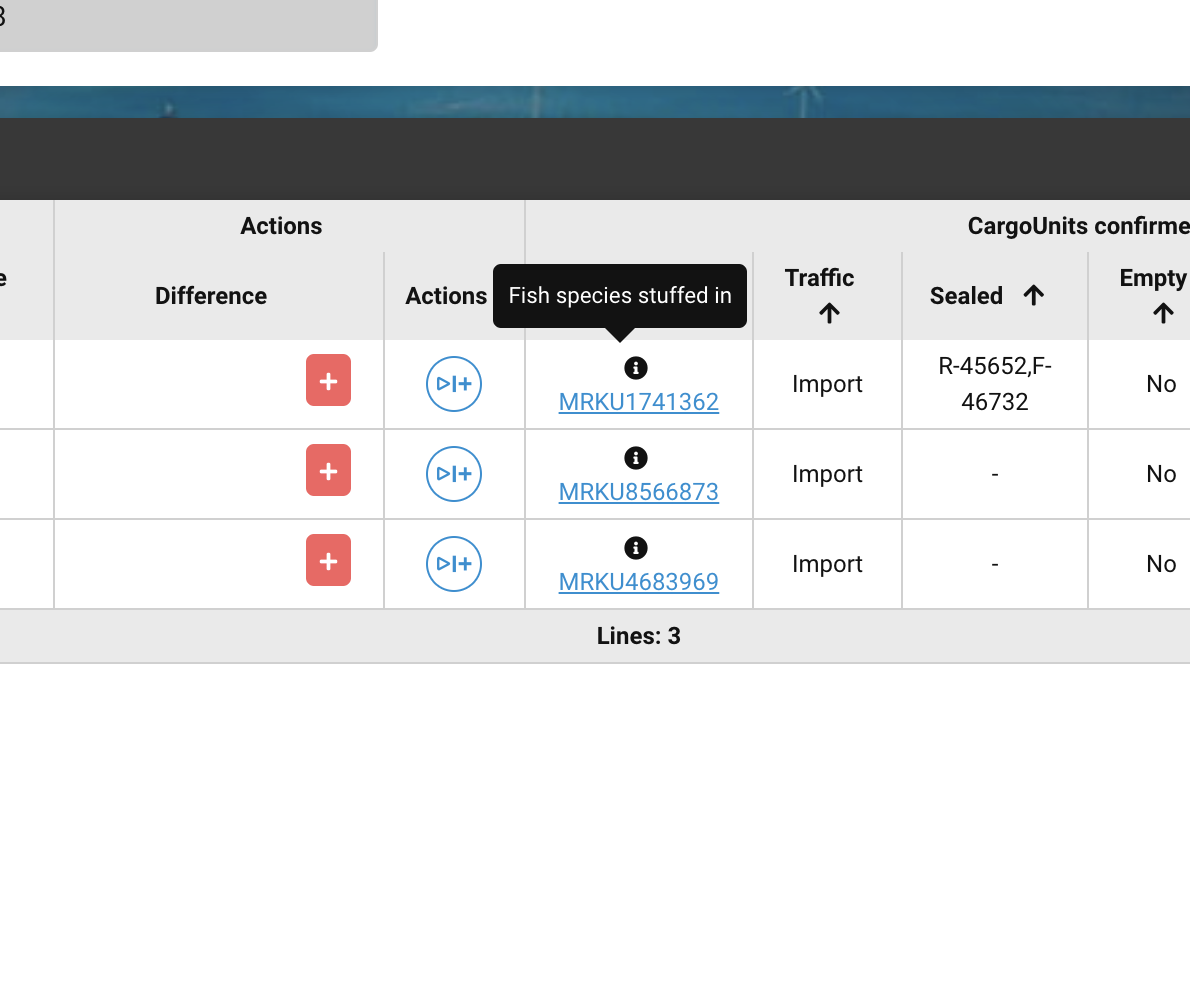
To do this, you’ll have to accept the differences and attach all your cargo units to either an existing or a new BL (For more information on the general process, please see this).
To help you during the BL attachment process, you can hover over the exclamation point symbol to obtain stevedore information regarding the content of the containers.
Use the BL Item attachment screen
You can use either an existing BL of your choosing, or create a new one. To help create the customs request, it is advised to create one BLItem per species of fish.
Choose 1 for the number of packages, as the fish represented in the container is a bulk of one item. In the goods description, enter the species of fish and then add the net weight and expected volume of the BL.
Then click on the Generate final manifest button. You can access your final manifest with the Final Manifest button.